- Click on the open console button, and you will get redirected to AWS Console in a new browser tab.
- On the AWS sign-in page,
- Leave the Account ID as default. Never edit/remove the 12 digit Account ID present in the AWS Console. otherwise, you cannot proceed with the lab.
- Now copy your User Name and Password in the Lab Console to the IAM Username and Password in AWS Console and click on the Sign in button.
- Once Signed In to the AWS Management Console, Make the default AWS Region as US East (N. Virginia) us-east-1.
- Make sure you are in the US East (N. Virginia) us-east-1 Region.
- Navigate to the services menu in the top, click on S3 in the Storage section.
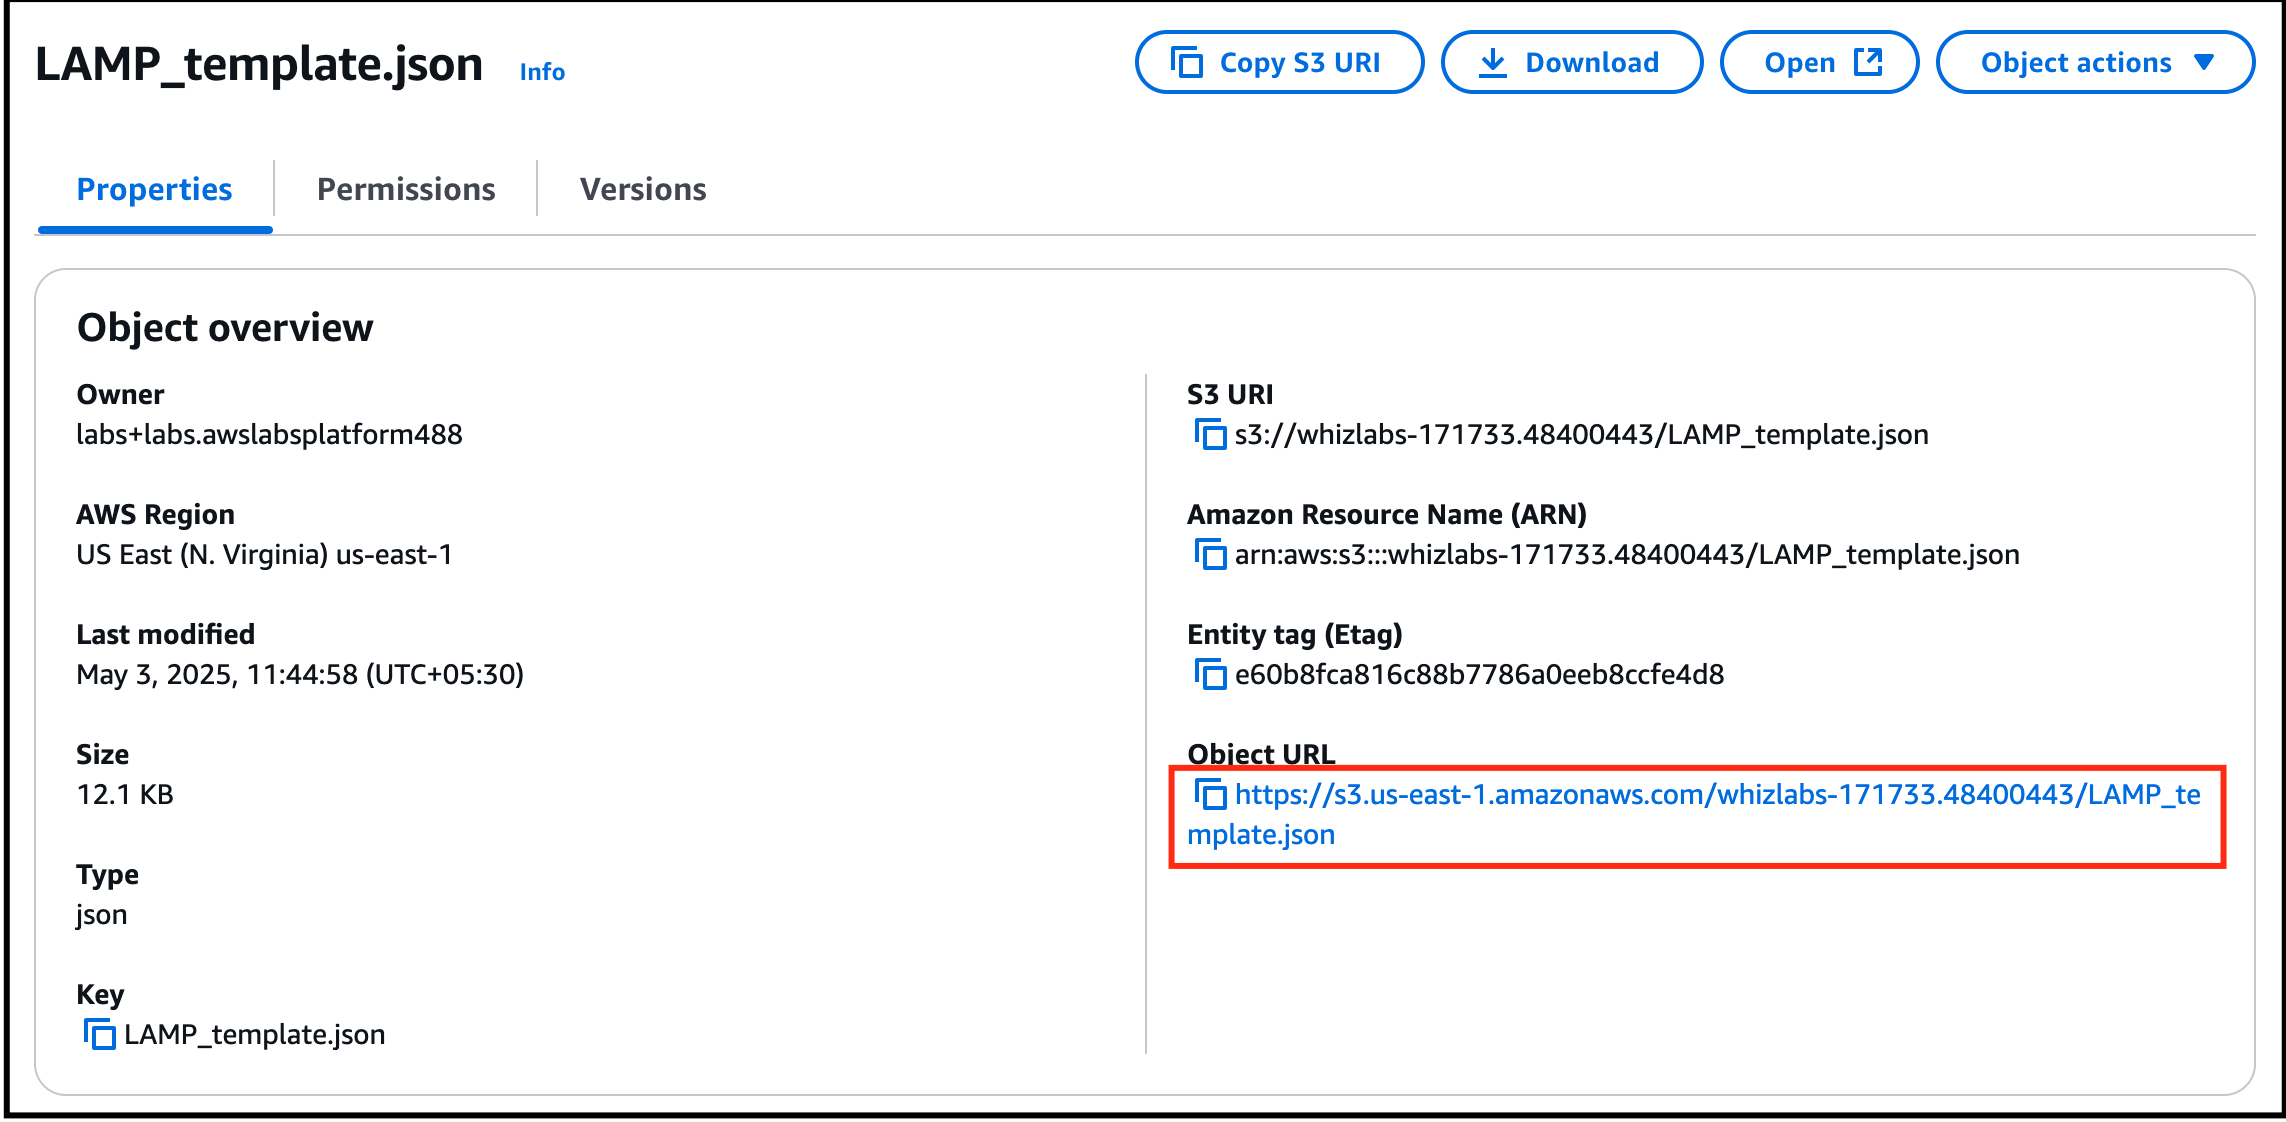
- You can see the bucket present with a name similar to lab.1400.54051021. In your case, the name of the bucket might be different numerics.
- Open that bucket and you will see LAMP_template.json file.
- Now copy the Object URL and save it in notepad.
- Task 2 : Exploring templates in an S3 Bucket

- This given LAMP_template.json contains the JSON code for launching the LAMP Server using Cloudformation.
- Navigate to CloudFormation. Click services, click on CloudFormation in the Management and Governance section.
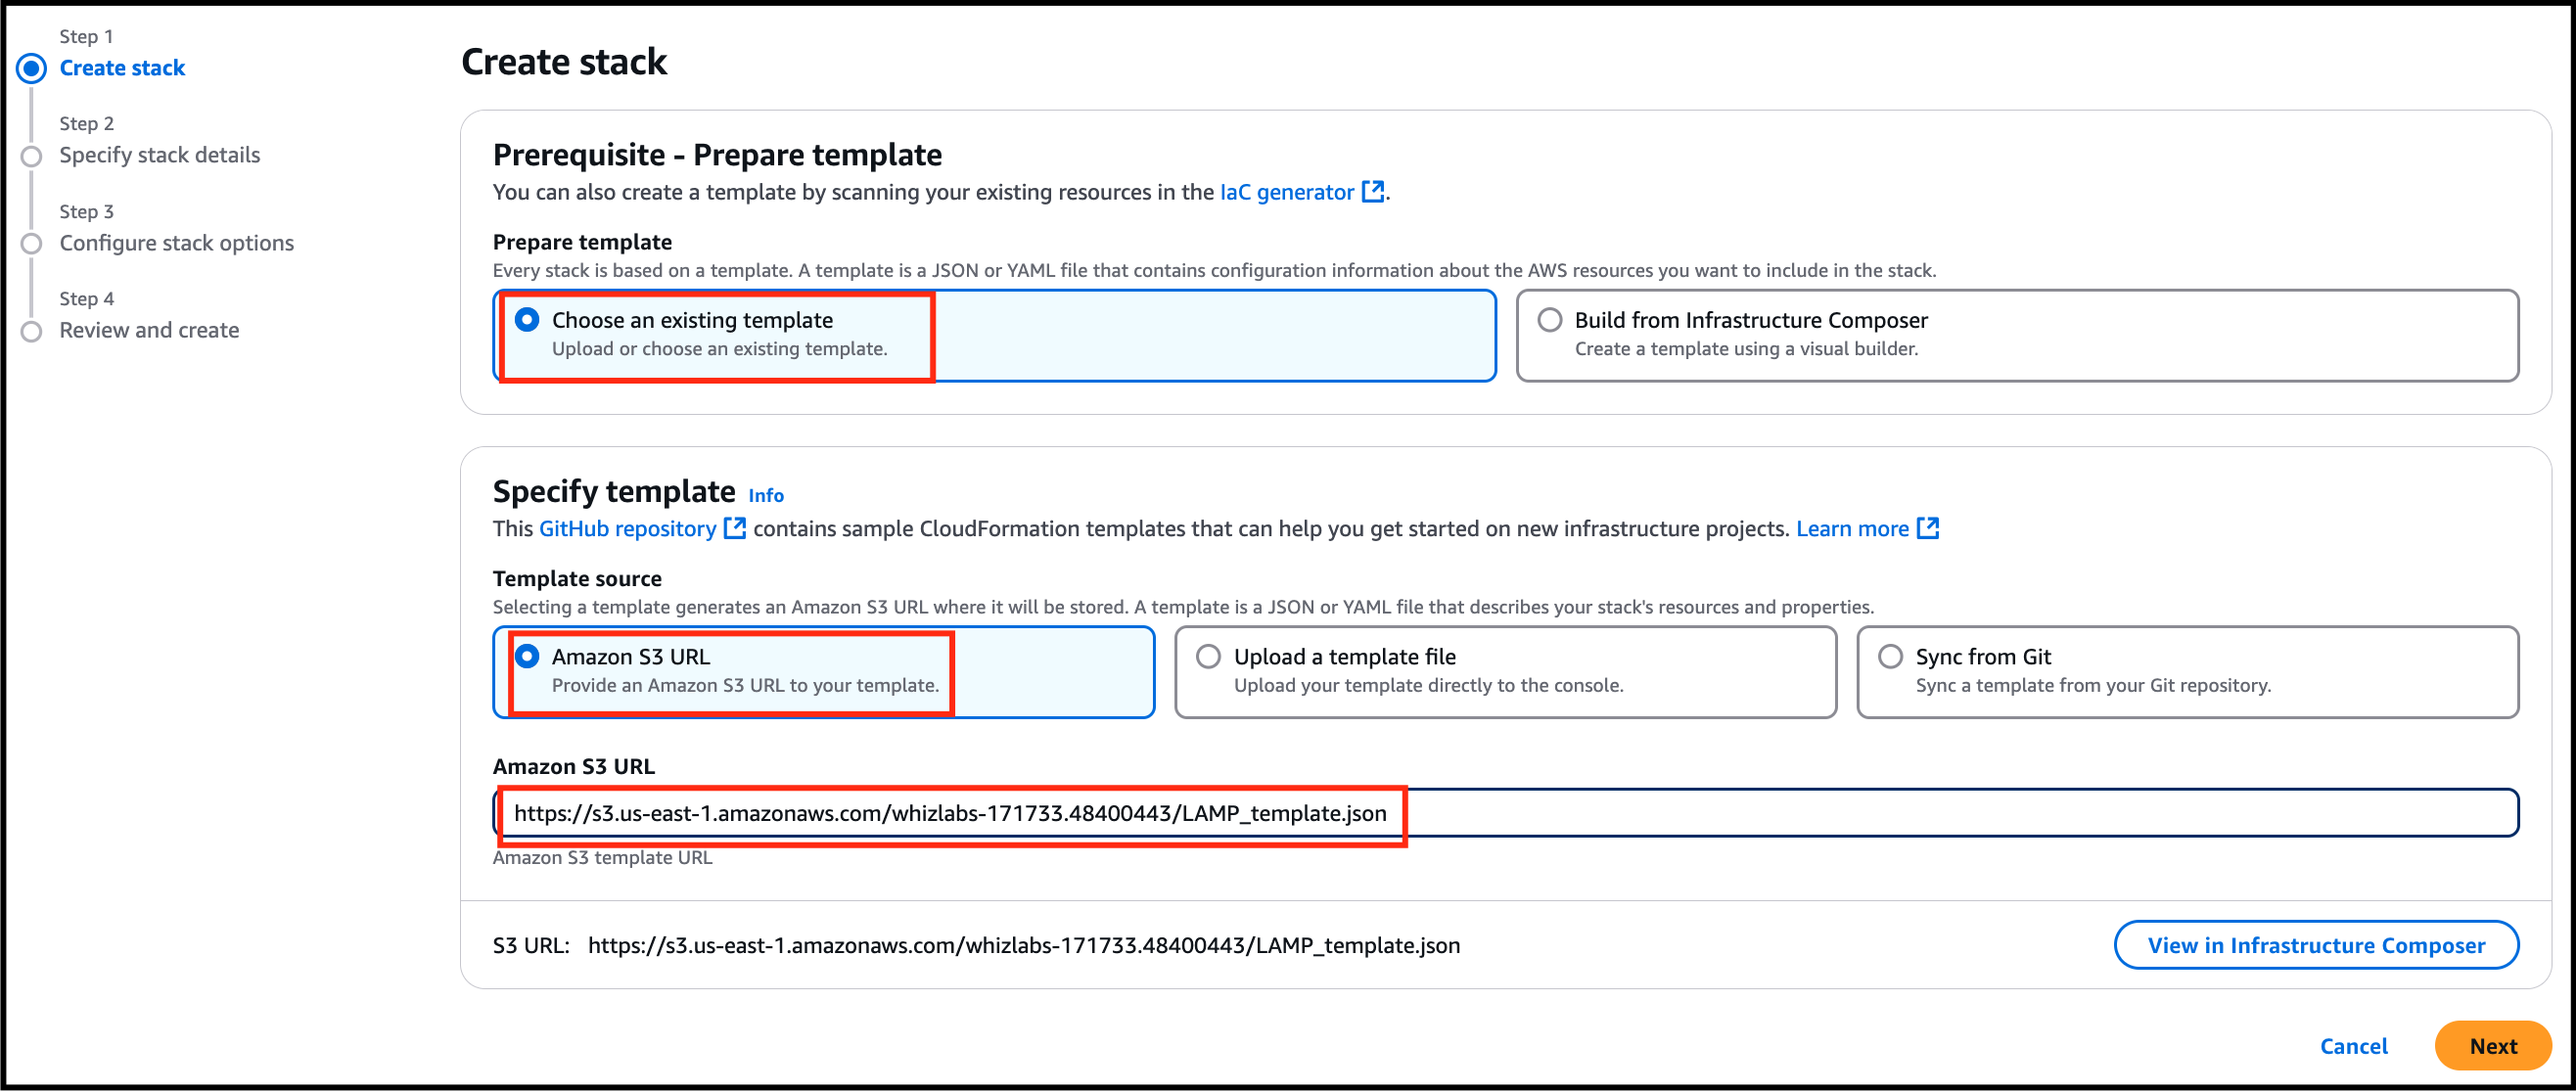
- On the CloudFormation dashboard, click on create stack. Prerequisite - Prepare template : Select Choose an existing template Specify Template : Template source: Select Amazon S3 URL Amazon S3 URL: Paste the URL copied from earlier steps.
- On the CloudFormation dashboard, click on create stack.
- Prerequisite - Prepare template : Select Choose an existing template
- Specify Template : Template source: Select Amazon S3 URL Amazon S3 URL: Paste the URL copied from earlier steps.
- Specify Template :
- Template source: Select Amazon S3 URL
- Amazon S3 URL: Paste the URL copied from earlier steps.
- Task 3 : Create Cloudformation Stack
- Click on Next.
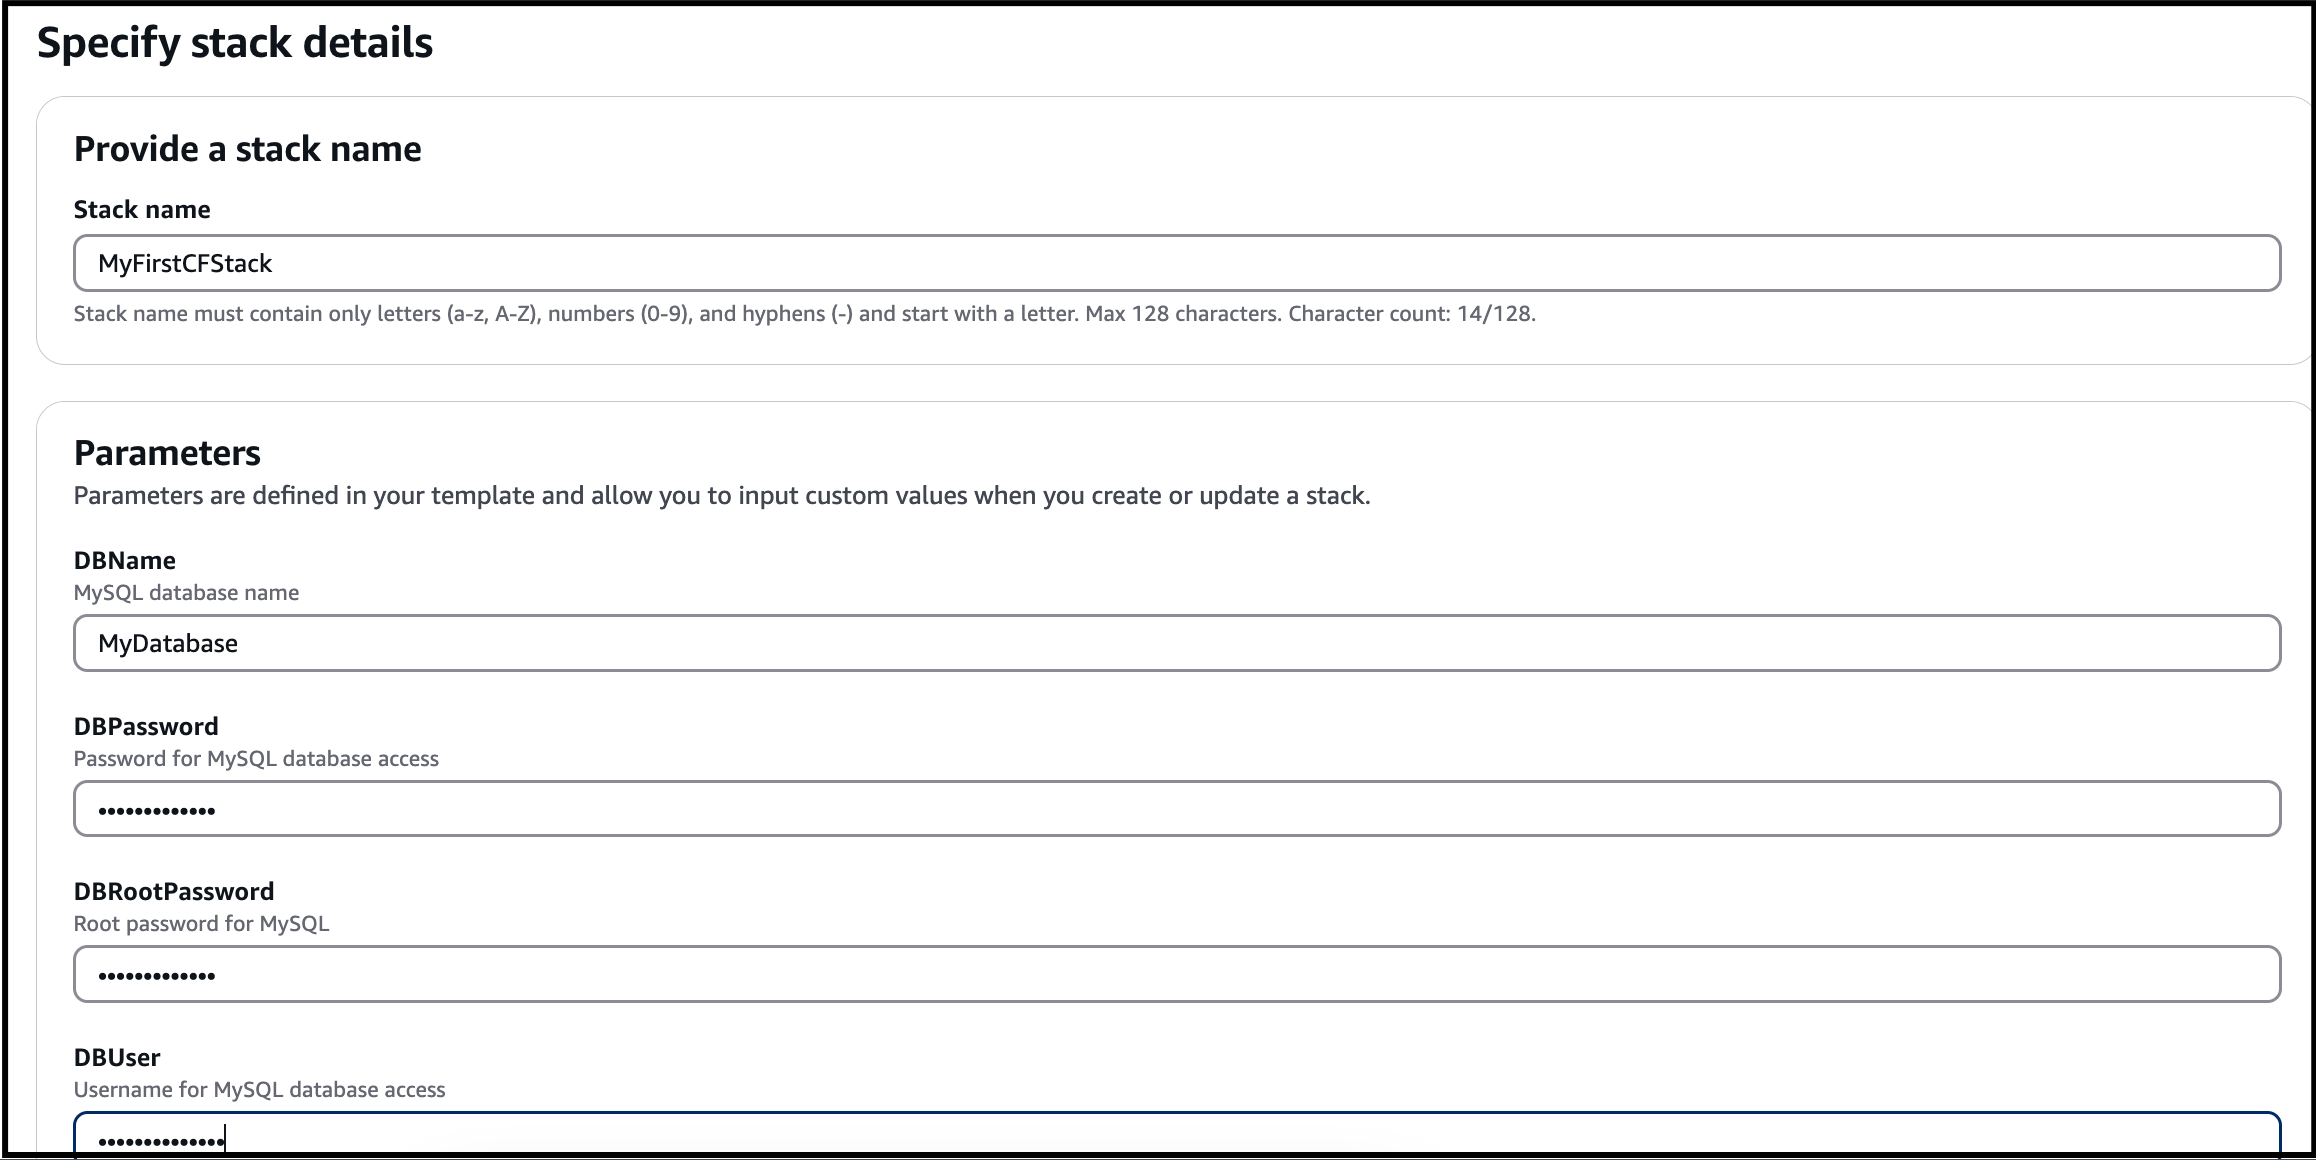
- Specify stack Details Stack name: Enter a unique stack name - MyFirstCFStack Parameters DB Name : Enter a database name - MyDatabase DB Password : Enter a database password - labdb123 DB Root Password : Enter database root password - labdbroot123 DB User : Enter the database username - labDBUser Instance Type : Select t2.micro Key Name : Select the key from the list name lab-key SSH Location : Enter 0.0.0.0/0 Click on Next.

- Specify stack Details
- Stack name: Enter a unique stack name - MyFirstCFStack
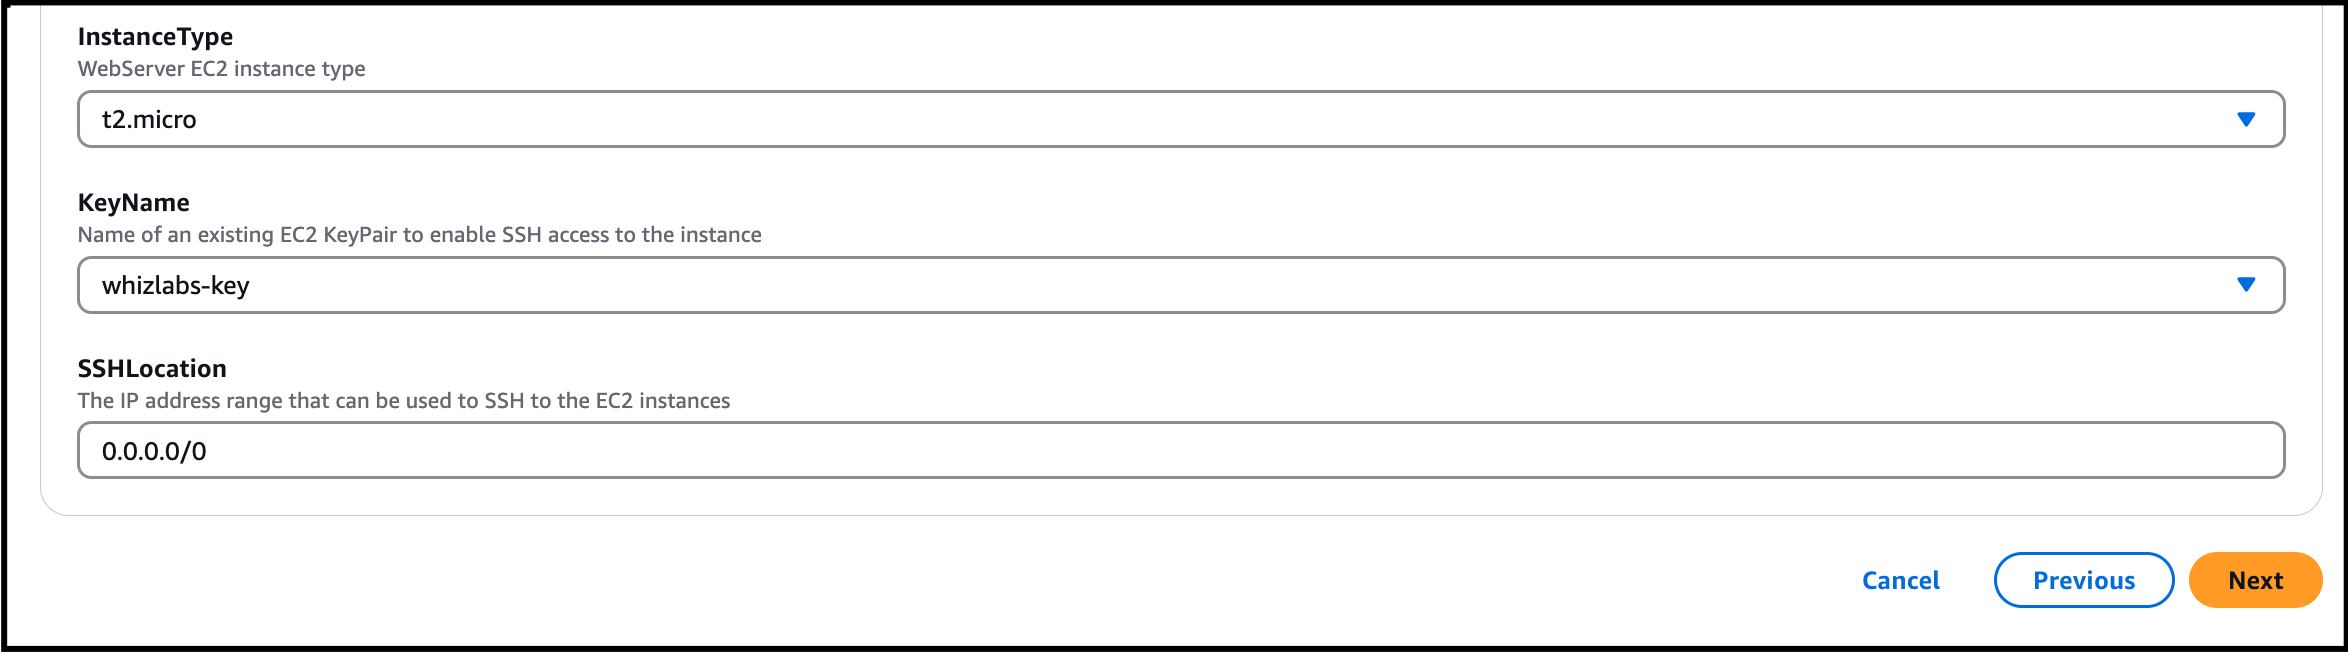
- Parameters DB Name : Enter a database name - MyDatabase DB Password : Enter a database password - labdb123 DB Root Password : Enter database root password - labdbroot123 DB User : Enter the database username - labDBUser Instance Type : Select t2.micro Key Name : Select the key from the list name lab-key SSH Location : Enter 0.0.0.0/0 Click on Next.

- Parameters
- DB Name : Enter a database name - MyDatabase
- DB Password : Enter a database password - labdb123
- DB Root Password : Enter database root password - labdbroot123
- DB User : Enter the database username - labDBUser
- Instance Type : Select t2.micro
- Key Name : Select the key from the list name lab-key
- SSH Location : Enter 0.0.0.0/0
- Click on Next.


- Task 3 : Create Cloudformation Stack

- Configure stack options : Tags: Click on add new tag Key : Enter Name Value : Enter MyCF Permissions: No need to select for this lab, leave it blank. Leave all other configuration fields as default. Click on Next.

- Configure stack options :
- Tags: Click on add new tag Key : Enter Name Value : Enter MyCF
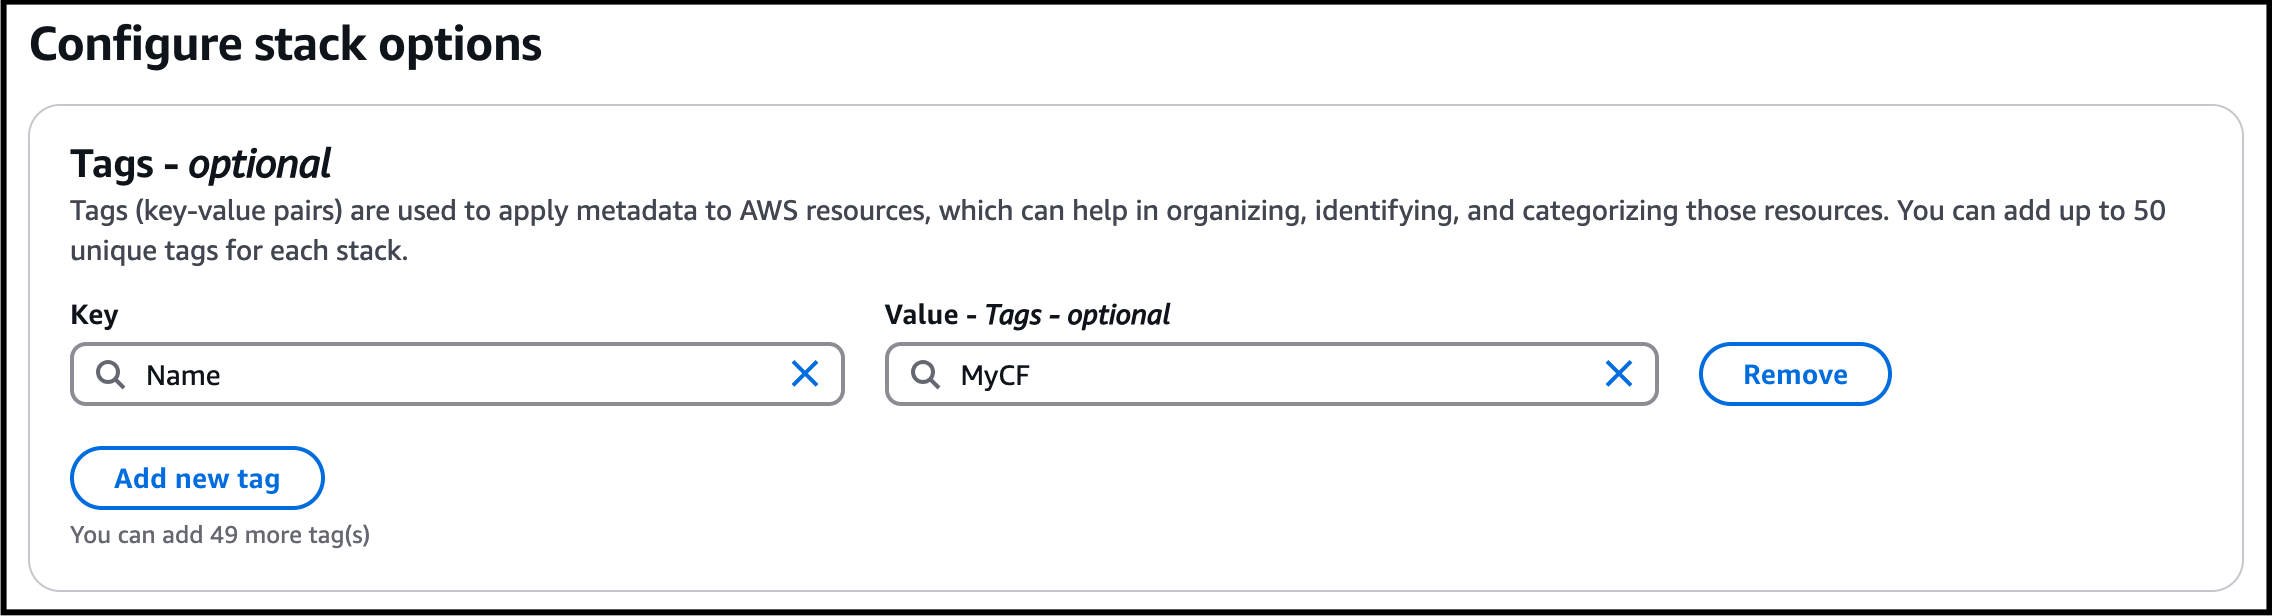
- Tags: Click on add new tag
- Key : Enter Name
- Value : Enter MyCF

- Task 3 : Create Cloudformation Stack

- Permissions: No need to select for this lab, leave it blank.
- Leave all other configuration fields as default.
- Click on Next.
- Review: Review your stack details and click on Submit.
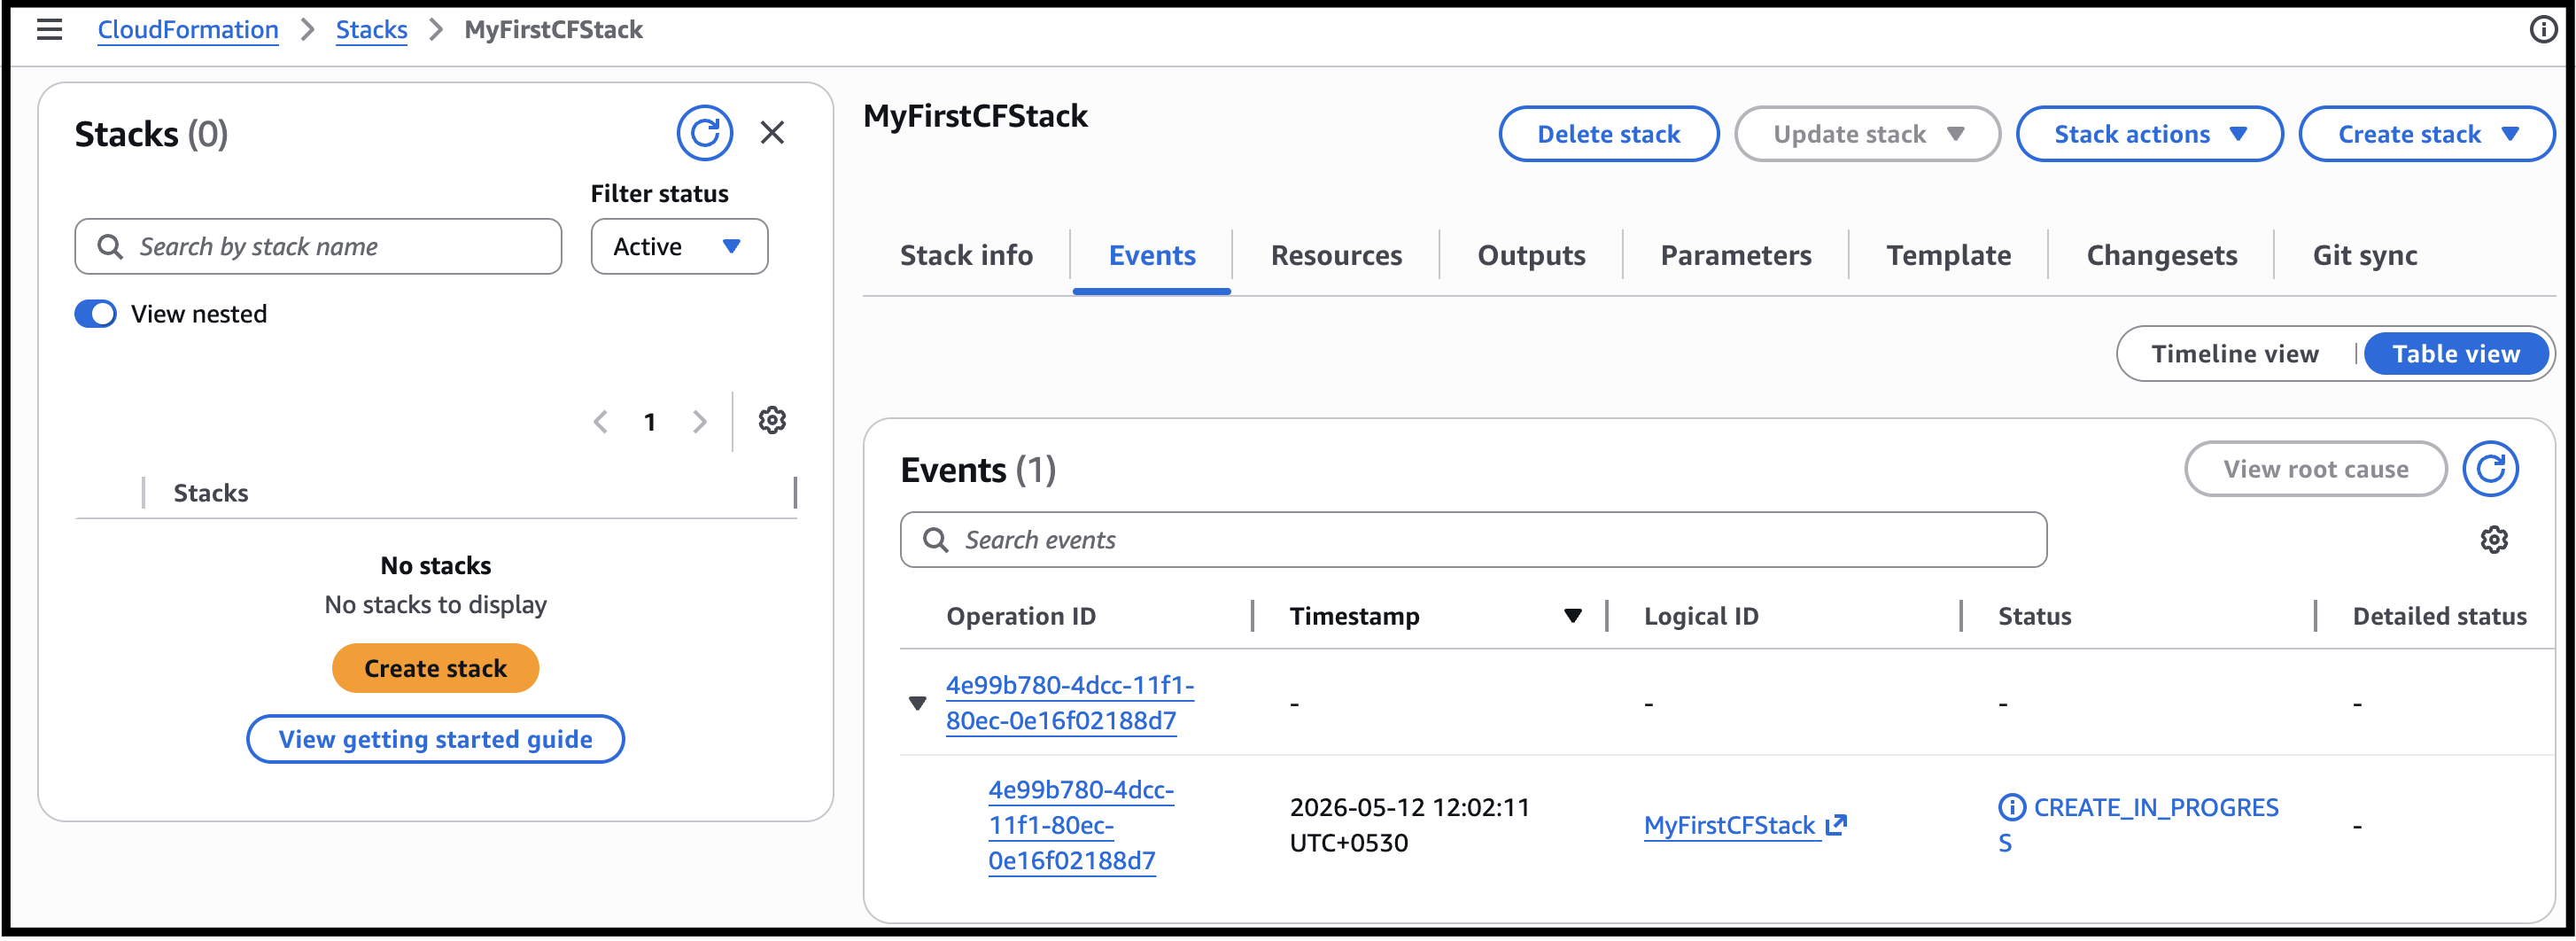
- Once you have clicked the create button, you will be redirected to the CloudFormation stack list. A sample screenshot is provided below.
- Task 3 : Create Cloudformation Stack

- Status: You will see the status CREATE_IN_PROGRESS.
- You need to wait around 1-5 minutes to complete the stack resource creation.
- Click on the refresh button to see the updates.
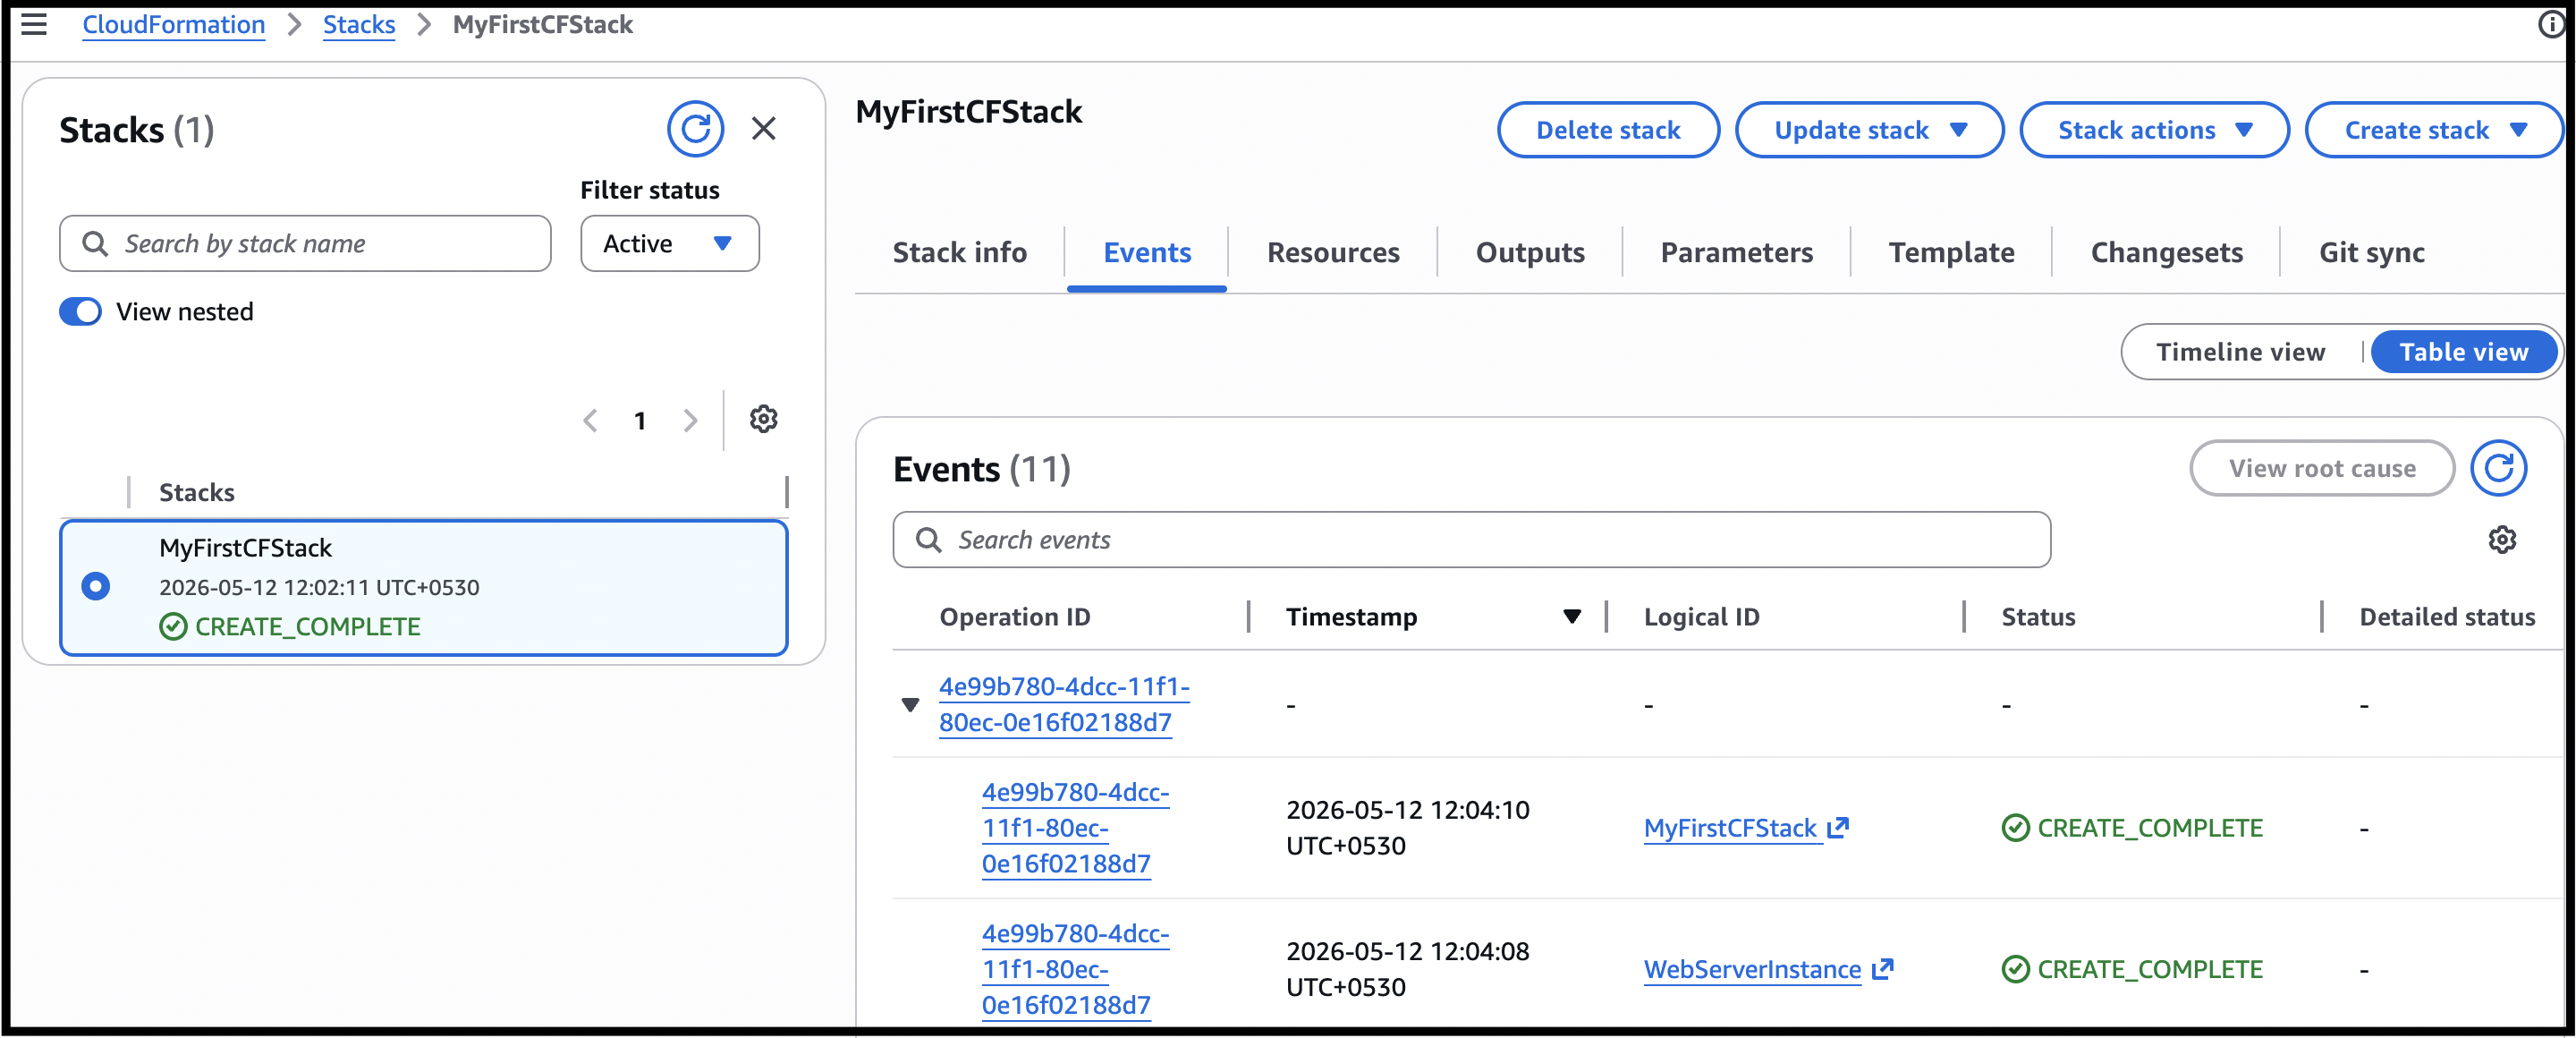
- Once your stack status changes to Create Complete.
- Task 3 : Create Cloudformation Stack
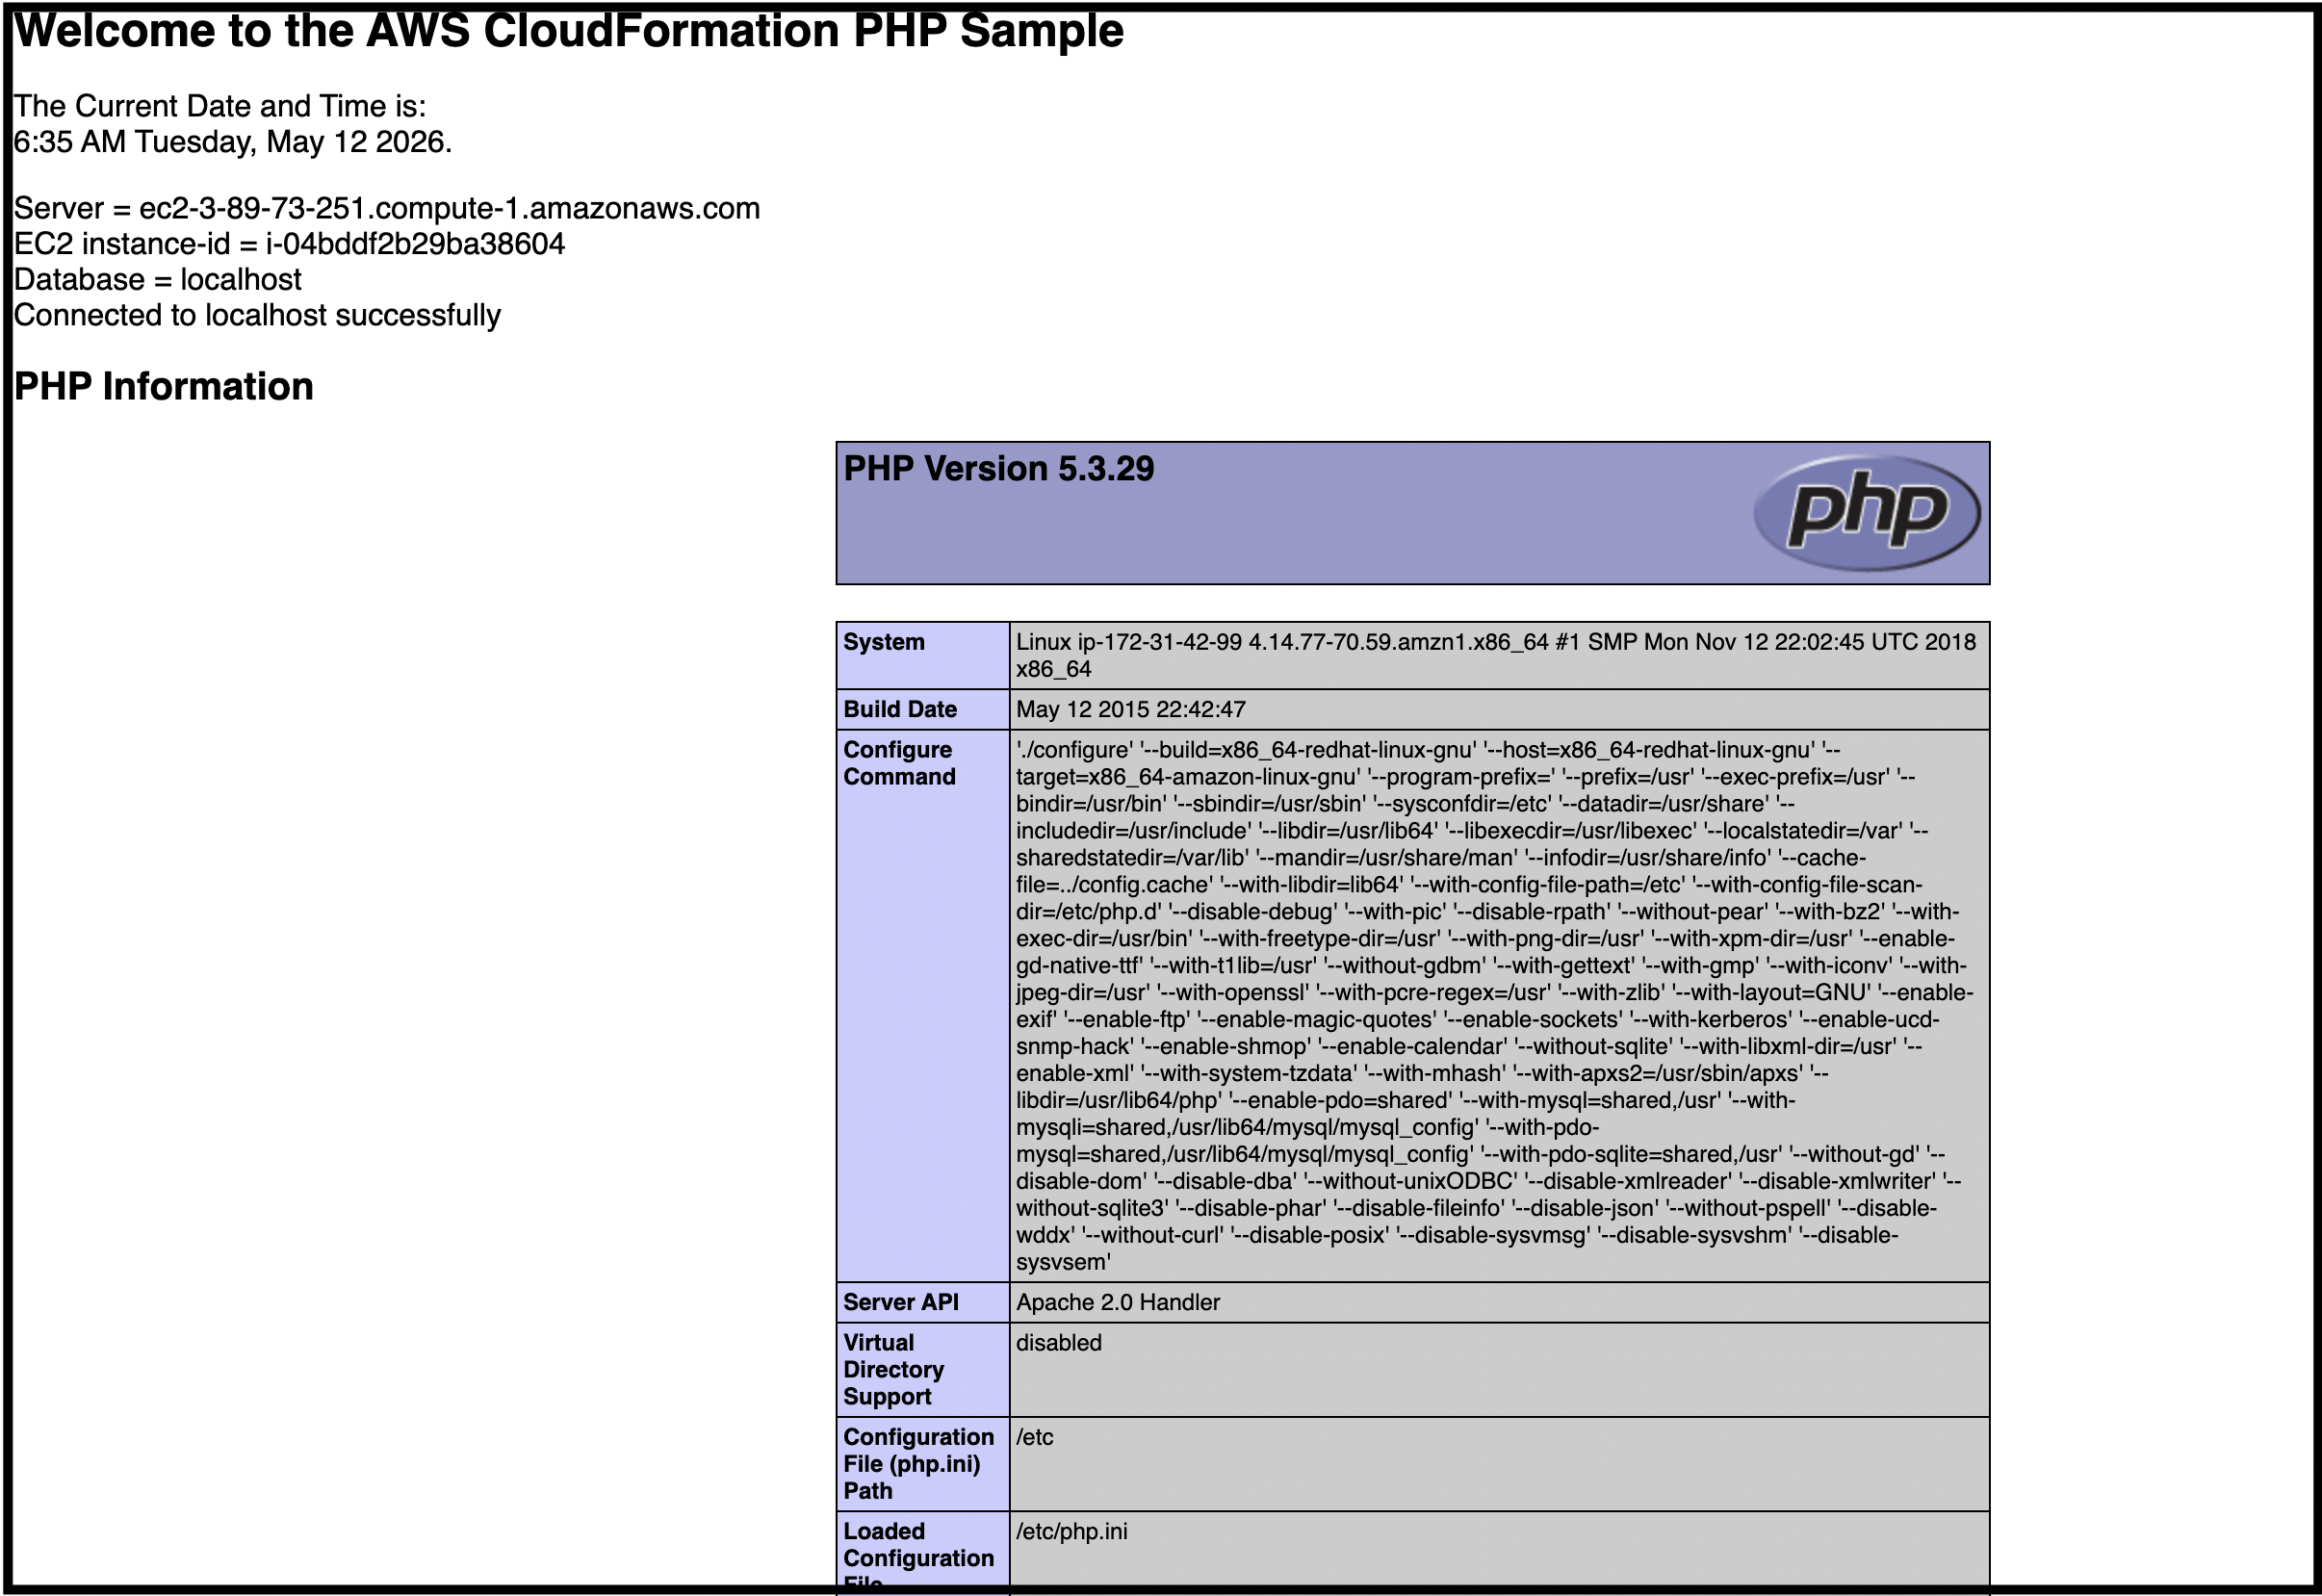
- Navigate to the outputs tab and you will be able to see an URL similar to below. Click on the URL. This will take you to your server's home page. http://ec2-3-89-73-251.compute-1.amazonaws.com
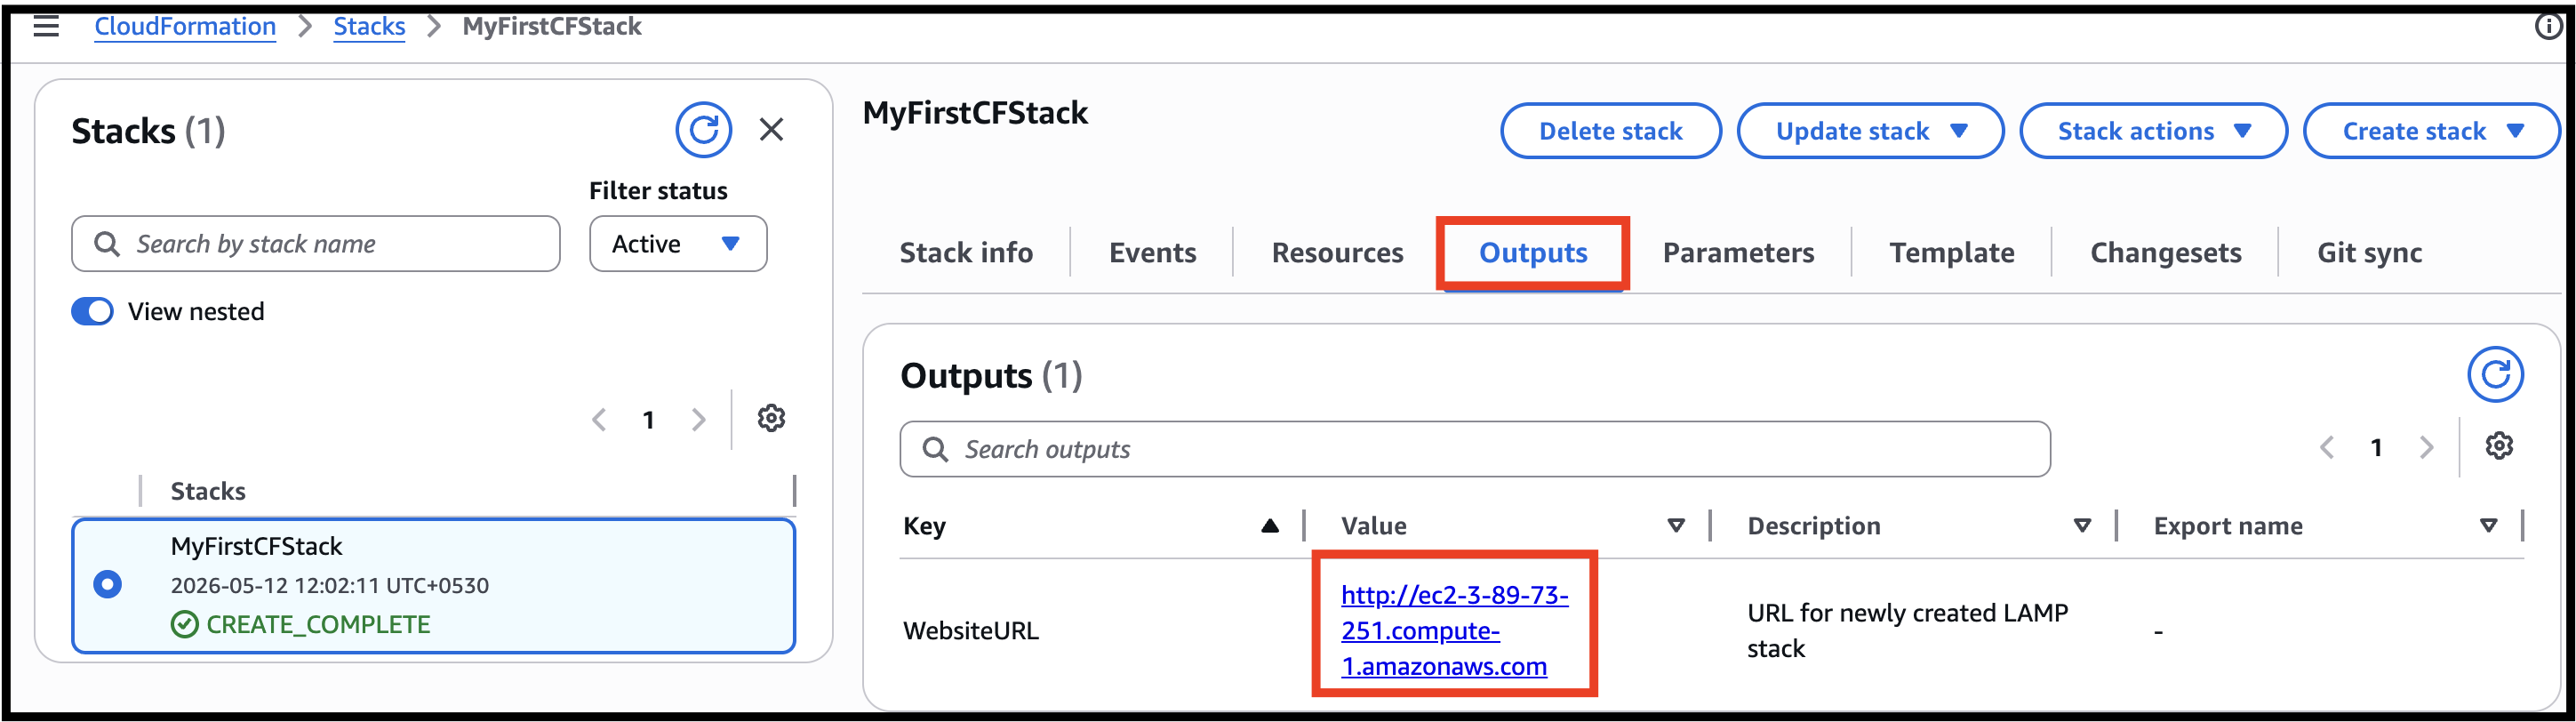
- Navigate to the outputs tab and you will be able to see an URL similar to below. Click on the URL. This will take you to your server's home page.
- Task 4 : Testing

- http://ec2-3-89-73-251.compute-1.amazonaws.com
- If you see the PHP info and your database connection, it means you have completed a LAMP server setup with AWS CloudFormation. Sample screenshot provided below:

- Task 4 : Testing
- By using CloudFormation, you can manage your infrastructure more efficiently, reduce manual effort, ensure consistency, and achieve faster and more reliable deployments. It provides a scalable and flexible approach to infrastructure provisioning and management, making it a valuable tool for both small and large-scale AWS deployments.
- Once the lab steps are completed, please click on the Validation button on the right side panel.
- This will validate the resources in the AWS account and displays whether you have completed this lab successfully or not.
- Sample output :

- Task 5 : Validation Test
- You have successfully created a Lamp server setup using a new Cloudformation Stack with the help of the JSON template provided in the S3 bucket.
- You have successfully tested the new lamp server created by CloudFormation.
- Sign out from the AWS Management Console.
- Click on End Lab button from the lab console and wait till the process gets completed.