Intermediate00:55:00
How to Create Virtual Private Cloud (VPC) with AWS CloudFormation
- Click on the Open Console button, and you will get redirected to AWS Console in a new browser tab.
- On the AWS sign-in page, Leave the Account ID as default. Never edit/remove the 12 digit Account ID present in the AWS Console. otherwise, you cannot proceed with the lab. Now copy your User Name and Password in the Lab Console to the IAM Username and Password in AWS Console and click on the Sign in button.
- On the AWS sign-in page,
- Leave the Account ID as default. Never edit/remove the 12 digit Account ID present in the AWS Console. otherwise, you cannot proceed with the lab.
- Now copy your User Name and Password in the Lab Console to the IAM Username and Password in AWS Console and click on the Sign in button.
- Once Signed In to the AWS Management Console, Make the default AWS Region as US East (N. Virginia) us-east-1.
- Note : If you face any issues, please go through FAQs and Troubleshooting for Labs.
- In this task , we will be creating VPC stack using the pre-created cloudformation template in the S3 bucket.
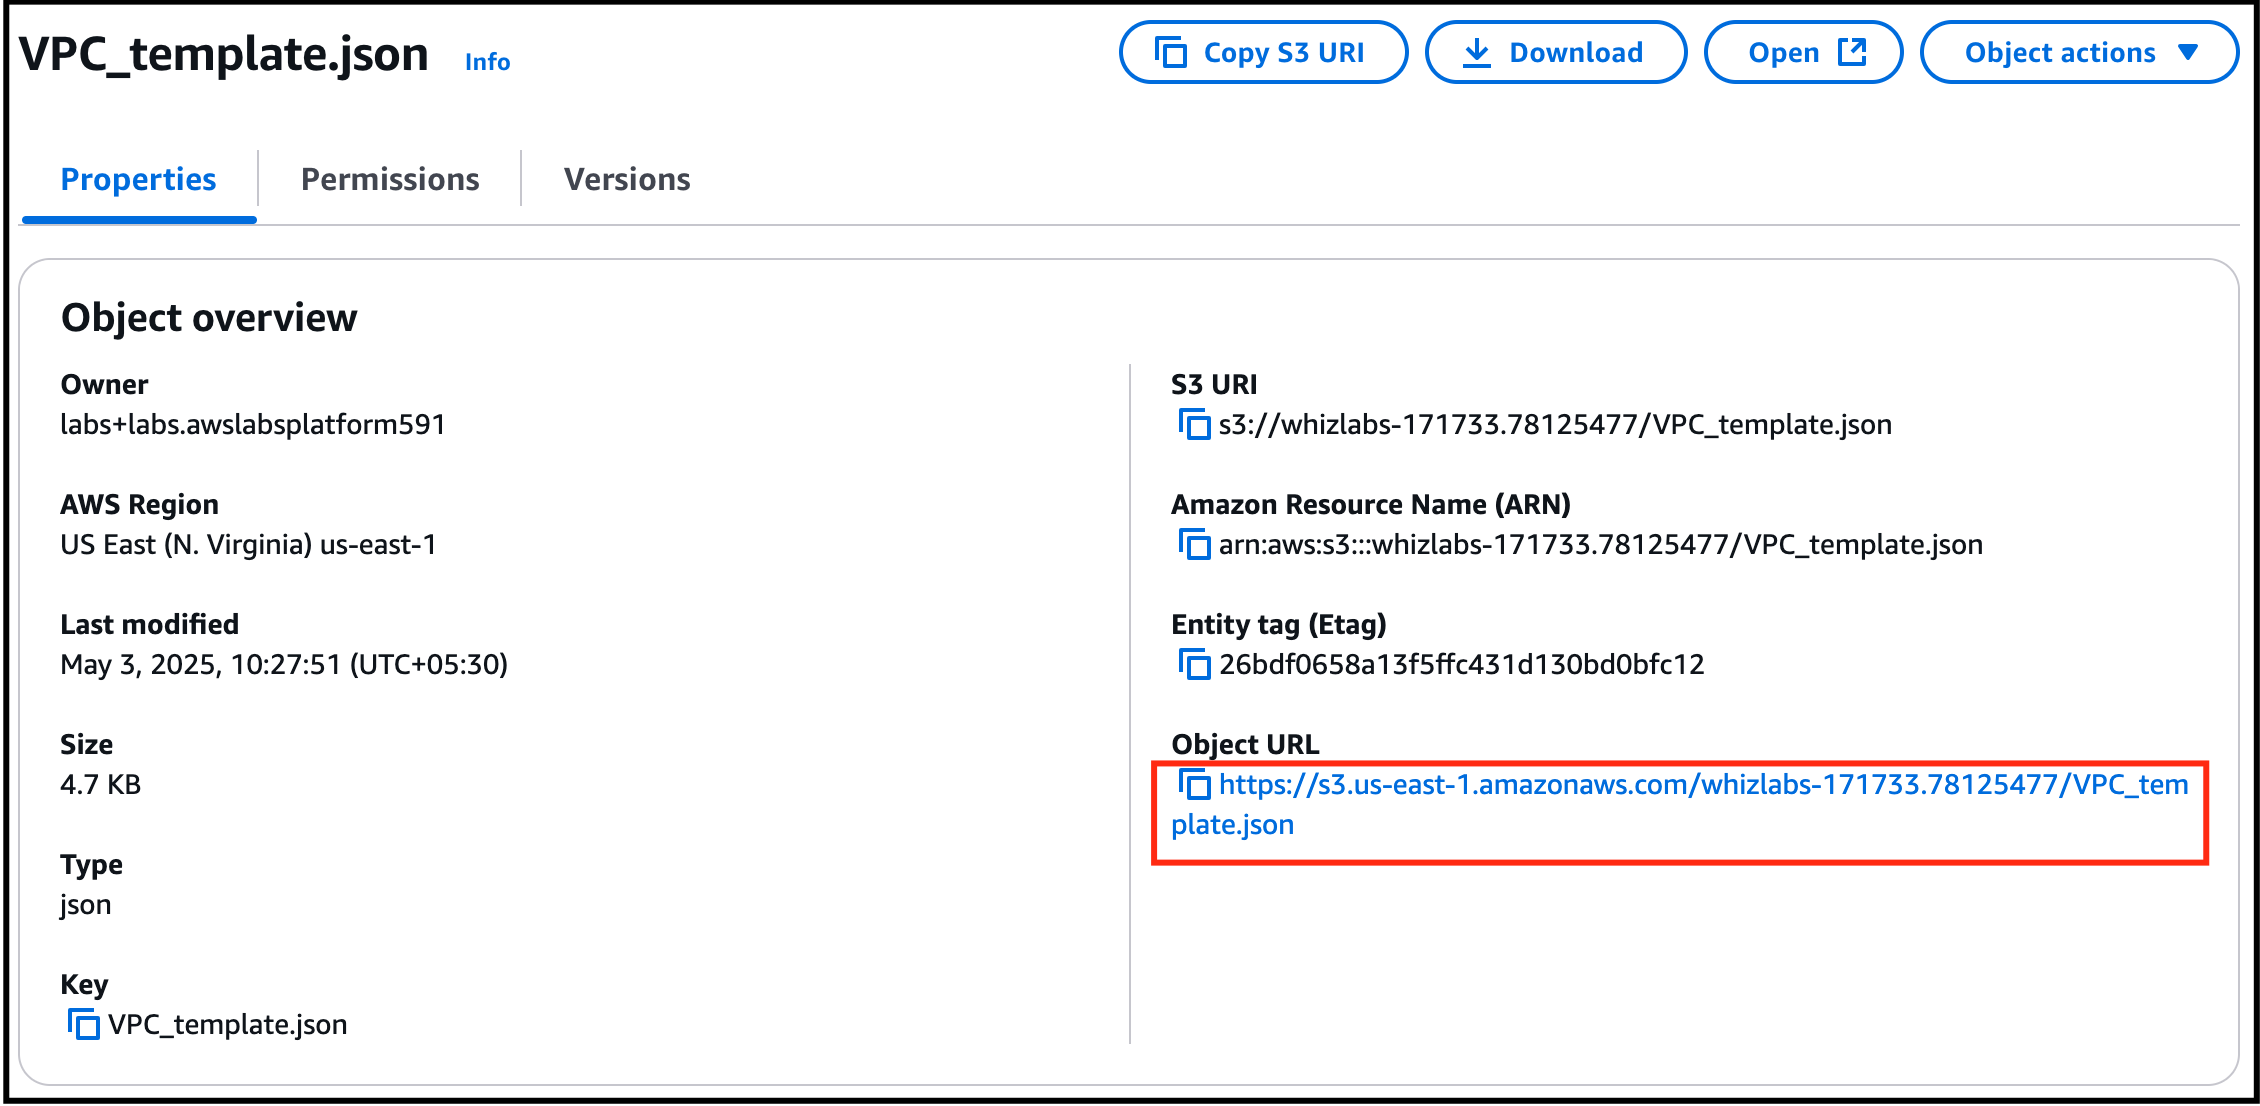
- Search for S3 by click on Services in the top menu, then click on S3 in the Storage section. You will see a bucket name starting with "lab" with numeric digits appended to the end, like lab1234564543. Open that bucket and click on the object named VPC_template.json. Next, copy the Object URL to the clipboard for use in the CloudFormation template.

- Search for S3 by click on Services in the top menu, then click on S3 in the Storage section.
- You will see a bucket name starting with "lab" with numeric digits appended to the end, like lab1234564543.
- Open that bucket and click on the object named VPC_template.json.
- Next, copy the Object URL to the clipboard for use in the CloudFormation template.
- Task 2: Creating Subnets using the VPC Template cloudformation stack

- Navigate to CloudFormation by clicking on Services in the top menu, click on CloudFormation in the Management and Governance section.
- Then click on Create Stack and select Choose an existing template.
- Choose Amazon S3 URL in Specify template. Then paste the Object URL below.
- Click on Next

- Task 2: Creating Subnets using the VPC Template cloudformation stack

- Stack Name: Enter MyStack123 and click on Next

- Task 2: Creating Subnets using the VPC Template cloudformation stack

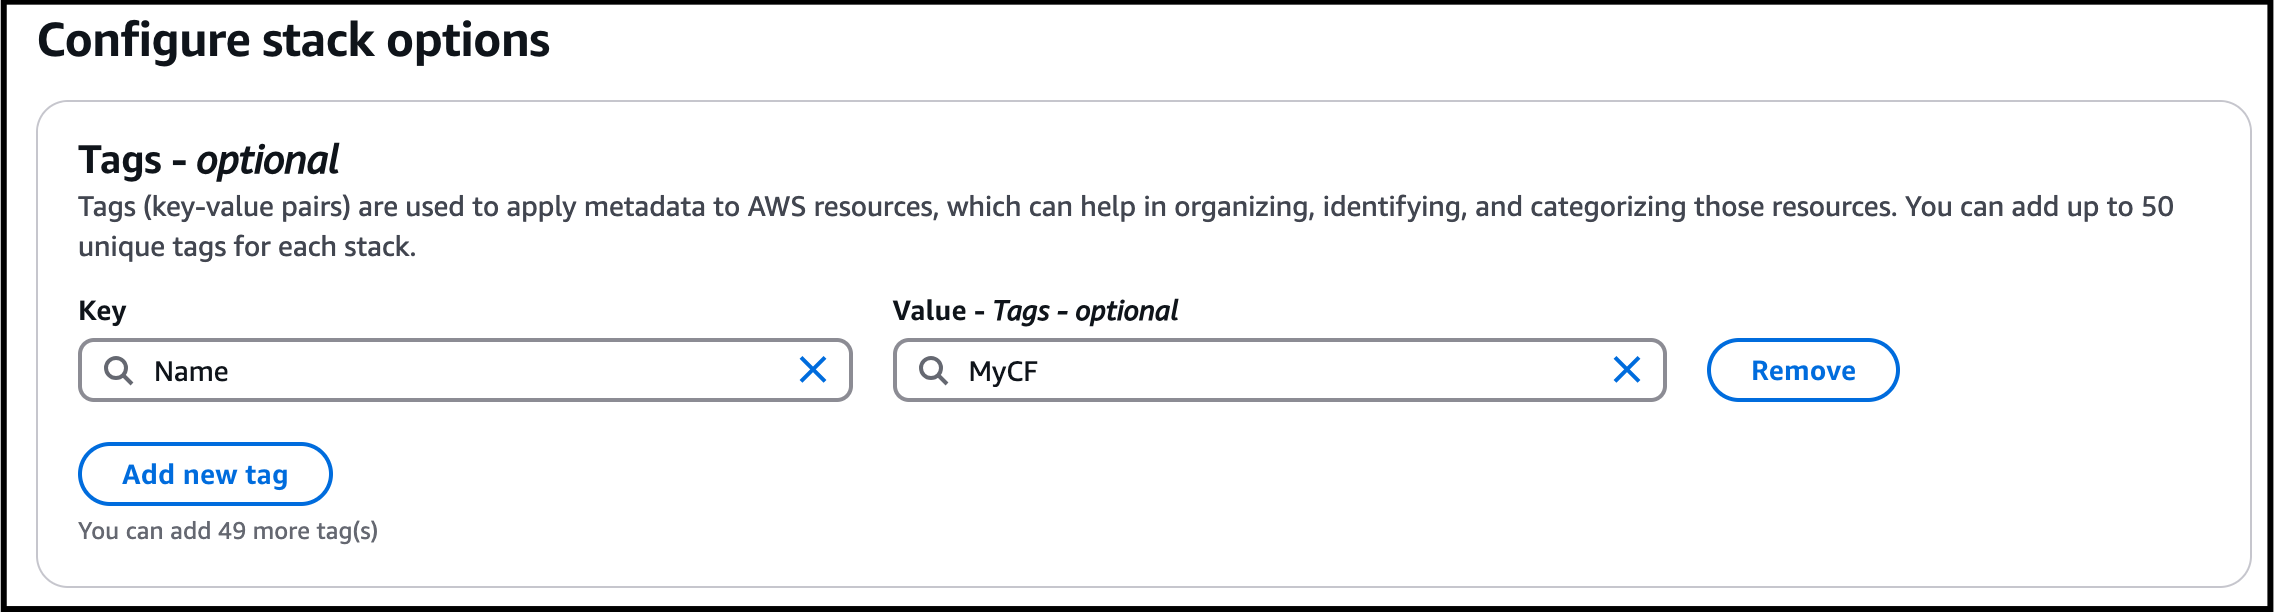
- On Tag option, click Add new tag.
- Key: Enter Name
- Value: Enter MyCF
- Task 2: Creating Subnets using the VPC Template cloudformation stack

- Leave other options as default and click on Next
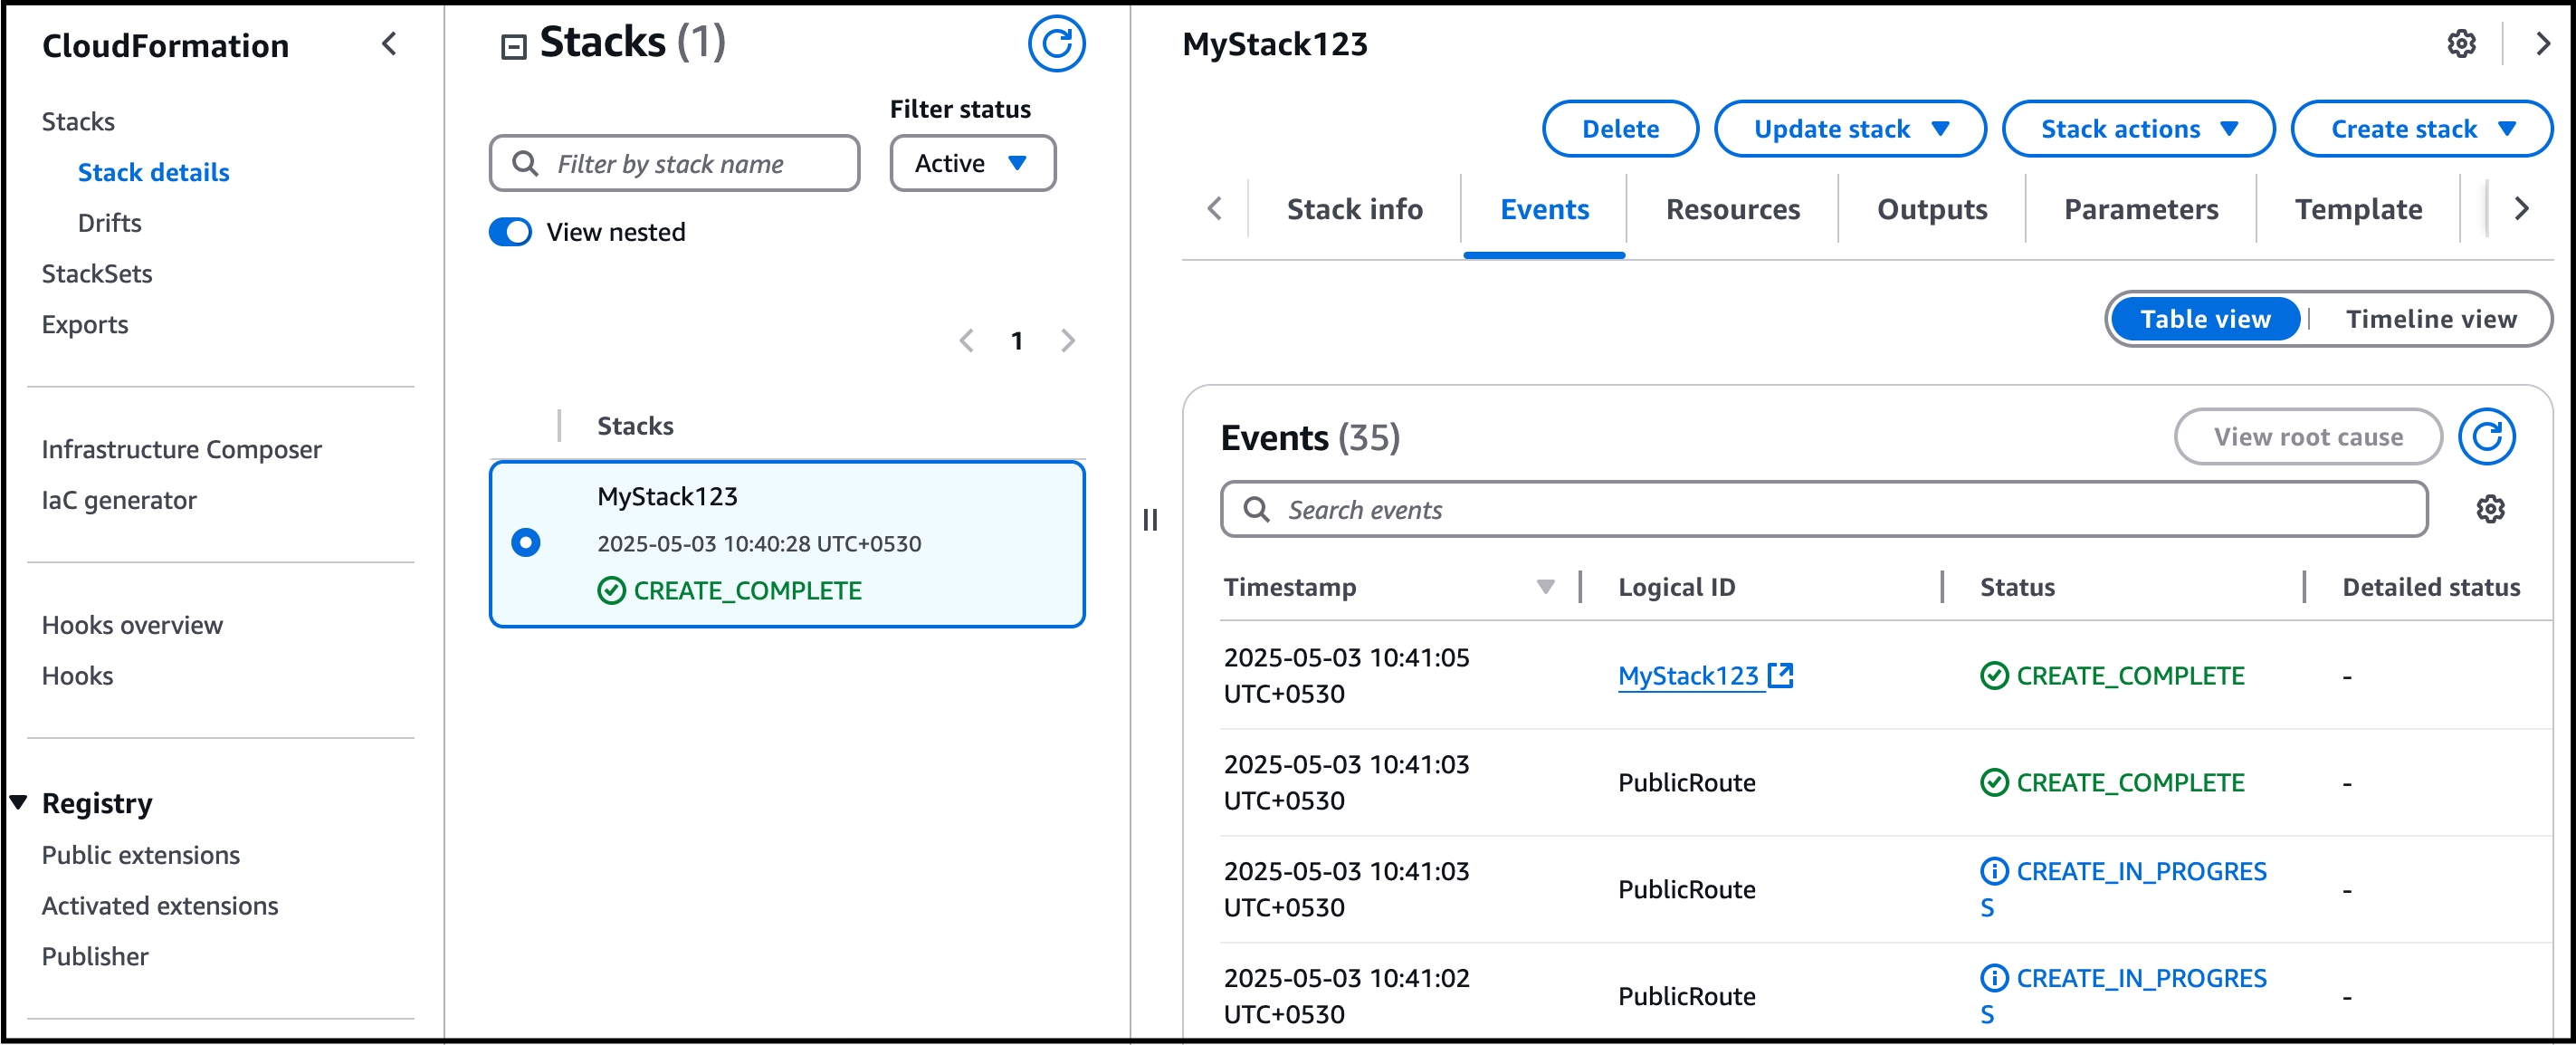
- Review the Stack details and click on Submit. Then you will be redirected to the CloudFormation Stack list.Note: You need to wait 5-10 minutes to complete the stack resource creation.
- Review the Stack details and click on Submit. Then you will be redirected to the CloudFormation Stack list.
- It will display CREATE_COMPLETE.
- Navigate to the Services menu in the top, click on VPC in the Networking and Content Delivery section.
- You can see the vpc resources created by CloudFormation.
- Search for S3 by clicking on Services in the top menu, then click on S3 in the Storage section. You will see a bucket name starting with lab with numeric digits appended to the end, like lab1234564543. Open that bucket and click on the object named VPC_II_template.json. Now, copy the Object URL to the clipboard for use in CloudFormation template.

- Search for S3 by clicking on Services in the top menu, then click on S3 in the Storage section.
- You will see a bucket name starting with lab with numeric digits appended to the end, like lab1234564543.
- Open that bucket and click on the object named VPC_II_template.json.
- Now, copy the Object URL to the clipboard for use in CloudFormation template.

- Task 3: Creating Subnets using the VPC II Template cloudformation stack

- Click on Services in the top menu, then click on CloudFormation in the Management and Governance section
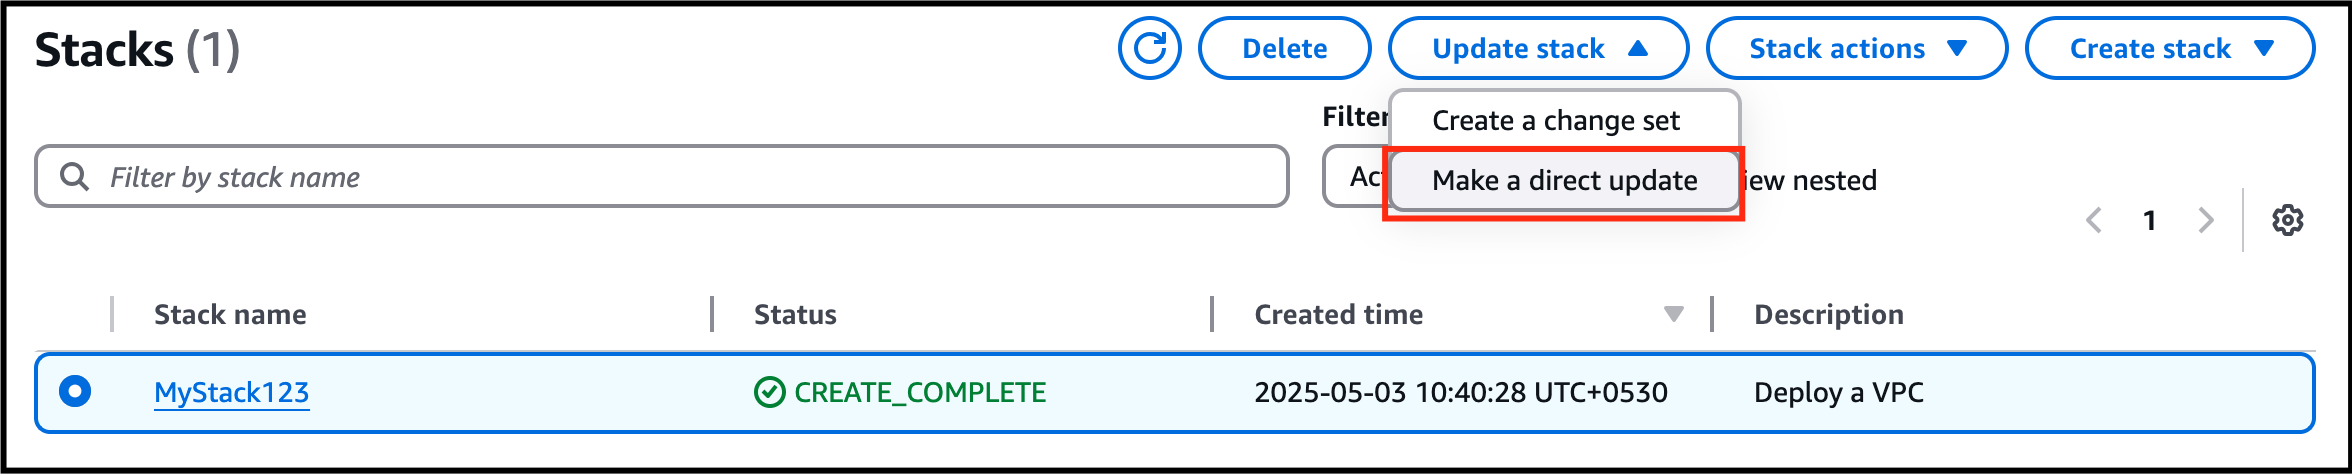
- Select the stack MyStack123 and click on Update stack and select Make a direct update from dropdown.

- Task 3: Creating Subnets using the VPC II Template cloudformation stack
- Select Replace existing template and paste the URL below in the Amazon S3 URL.
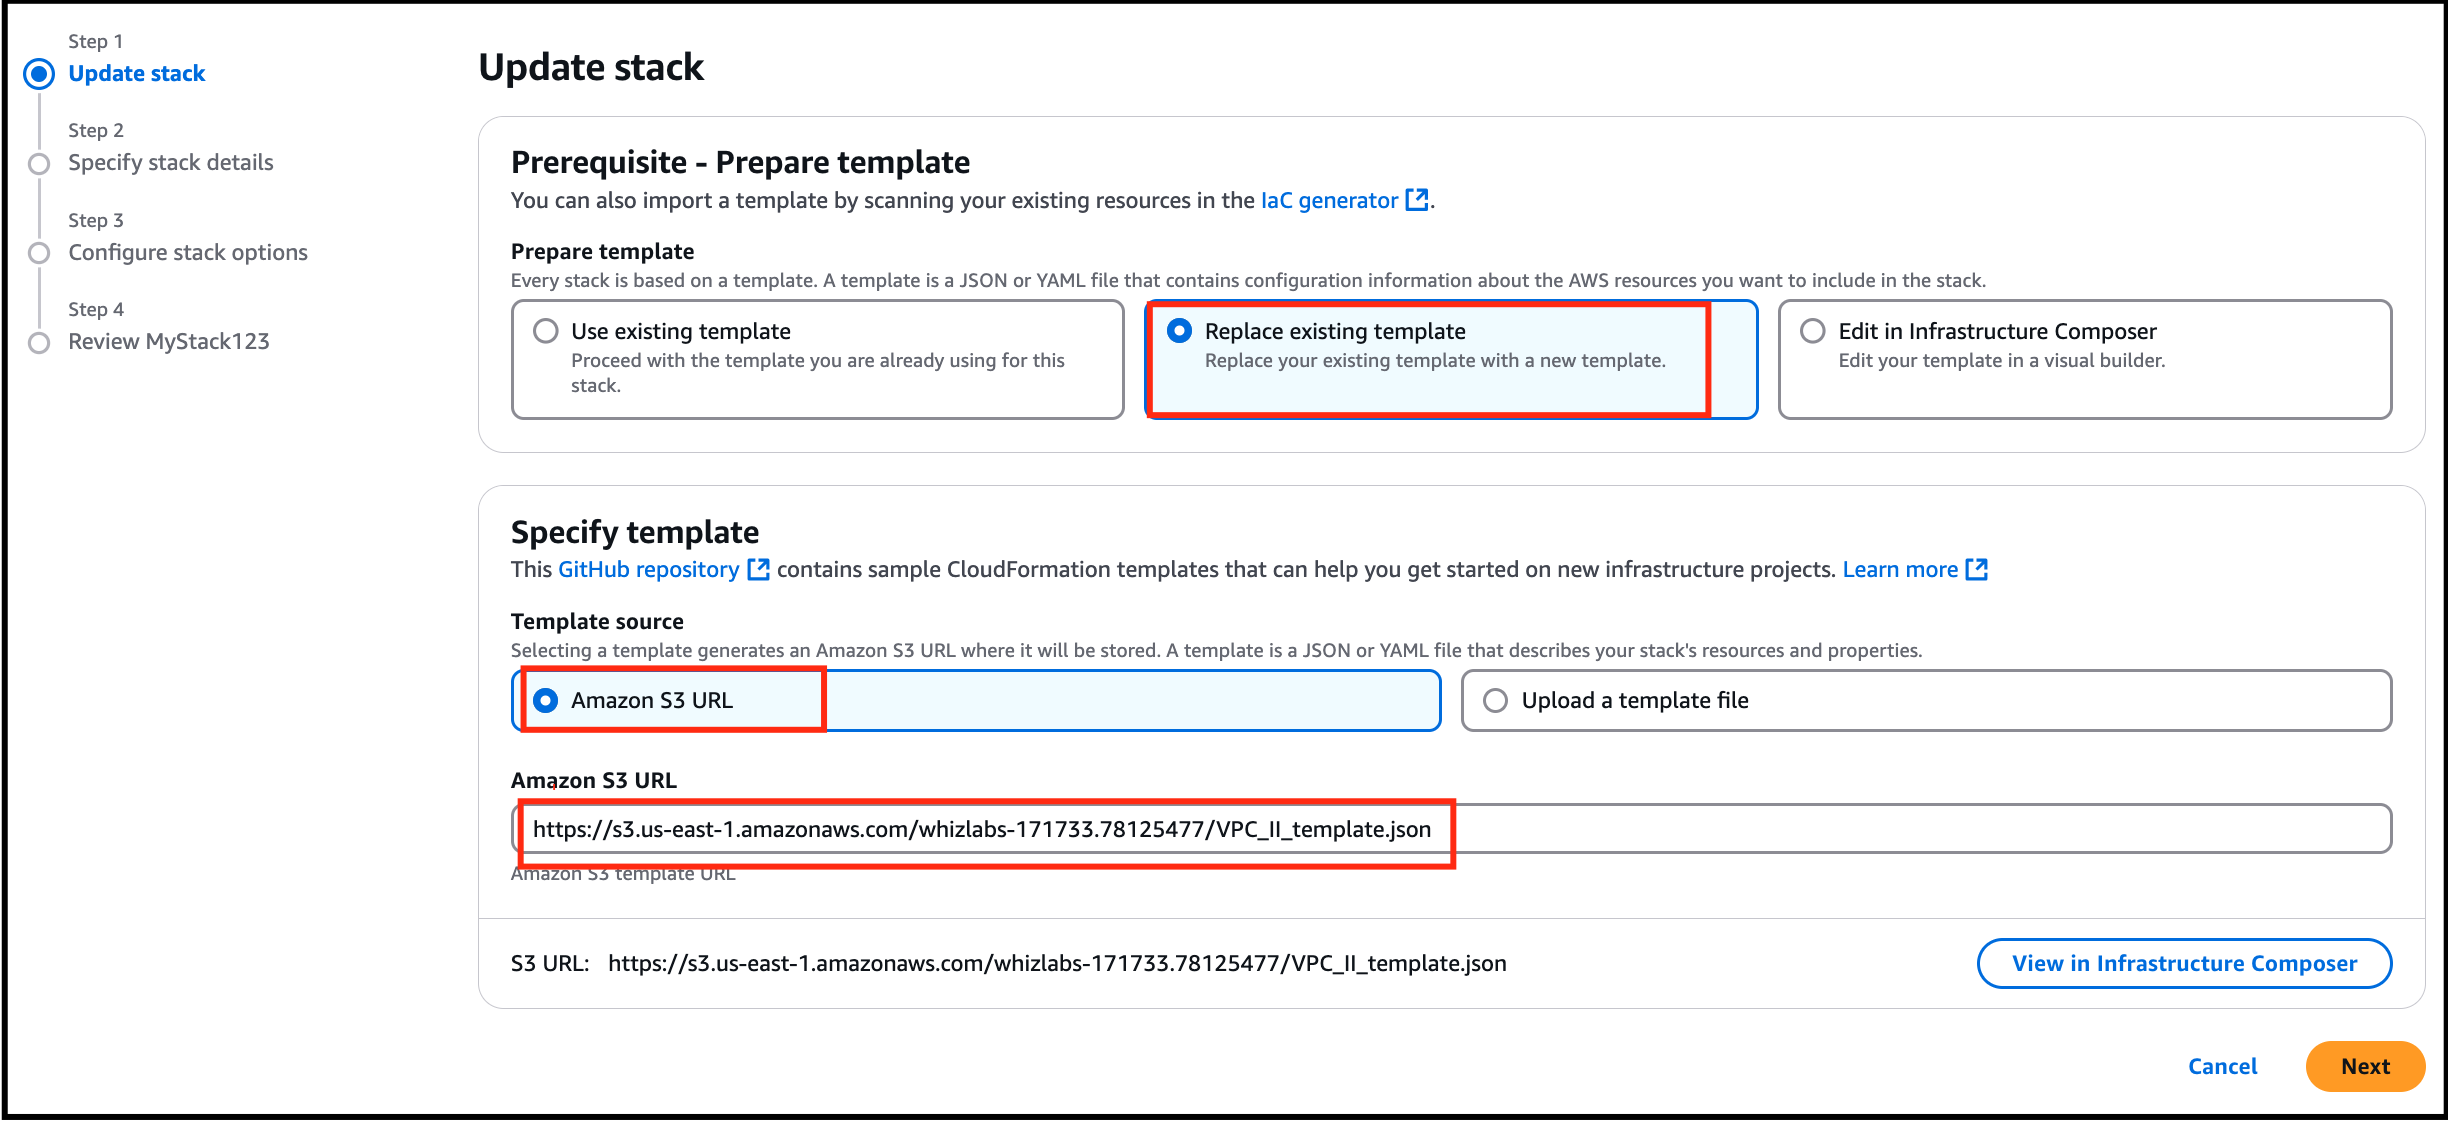
- Click on Next. You should see No Parameters being displayed. Then, click on Next.
- Tags - No changes needed in this page, click on Next button.
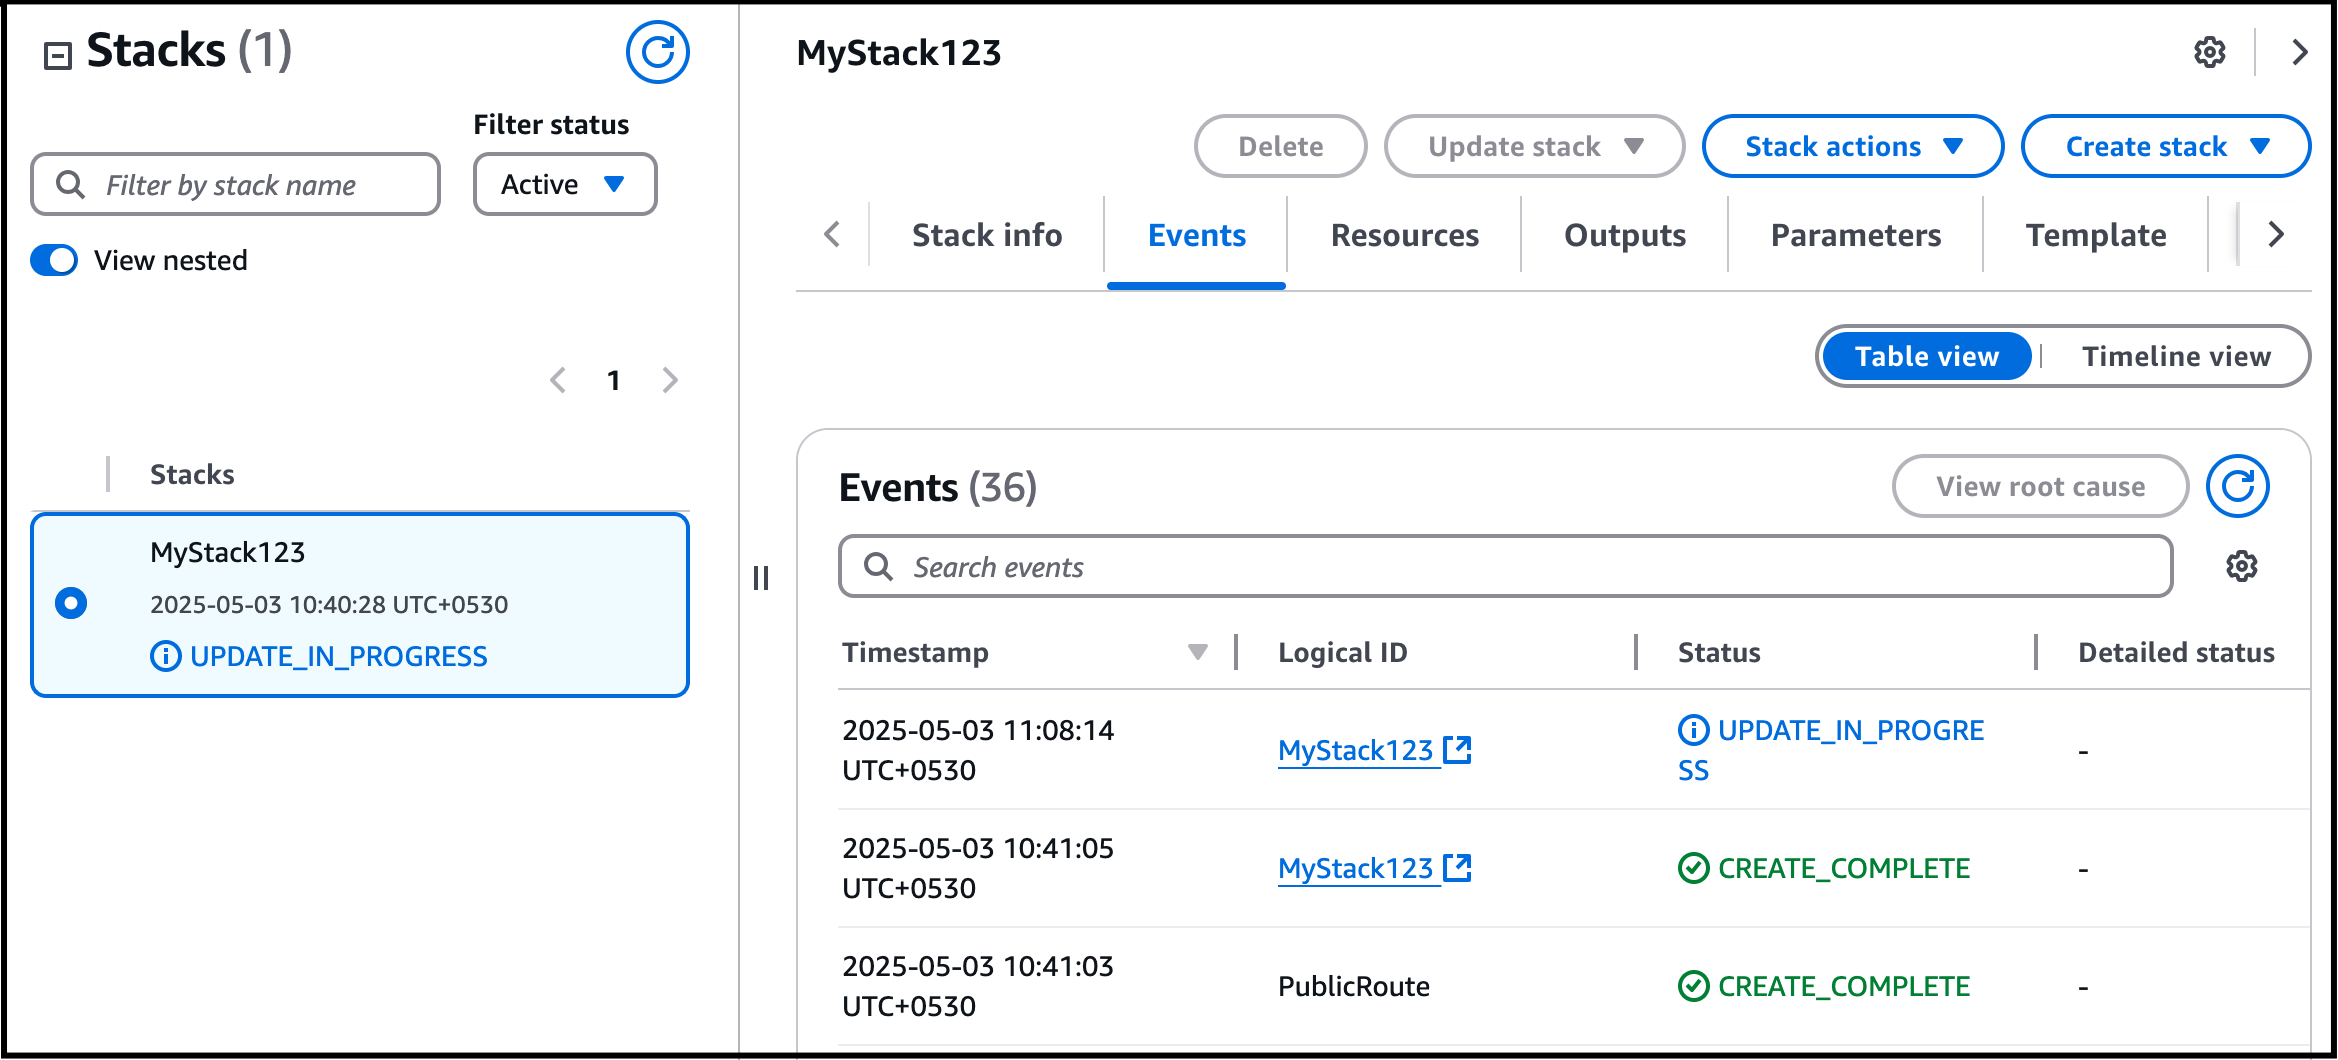
- Review the stack details and click on Submit .
- Click on Events and it will display extra space UPDATE_IN_PROGRESS.

- Task 3: Creating Subnets using the VPC II Template cloudformation stack
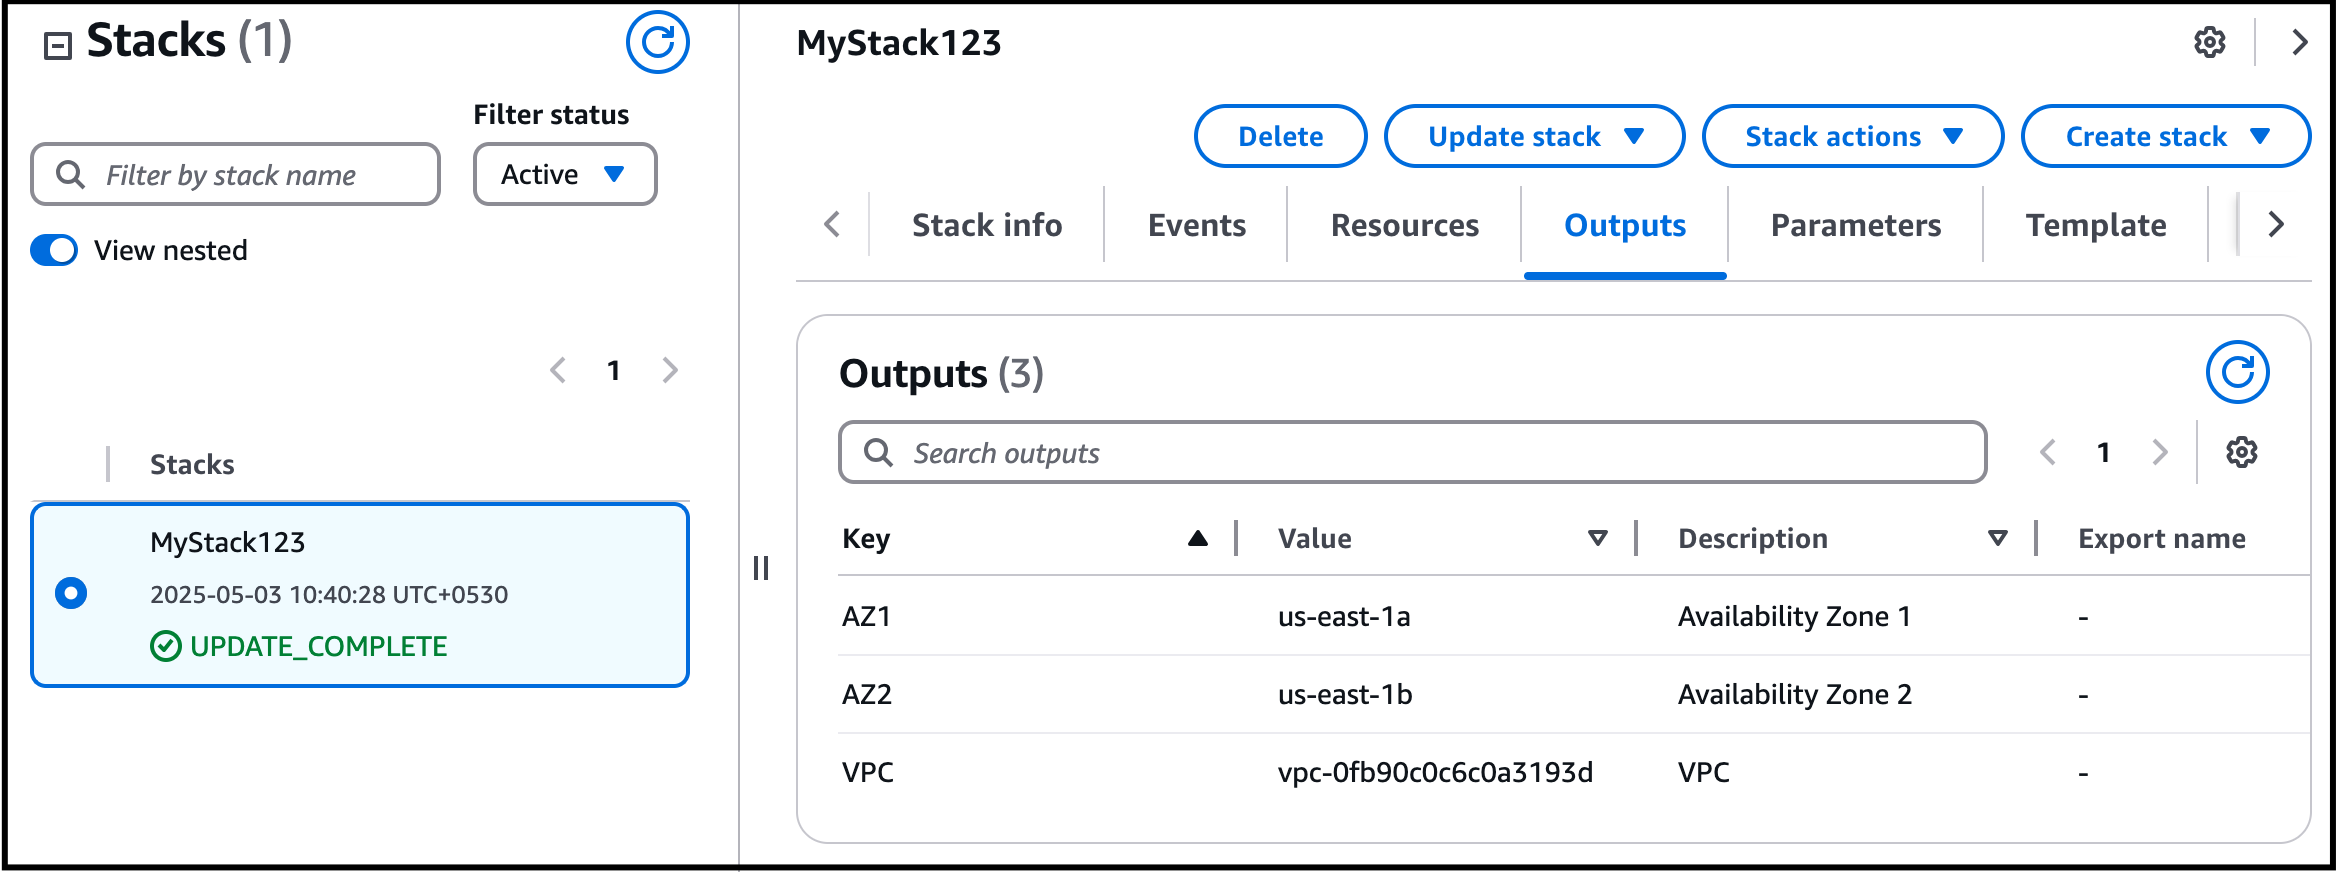
- Once your stack status changes to UPDATE_COMPLETE, we can proceed forward.
- Click on the Output tab. You can see an additional Availability Zone displayed with a different value than the original Availability Zone.
- Task 3: Creating Subnets using the VPC II Template cloudformation stack

- Click on Services in the top menu, click on VPC in the Networking and Content Delivery section.
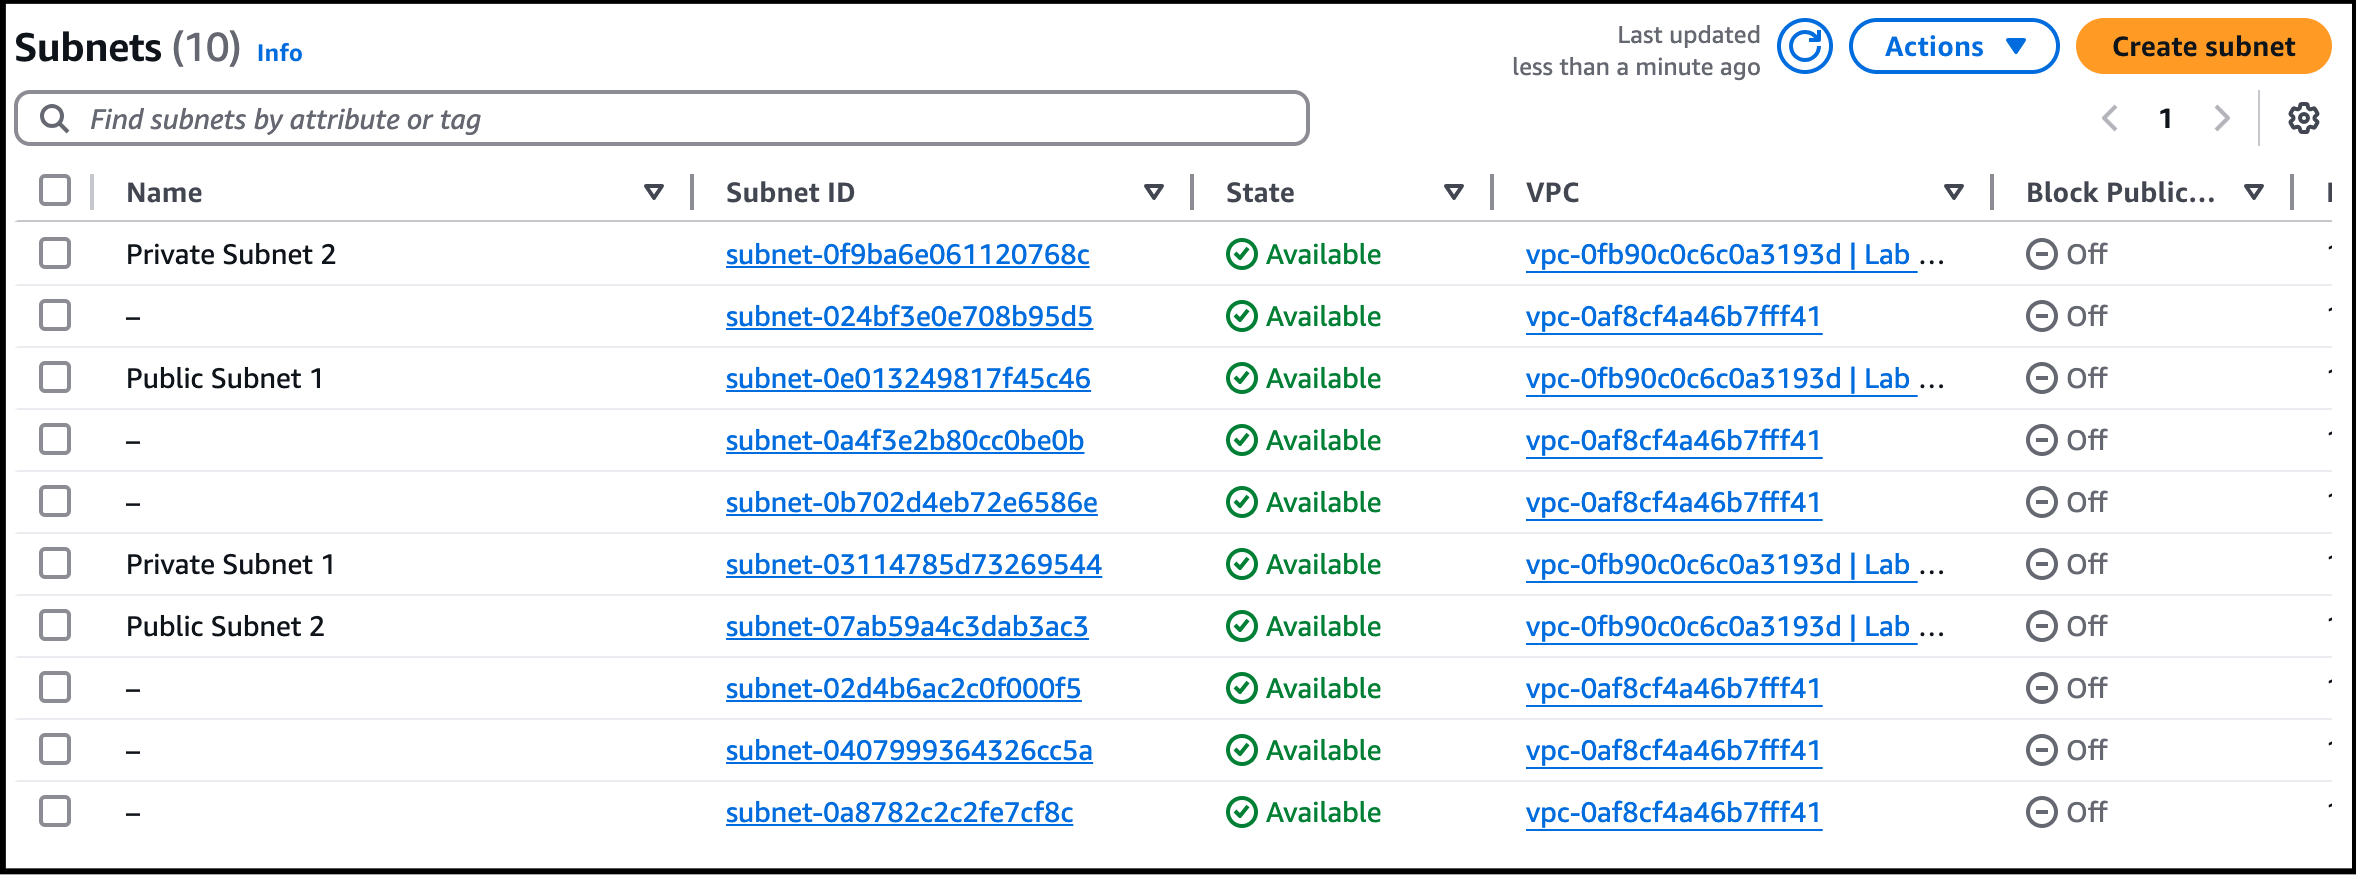
- Select the VPC named Lab VPC in the list and click on Subnets in the left panel.
- You will now see your subnets. The VPC has been updated with a new stack.
- Task 3: Creating Subnets using the VPC II Template cloudformation stack

- In the present lab, we have used two templates for stack creation. They are VPC_Template and VPC_II_Template.
- When you download and open the template,here is how the VPC_template.json looks like,
- Task 4: Deep dive into the VPC_Template and VPC_II_Template
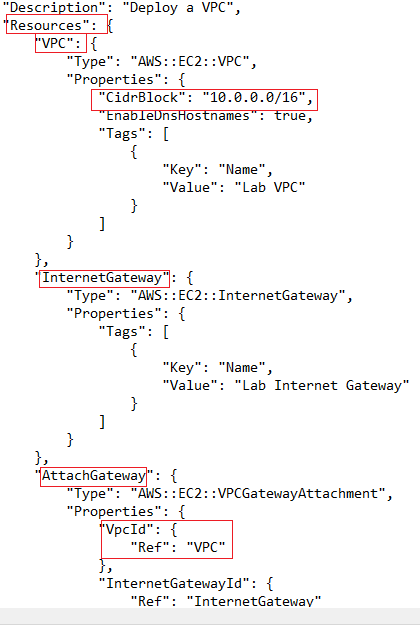
- In the above image, we are first creating a VPC with the name Lab VPC, CIDR block- 10.0.0.0/16. Then an internet gateway with the name Lab Internet Gateway is created. Lab VPC is then attached to the Lab Internet Gateway.
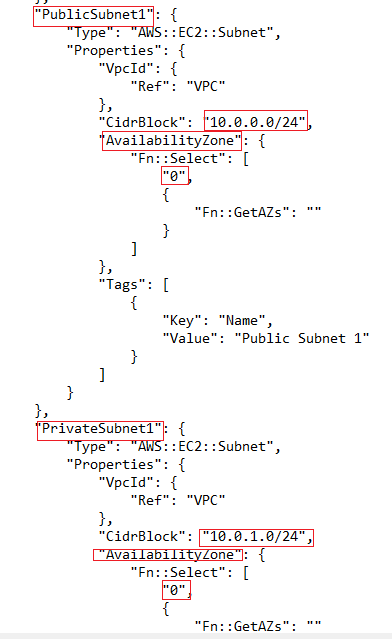
- We then are creating a public subnet named public subnet 1 in availability zone 1 with the IP address 10.0.0.0/24. The private subnet is created (named private subnet 1)with IP address 10.0.1.0/24 in the AZ-1.
- Task 4: Deep dive into the VPC_Template and VPC_II_Template
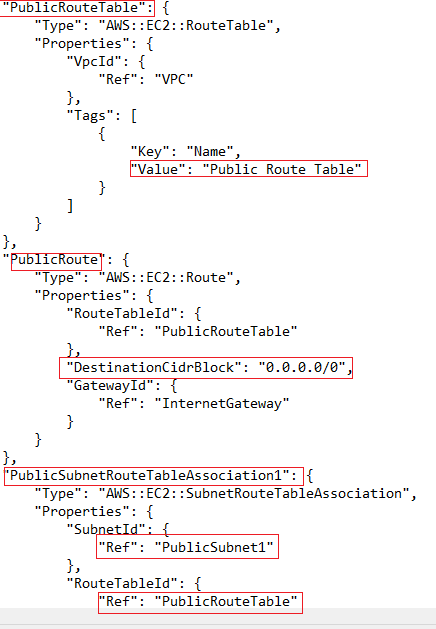
- After the subnets are created then a public route table is created. The public subnet 1 is then associated with the public route table.
- Task 4: Deep dive into the VPC_Template and VPC_II_Template
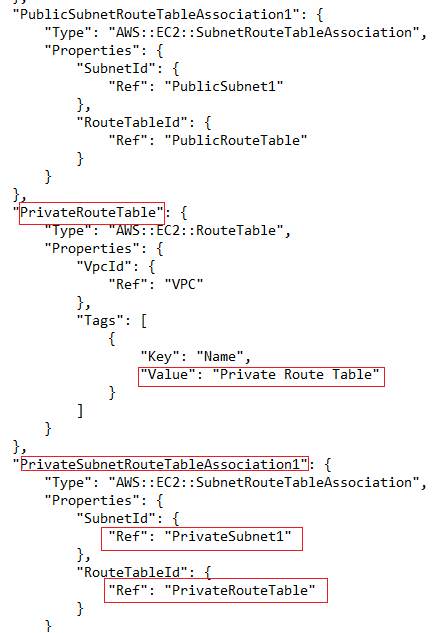
- A private route table then is created. The private subnet1 is then associate with the private route table. (We can find the subnet associations option in route table and add the required subnet in the console).
- Mystack123 is then created executing all the required resources. After that, you are updating the stack template with VPC_II_Template.
- When you download and open the second template VPC_II_template.json. that is present in the s3 bucket. You are creating a VPC with 2 public subnets and 2 private subnets.VPC is named Lab VPC similar to the above-created stack. An internet gateway is attached to the VPC. The public subnets used here are public subnet 1 (10.0.0.0/24) and public subnet 2 (10.0.2.0/24). The private subnets are private subnet1 (10.0.1.0/24) and private subnet2 (10.0.3.0/24) respectively. The public subnets are associated with the public route table and private subnets are associated with the private route table. The main difference is public subnet 1 and private subnet 1 are created in the same availability zone ie; AZ-1 and private subnet and public subnet 2 are created in AZ-2.
- New resources are created after the stack is updated.Do You Know ?AWS CloudFormation provides a powerful feature called custom resources, which allows you to extend the capabilities of CloudFormation templates by adding your own resource types. These custom resources can be created and managed using AWS Lambda functions.
- New resources are created after the stack is updated.
- AWS CloudFormation provides a powerful feature called custom resources, which allows you to extend the capabilities of CloudFormation templates by adding your own resource types. These custom resources can be created and managed using AWS Lambda functions.
- Once the lab steps are completed, please click on the Validation button on the left side panel.
- This will validate the resources in the AWS account and displays whether you have completed this lab successfully or not.
- Sample output :
- Task 5: Validation Test
- You have successfully deployed an AWS CloudFormation template that creates an Amazon VPC
- You have successfully examined the components in the template
- You have successfully updated a CloudFormation stack
- You have successfully examined a template with the AWS CloudFormation Designer.
- You have successfully validated the lab.
- Sign out from the AWS Management Console.
- Click on End Lab button from the lab console and wait till the process gets completed.