Fundamental01:30:00
Encrypt S3 bucket, EBS Volume and AMI using AWS KMS
- Click on the Open Console button, and you will get redirected to AWS Console in a new browser tab.
- On the AWS sign-in page, Leave the Account ID as default. Never edit/remove the 12 digit Account ID present in the AWS Console. otherwise, you cannot proceed with the lab. Now copy your User Name and Password in the Lab Console to the IAM Username and Password in AWS Console and click on the Sign in button.
- On the AWS sign-in page,
- Leave the Account ID as default. Never edit/remove the 12 digit Account ID present in the AWS Console. otherwise, you cannot proceed with the lab.
- Now copy your User Name and Password in the Lab Console to the IAM Username and Password in AWS Console and click on the Sign in button.
- Once Signed In to the AWS Management Console, Make the default AWS Region as US East (N. Virginia) us-east-1.
- Make sure you are in the US East (N. Virginia) us-east-1 Region.
- Navigate to Key Management Service by clicking on the Services menu, under the Security, Identity and Compliance section.
- Click on Create Key.
- Note: Ignore, if any other customer-managed keys present in the account. It will take some time to delete the keys.
- Select the Key Type as Symmetric and click on Next.
- Under the Add Labels, give the following details: Alias: Enter Whizkey (Change the name, if there is a key present with the same name) Description: KMS key for encryption Leave everything else as default Click on Next.
- Under the Add Labels, give the following details:
- Alias: Enter Whizkey (Change the name, if there is a key present with the same name)
- Description: KMS key for encryption
- Leave everything else as default
- Click on Next.
- In the Define key administrative permissions, Key Administrators: Select the IAM User, with which you are logged in (starting with Whiz_User_) Check the Allow key administrators to delete the key Click on Next
- In the Define key administrative permissions,
- Key Administrators: Select the IAM User, with which you are logged in (starting with Whiz_User_)
- Check the Allow key administrators to delete the key
- Click on Next
- In the Define key usage permissions, This account: Select the same username selected earlier. Click on Next.
- In the Define key usage permissions,
- This account: Select the same username selected earlier.
- Click on Next.
- Review the details and click on Finish button.
- Task 2: Creating an AWS KMS Key
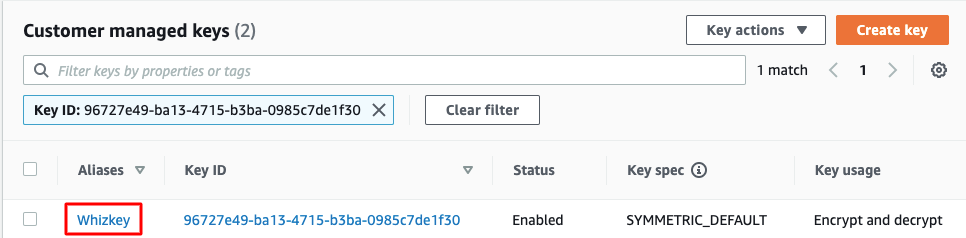
- Click the created alias Whizkey.
- Navigate to the Key rotation tab.
- Now, check the box for Automatically rotate. To do this, click Edit, then select Enable. In the Rotation period (in days) field, enter 365, and finally, click Save.
- Task 3: Enabling KMS Key rotation

- You have now successfully enabled yearly rotation for your KMS master key.
- When automatic key rotation is enabled, KMS generates new cryptographic material every 365 days and retains the older cryptographic material (old key).In this way, both keys can be used to encrypt or decrypt data.
- Navigate to S3 by clicking on the Services menu, under the Storage section.
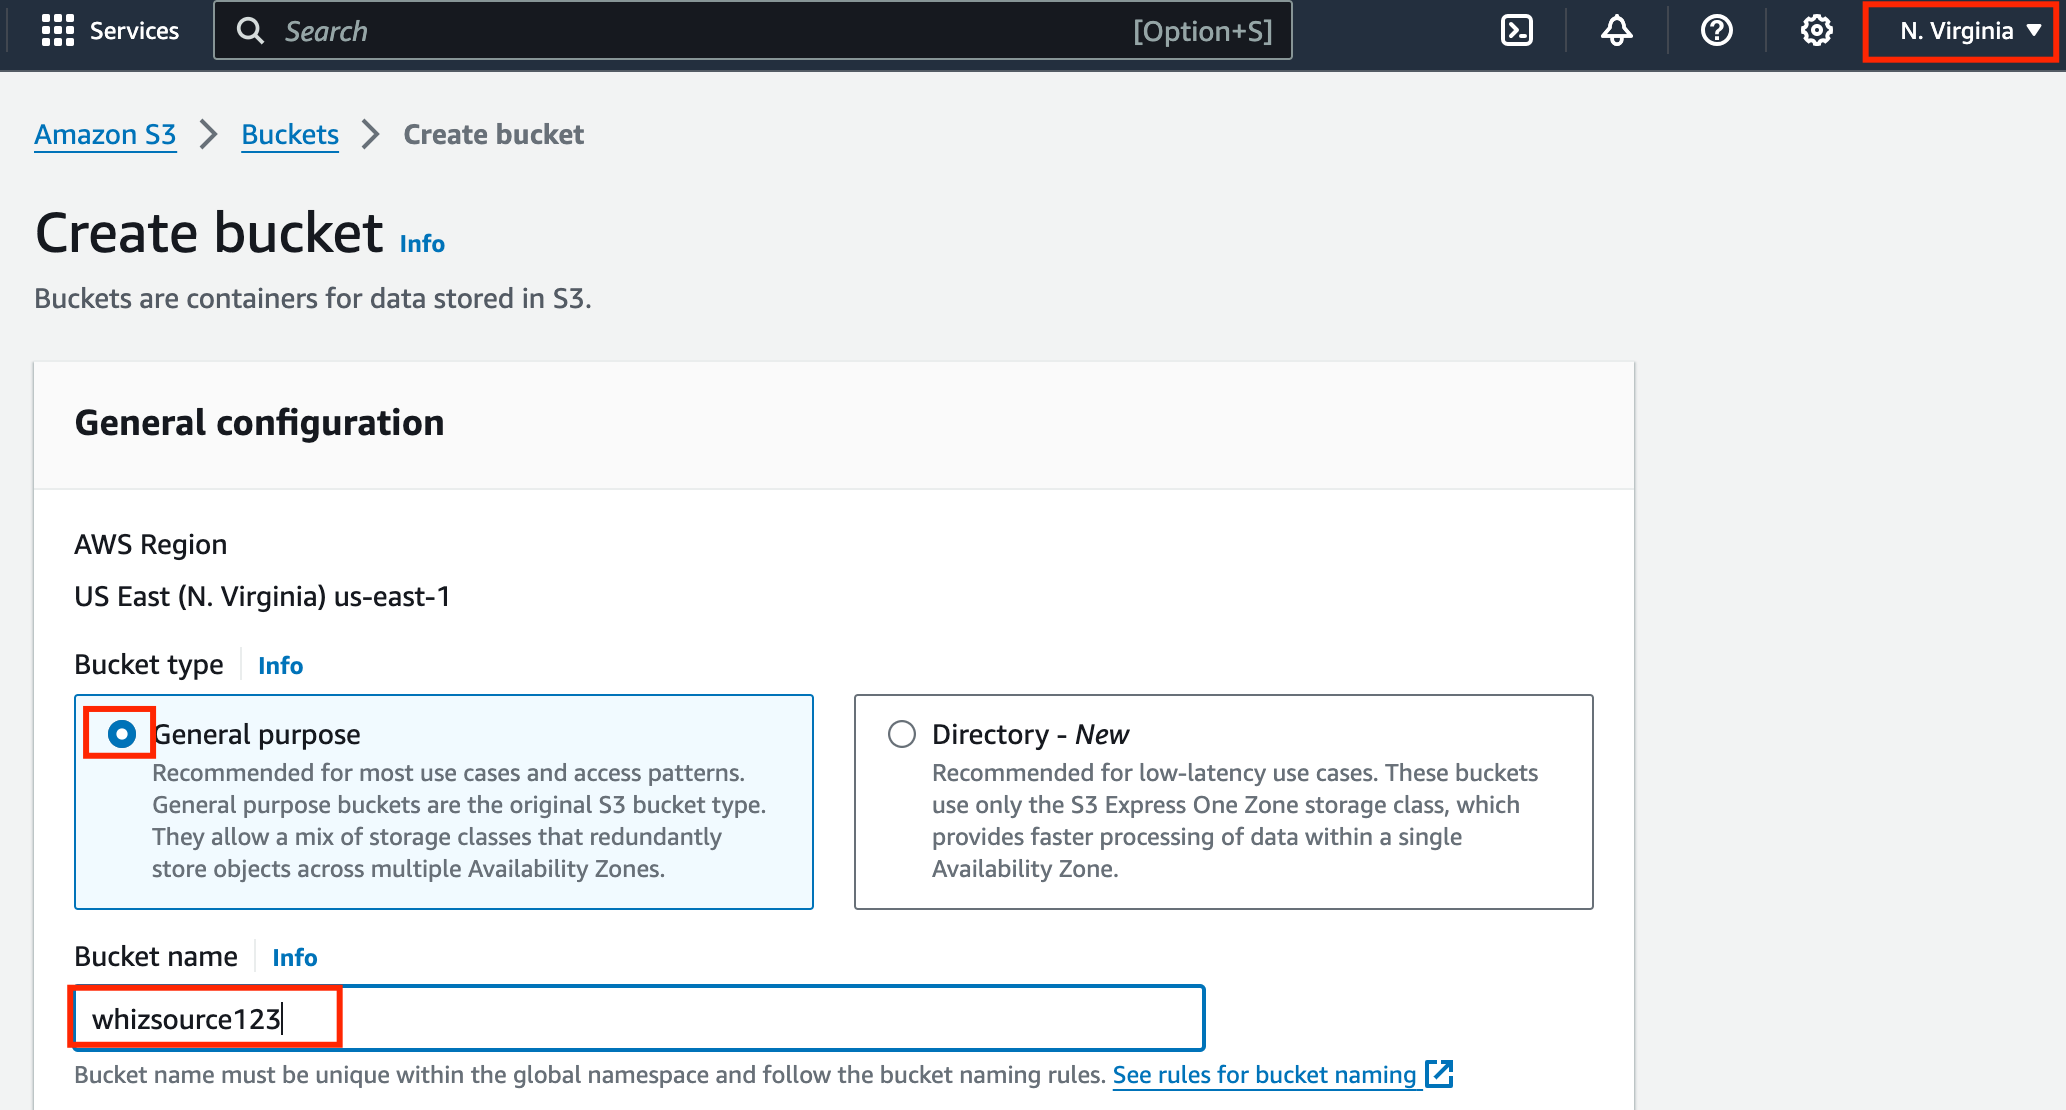
- Click on Create Bucket.
- Region: Select US East (N. Virginia) us-east-1 (i.e same region as the KMS master key)
- In the General Configuration,
- Bucket type : General purpose
- Bucket name: Enter a globally unique name.
- Task 4: Creating and encrypting S3 Bucket
- Object ownership: Select ACLs enabled option and select Object Ownership as Object Writer
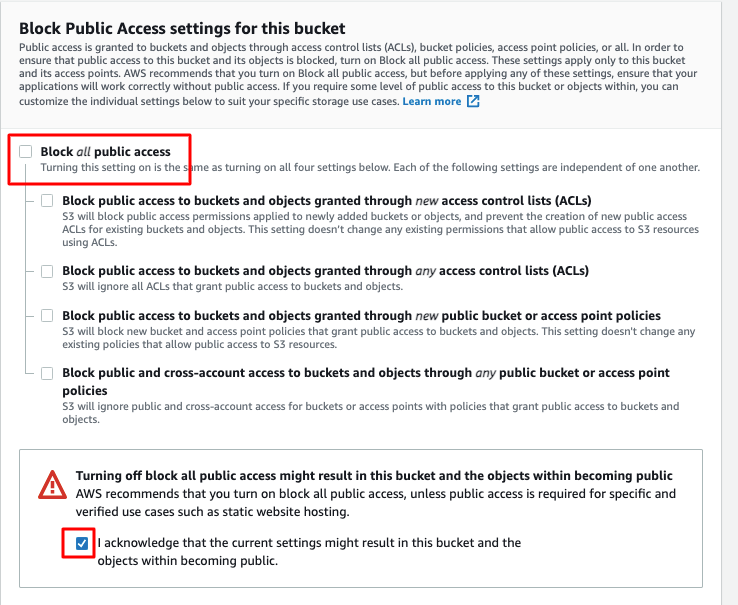
- In the Bucket Public Access settings for this bucket, Uncheck the Block all public access. Acknowledge the same by Checking the below option.
- Task 4: Creating and encrypting S3 Bucket
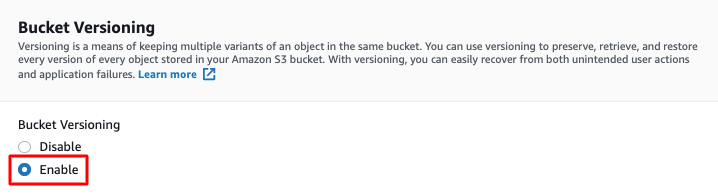
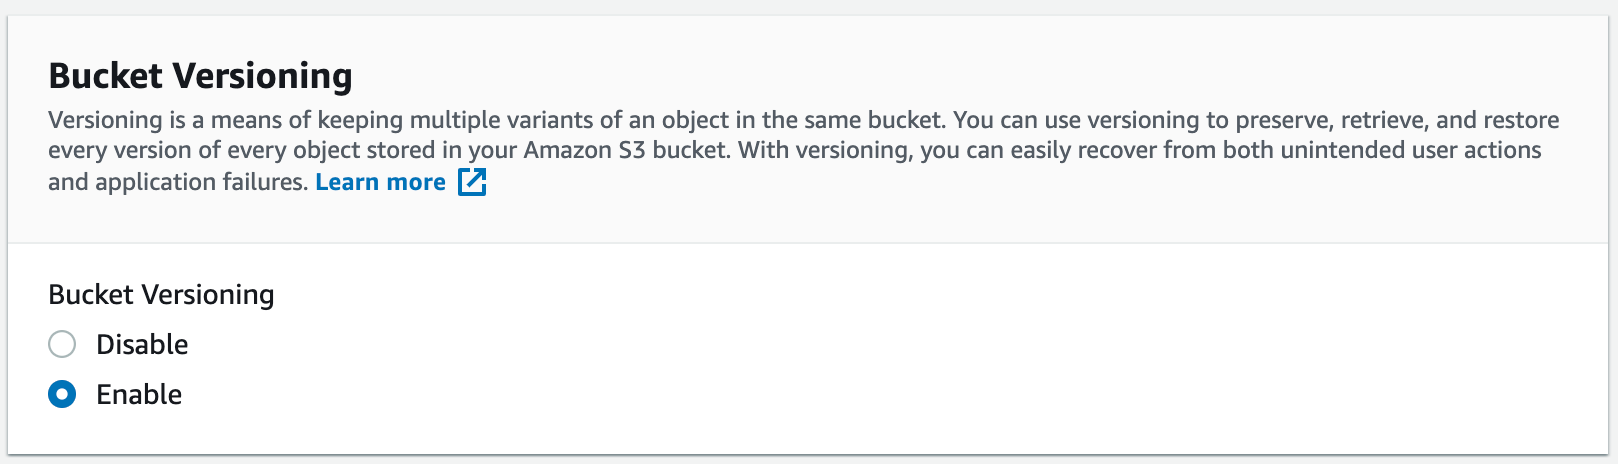
- In the Bucket Versioning, Check the option Enable.
- Task 4: Creating and encrypting S3 Bucket
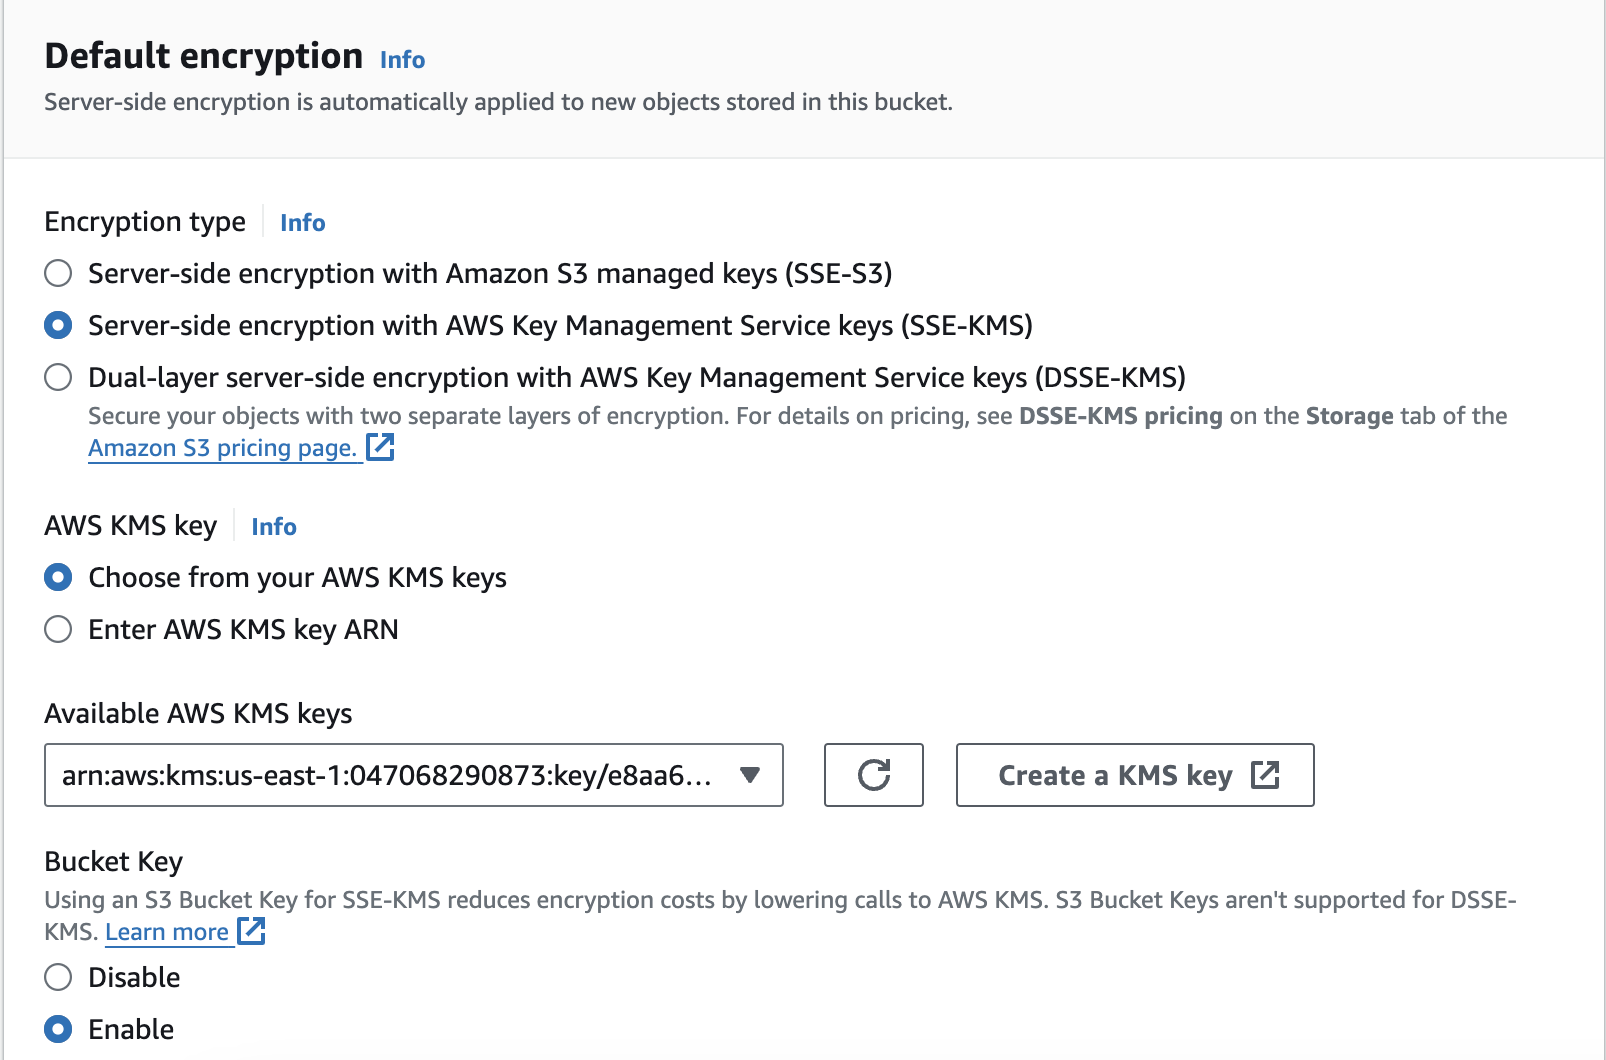
- In the Default encryption,
- Encryption key type: Select AWS Key Management Service key (SSE-KMS)
- AWS KMS key: Select Choose from your AWS KMS keys
- Select Whizkey from the dropdown menu.
- Task 4: Creating and encrypting S3 Bucket
- Keep other settings as default and click on Create Bucket.
- whizsource123 bucket is created now.
- Click on the whizsource123.
- Click on the Upload button.
- Click on the Add Files button and browse for a file(image or text) on your local machine.
- Before clicking on Upload, scroll down and expand the Properties tab
- Select the following details:
- Storage class: Select One Zone-IA
- Server-side encryption: Select Specify an encryption key
- Encryption settings: Choose Override default encryption bucket settings
- Encryption key type: Select AWS Key Management Service key (SSE-KMS)
- AWS KMS key: Select Choose from your AWS KMS keys
- Select Whizkey from the dropdown menu.
- Leave other settings as default and click on the Upload button.
- Click on the Close button.
- Now let us check whether the encryption is working.
- Select the object you have uploaded.
- Click on Actions, scroll down and select Make public using ACL.
- Choose Make Public and click on the Close button.
- Click the object. Copy the Object URL and paste the URL on a new browser tab.
- Task 6: Verifying the encryption of the object

- Note: You are getting this error as the file is encrypted using AWS KMS Encryption and is restricting the access from outside source. To access this file it should be decrypted first.
- Click the object, and click on the Open button on the top-right corner.
- Task 6: Verifying the encryption of the object

- Now you can see the object which you uploaded opened in a new tab.
- Task 6: Verifying the encryption of the object

- Note: You are able to access the file as the request to open the file came from a source which can decrypt the file.
- We already have a bucket whizsource123 (Source bucket) which we will use as the source bucket from where the data will be replicated. Now we need to create a bucket that will replicate the data from the source bucket.
- Change Region: From the drop down please Select Asia Pacific (Mumbai) ap-south-1
- Navigate to the S3 dashboard and click on Create Bucket.
- In the General Configuration, Bucket name: Enter a globally unique name.
- Task 7: Cross-Region Replication and Versioning in S3

- In the Bucket Public Access settings for this bucket, Uncheck the Block all public access. Acknowledge the same by Checking the below option.
- In the Bucket Versioning, Check the option Enable.
- Task 7: Cross-Region Replication and Versioning in S3
- Keep other settings as default and click on Create Bucket.
- Now open the whizsource123 bucket and click on the Management tab. Scroll down and select Create Replication rule
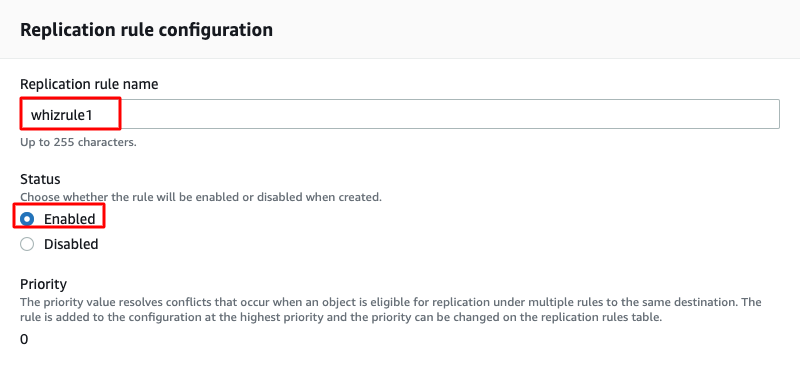
- Enter a rule name, Whizrule1, and keep the status as Enabled.
- .
- Choose a rule scope : Select Apply to all objects in the bucket
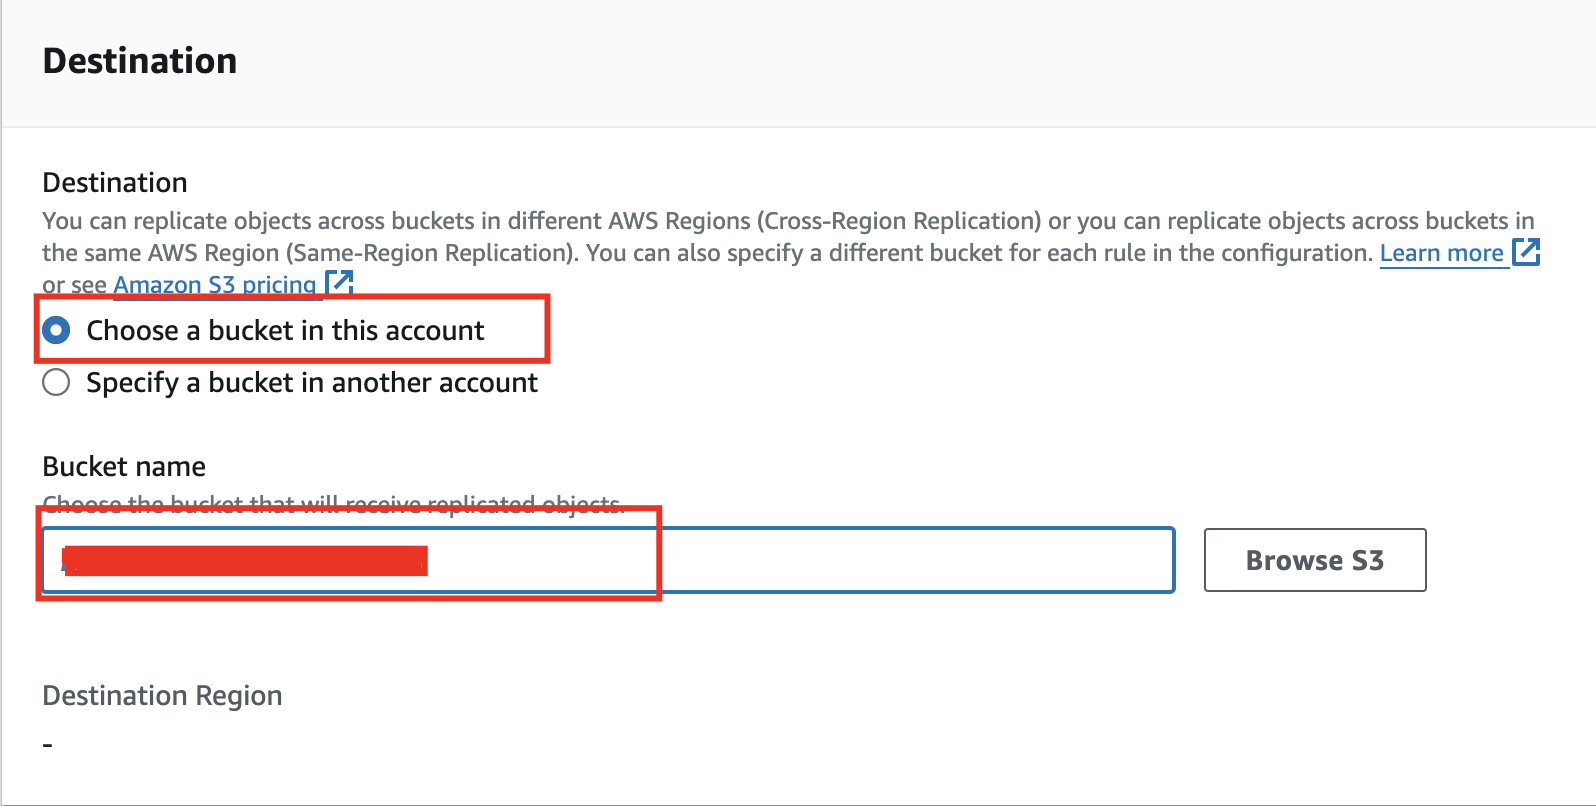
- Under Destination, select choose a bucket in this account and click on Browse S3.
- In the search option enter the Mumbai region bucket name, choose by browse the S3 option.
- Task 7: Cross-Region Replication and Versioning in S3
- Select the target bucket created earlier and click on Choose Path.
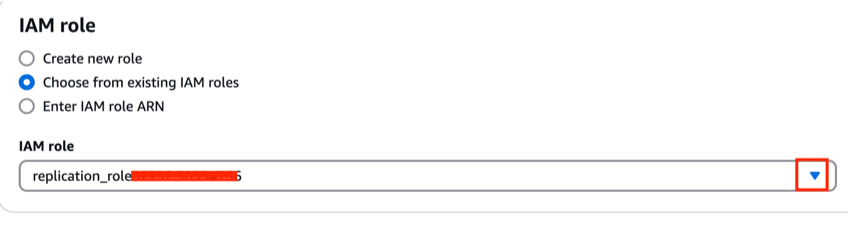
- Under IAM Role, Choose from existing IAM roles: select replication_role<random.numbers>
- Under Encryption, check Replicate objects encrypted with AWS KMS and select the alias aws/s3.
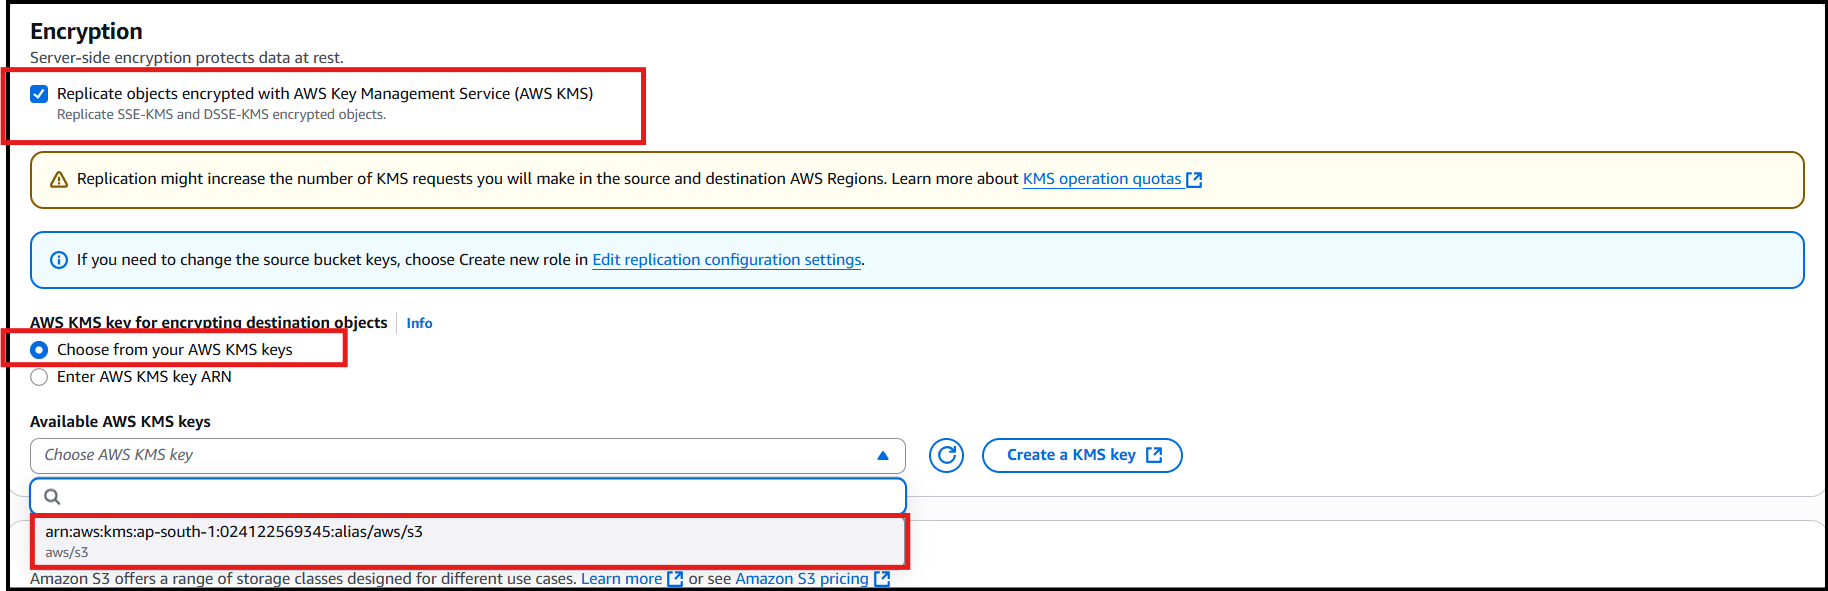
- Task 7: Cross-Region Replication and Versioning in S3

- AWS KMS key for encrypting destination object: Select Choose from your AWS KMS keys
- Select aws/s3 from the dropdown menu.
- Leave other settings as default. Review and click on Save.
- When, prompted click on the cancel button.
- Now navigate to the source bucket and upload an object in the Source bucket by clicking on Add Files. Click on Upload.
- Navigate to your Target Bucket to see the replication. It may take up to 3-5 minutes for replication.
- Note: You can see that the object from the source bucket has not been replicated, as the source and destination buckets have different encryption. Source bucket has Whizkey(Customer managed key) encryption and the destination bucket has aws/s3(AWS Managed) encryption.
- Now go to whizsource123 bucket and click on Add files. Before clicking on the Upload button, scroll down and click on the Properties option.
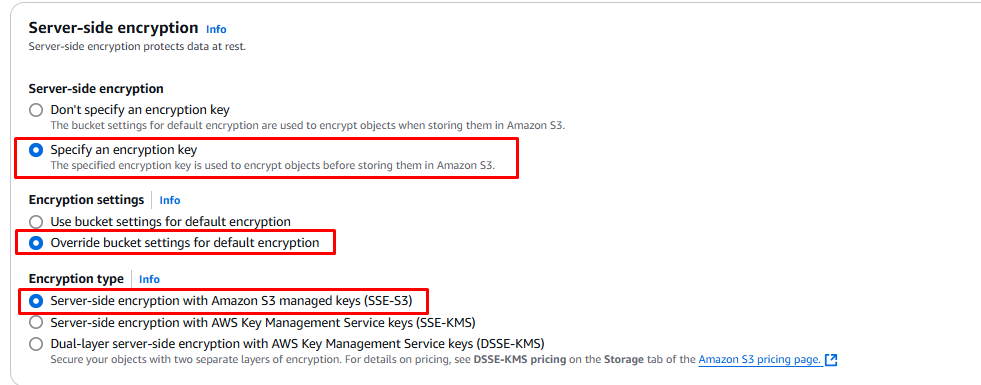
- Choose the option to specify an encryption key and choose Override default encryption bucket settings.
- Now in the Encryption key type, choose Amazon S3 key (SSE-S3).
- Click on Upload.
- Task 7: Cross-Region Replication and Versioning in S3
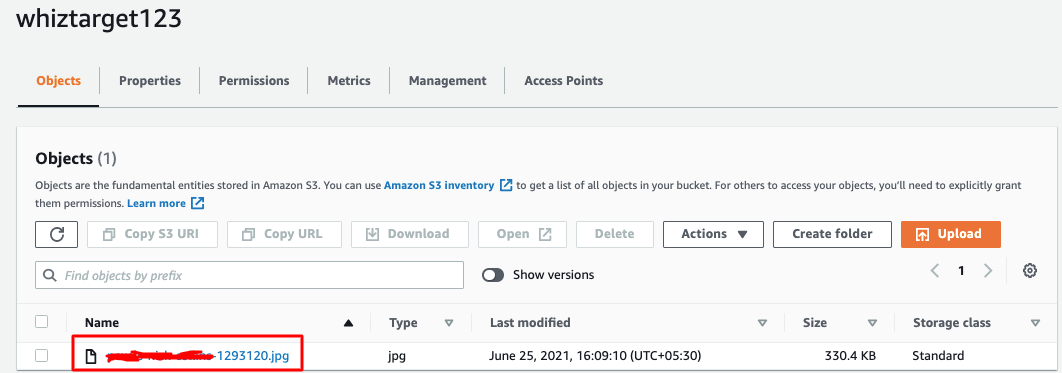
- Now you have successfully configured the Cross-Region Replication in S3 Bucket and the object created in whizsource123 will be replicated to whiztarget123.
- Navigate to the target bucket and refresh. You will be able to see the replicated object.
- Click the object and select Open to see the object in the target bucket.
- Task 7: Cross-Region Replication and Versioning in S3
- Make sure you are in the US East (N.Virginia) us-east-1 Region.
- Navigate to Key Management Service by clicking on the Services menu, under the Security, Identity and Compliance section.
- Select the alias Whizkey.
- Click on Key actions and select Disable.
- Check the confirmation and click on Disable Key.
- Navigate to the Services section and click on S3 under Storage
- Click on whizsource123 and click on the object other than the one uploaded recently (since we have Amazon S3 master key for the recently uploaded object).
- Click Open on the top right side of the screen.
- Task 8: Disabling the KMS Key

- You can see that access is denied as the KMS Key is disabled.
- Navigate back to Key Management Service and enable Whizkey by clicking on the alias Whizkey and click on Enable in the Key actions.
- Make sure you are in the US East (N. Virginia) us-east-1 Region.
- Navigate to EC2 by clicking on the Services menu, under the Compute section.
- On the left navigation panel, click on Volumes under Elastic Block Store.
- Click on Create Volume.
- In the Create volume,
- Volume Type: Select General Purpose SSD(gp2)
- Size: Change to 1 GiB
- Availability Zone: Choose us-east-1a
- Encryption: Check
- Key: Choose Whizkey from the list.
- Tags: Key: Enter Name Value: Enter WhizEBS
- Tags:
- Key: Enter Name
- Value: Enter WhizEBS
- Click on Create Volume and Close.
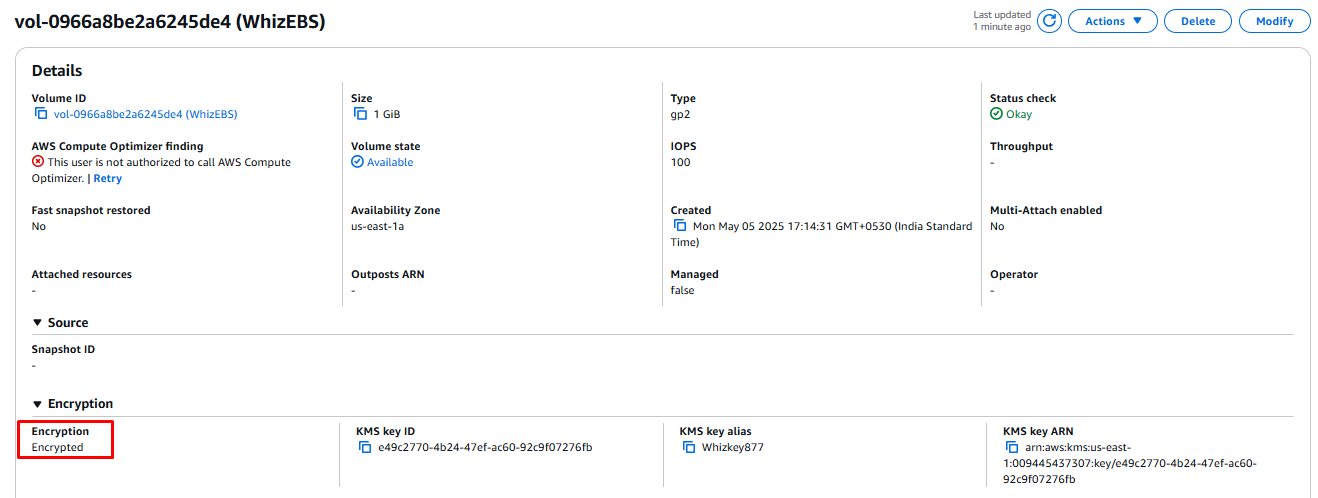
- Now we can see WhizEBS created. Select WhizEBS and under description, we can see that the volume is encrypted.
- Your master key is used to encrypt/decrypt this volume.
- Task 9: Encrypting EBS volume
- On the left navigation panel, click on Instances.
- You can see an EC2 instance already running.
- Select the instance, click on the Actions, and select Create Image under Image and Templates.
- Create Image
- Image name: Enter WhizUnencrypted
- Leave everything else as default and click on Create Image.
- On the left navigation panel, click on AMIs under Images.
- Select WhizUnencrypted and wait till the status changes to available.
- Click on the Actions button and select Copy AMI.
- Fill in the details:
- Name: Change the name to WhizEncrypted
- Destination region: Choose US East (N. Virginia)
- Encrypt EBS snapshots of AMI copy: Check
- KMS key: Select Whizkey
- Click on Copy AMI.
- Refresh the page to see the copied AMI. Wait till the status of the AMI becomes available.
- Select the copied AMI i.e WhizEncrypted and copy the AMI ID from the details tab.
- On the left navigation panel, click on Snapshots under Elastic Block Store.
- In the search, paste and search the AMI ID.
- Wait for the snapshot status to change from pending to completed.
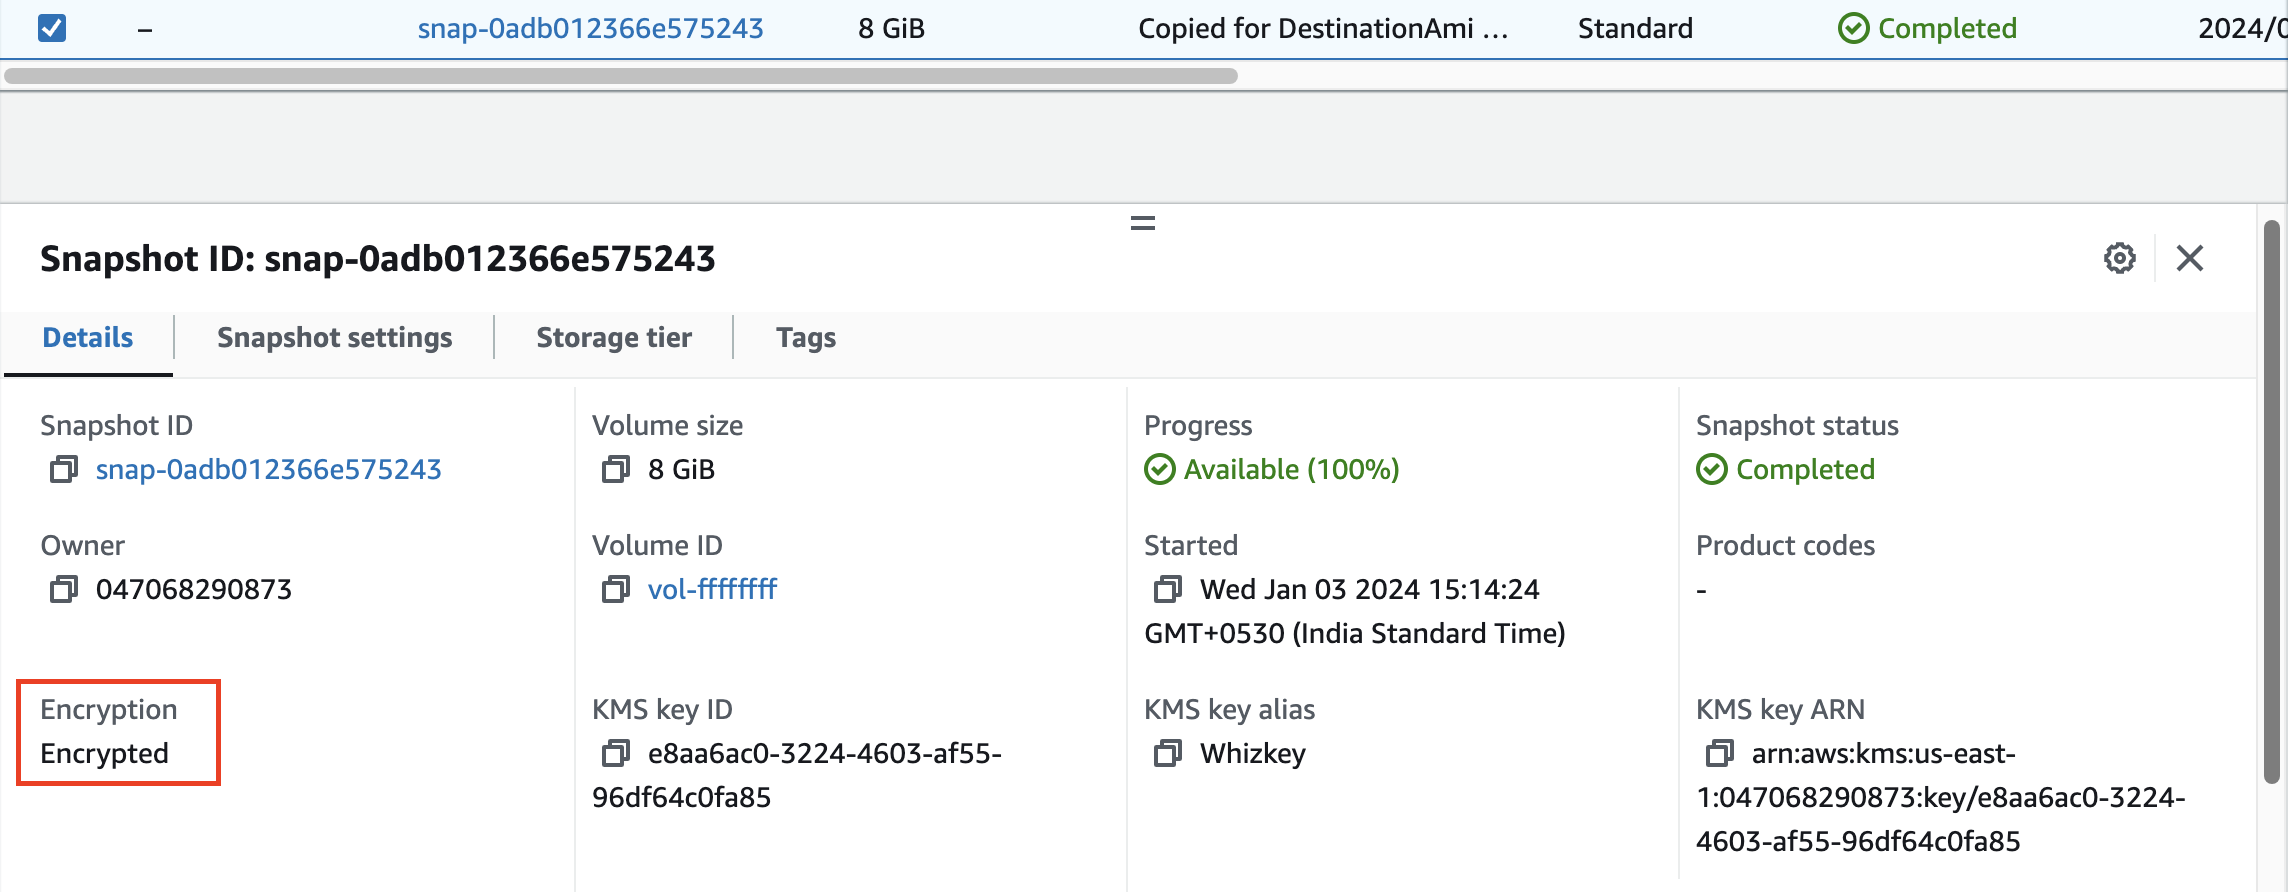
- Select the snapshot and check the description tab to see that the snapshot is encrypted using Whizkey.
- Note: Now any instance launched with encrypted AMI will be encrypted by Whizkey.
- Task 10: Encrypting AMI and Snapshot
- Once the lab steps are completed, please click on the Validation button on the left side panel.
- This will validate the resources in the AWS account and displays whether you have completed this lab successfully or not.
- Sample output :
- Task 11 : Validation of the Lab
- Key Rotation: AWS KMS supports automatic key rotation to enhance security by regularly changing encryption keys.
- Make sure you are in the US East (N. Virginia) us-east-1 Region.
- Navigate to Key Management Service by clicking on the Services menu, under the Security,Identity and Compliance section.
- Select Whizkey, click on the Key actions button, and click Schedule key deletion.
- Schedule key deletion
- Waiting period: 7 days
- Check confirmation for deletion.
- Click on Schedule deletion.
- Make sure you are in the US East (N. Virginia) us-east-1 Region.
- Navigate to EC2 by clicking on the Services menu, under the Compute section.
- On the left navigation panel, click on AMIs under Images.
- Select WhizUnencrypted and WhizEncrypted AMIs and click on Actions button
- Select Deregister AMI from the dropdown menu and click on Deregister AMI.
- On the left navigation panel, click on Snapshots under Elastic Block Store.
- Remove the AMI ID if present in the search.
- Select both snapshots and click on the Actions button
- Click on Delete Snapshot and confirm by entering delete and click on Delete
- Click on Instances on the left side panel
- Select the instance, click on Instance state and then click on Terminate Instance
- In the pop-up screen, click on Terminate to delete the EC2.
- You have created KMS Key and enabled key rotation.
- You have created Cloudtrail and accessed the logs.
- You have encrypted S3 buckets and created cross-region replication.
- You have encrypted EBS Volume and AMI.
- You have scheduled the deletion of KMS Master Key.
- Sign out of the AWS Account.
- You have successfully completed the lab.
- Once you have completed the steps, click on End Lab from your lab lab console and wait till the process gets completed.