Fundamental01:00:00
Discover sensitive data present in S3 bucket using Amazon Macie
- Click on the Open Console button, and you will get redirected to AWS Console in a new browser tab.
- On the AWS sign-in page, Leave the Account ID as default. Never edit/remove the 12 digit Account ID present in the AWS Console. otherwise, you cannot proceed with the lab. Now copy your User Name and Password in the Lab Console to the IAM Username and Password in AWS Console and click on the Sign in button.
- On the AWS sign-in page,
- Leave the Account ID as default. Never edit/remove the 12 digit Account ID present in the AWS Console. otherwise, you cannot proceed with the lab.
- Now copy your User Name and Password in the Lab Console to the IAM Username and Password in AWS Console and click on the Sign in button.
- Once Signed In to the AWS Management Console, Make the default AWS Region as US East (N. Virginia) us-east-1.
- Make sure you are in the US East (N. Virginia) us-east-1 Region.
- Navigate to Amazon Macie by clicking on the Services menu in the top, then click on Amazon Macie in the Security, Identity & Compliance section.
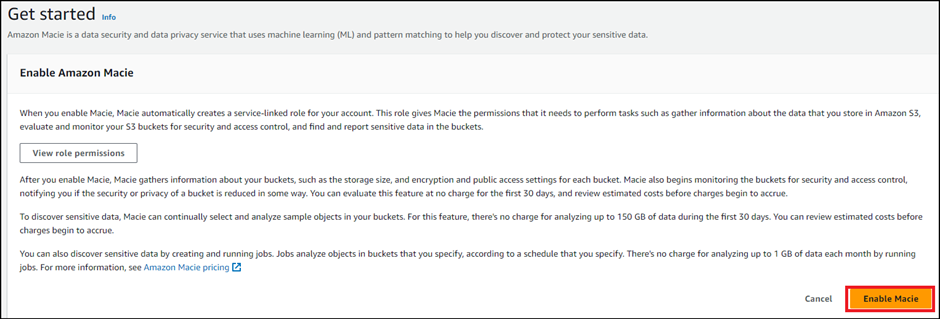
- On the home page, click on the Get started button to configure Amazon Macie.

- Task 2: Enable Macie for the account

- On the Get started page, click on the Enable Macie button.

- Task 2: Enable Macie for the account
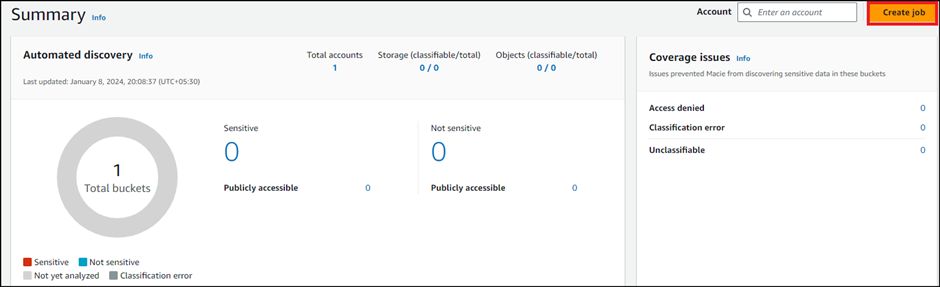
- Macie will try to find out all the details of the account, which may take some time. No need to wait, simply click on the Create job button.

- Task 3: Create a Macie job
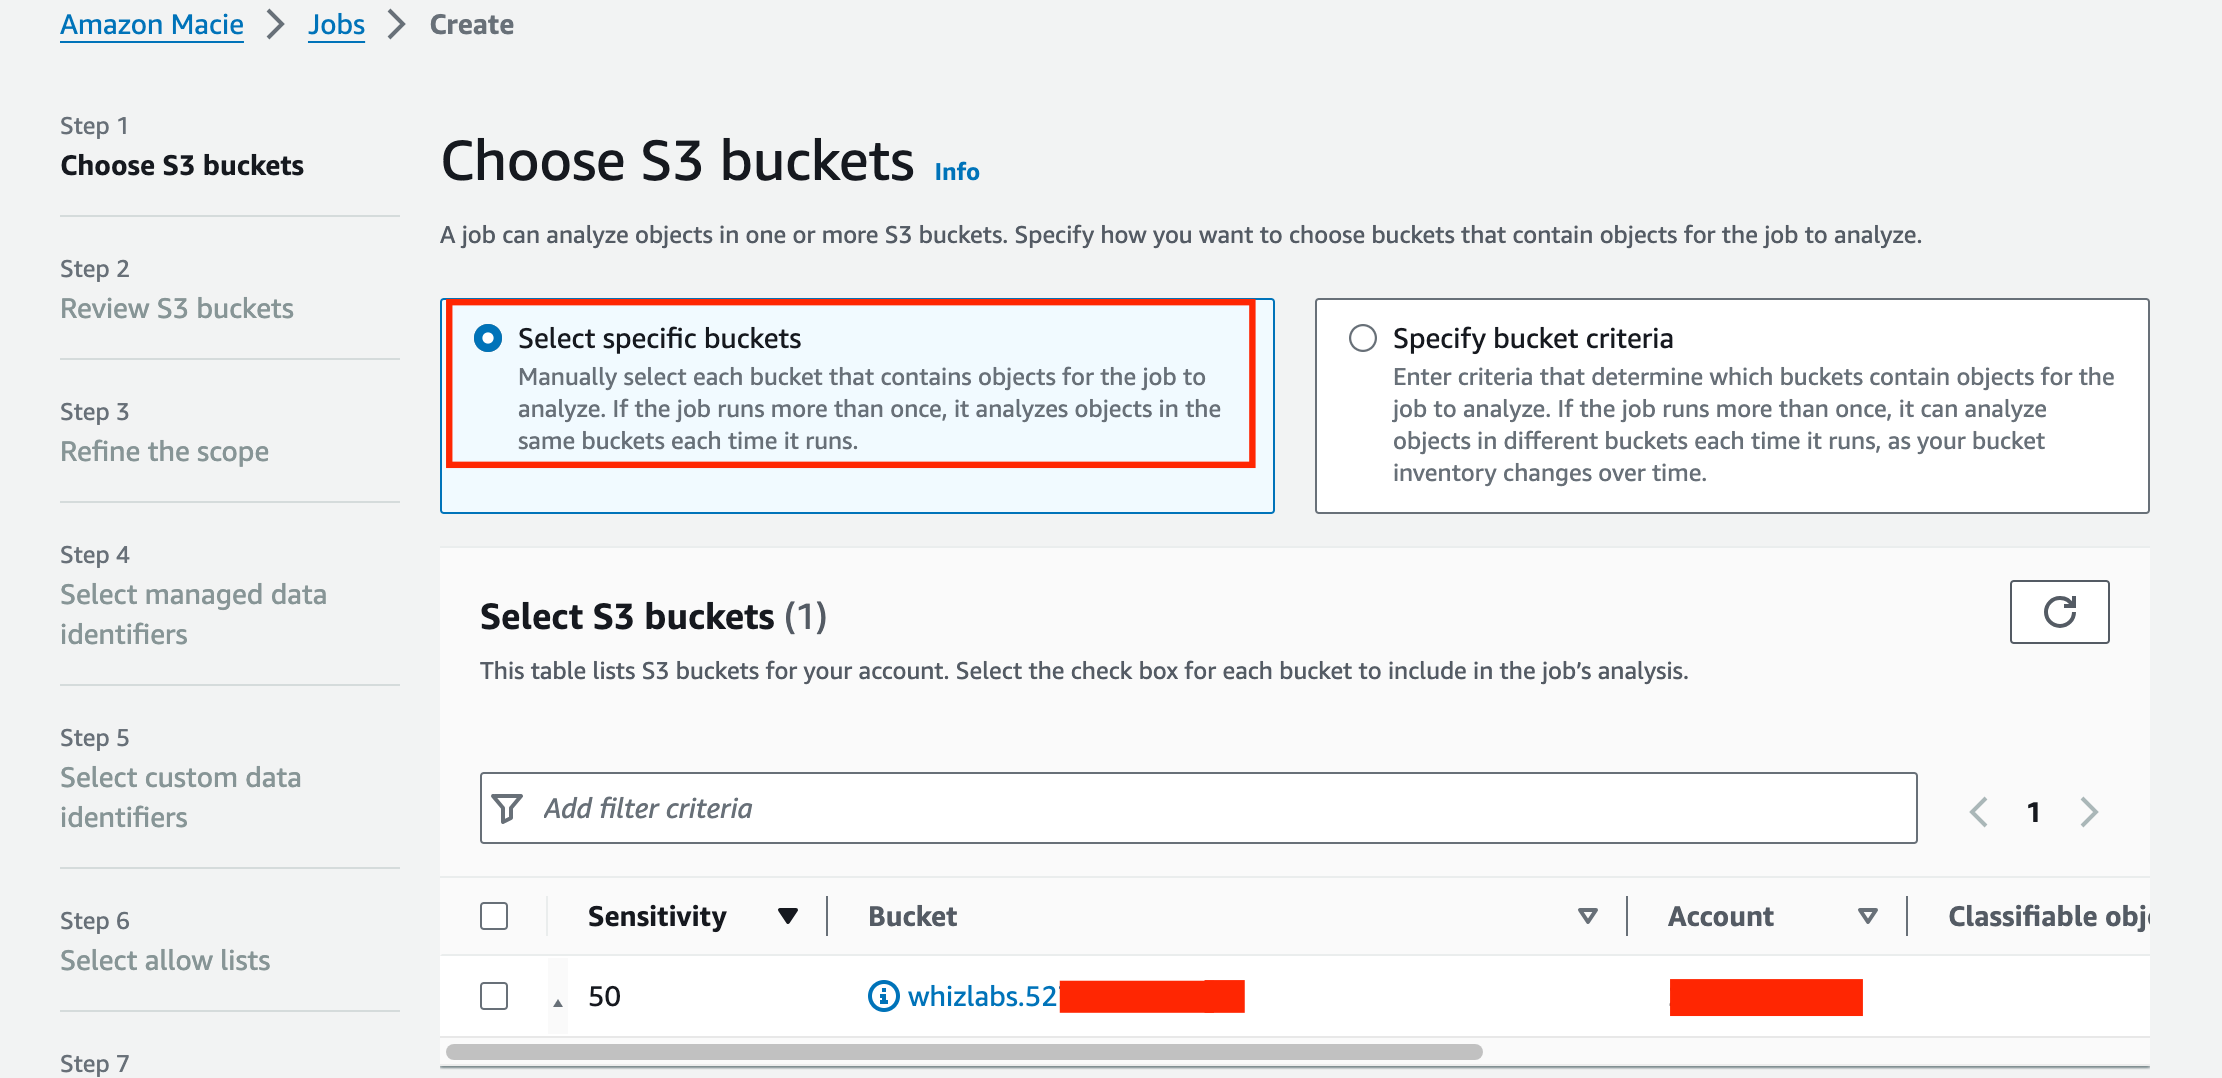
- For Step-1, Choose S3 Bucket,
- If you can not See the bucket, click on the Add filter criteria field and click on the Bucket name.
- Type lab and select the bucket name starting with lab, and click on the Next button
- Task 3: Create a Macie job
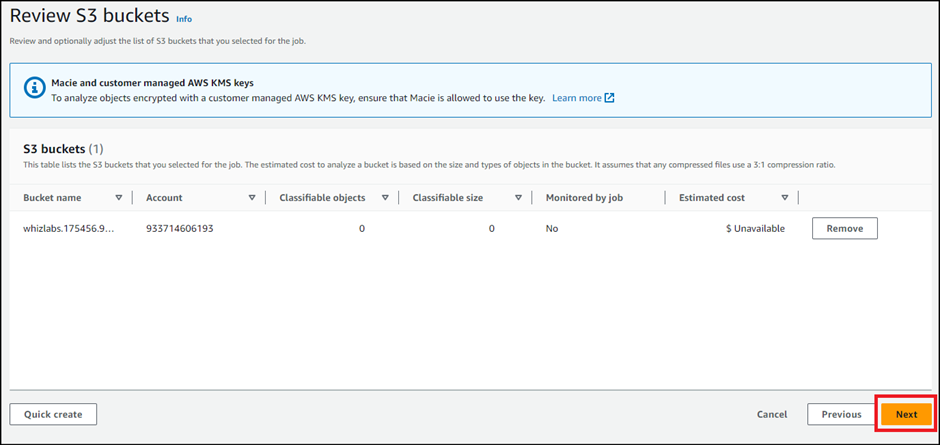
- Review S3 buckets Keep everything as default and click on the Next button.
- Task 3: Create a Macie job
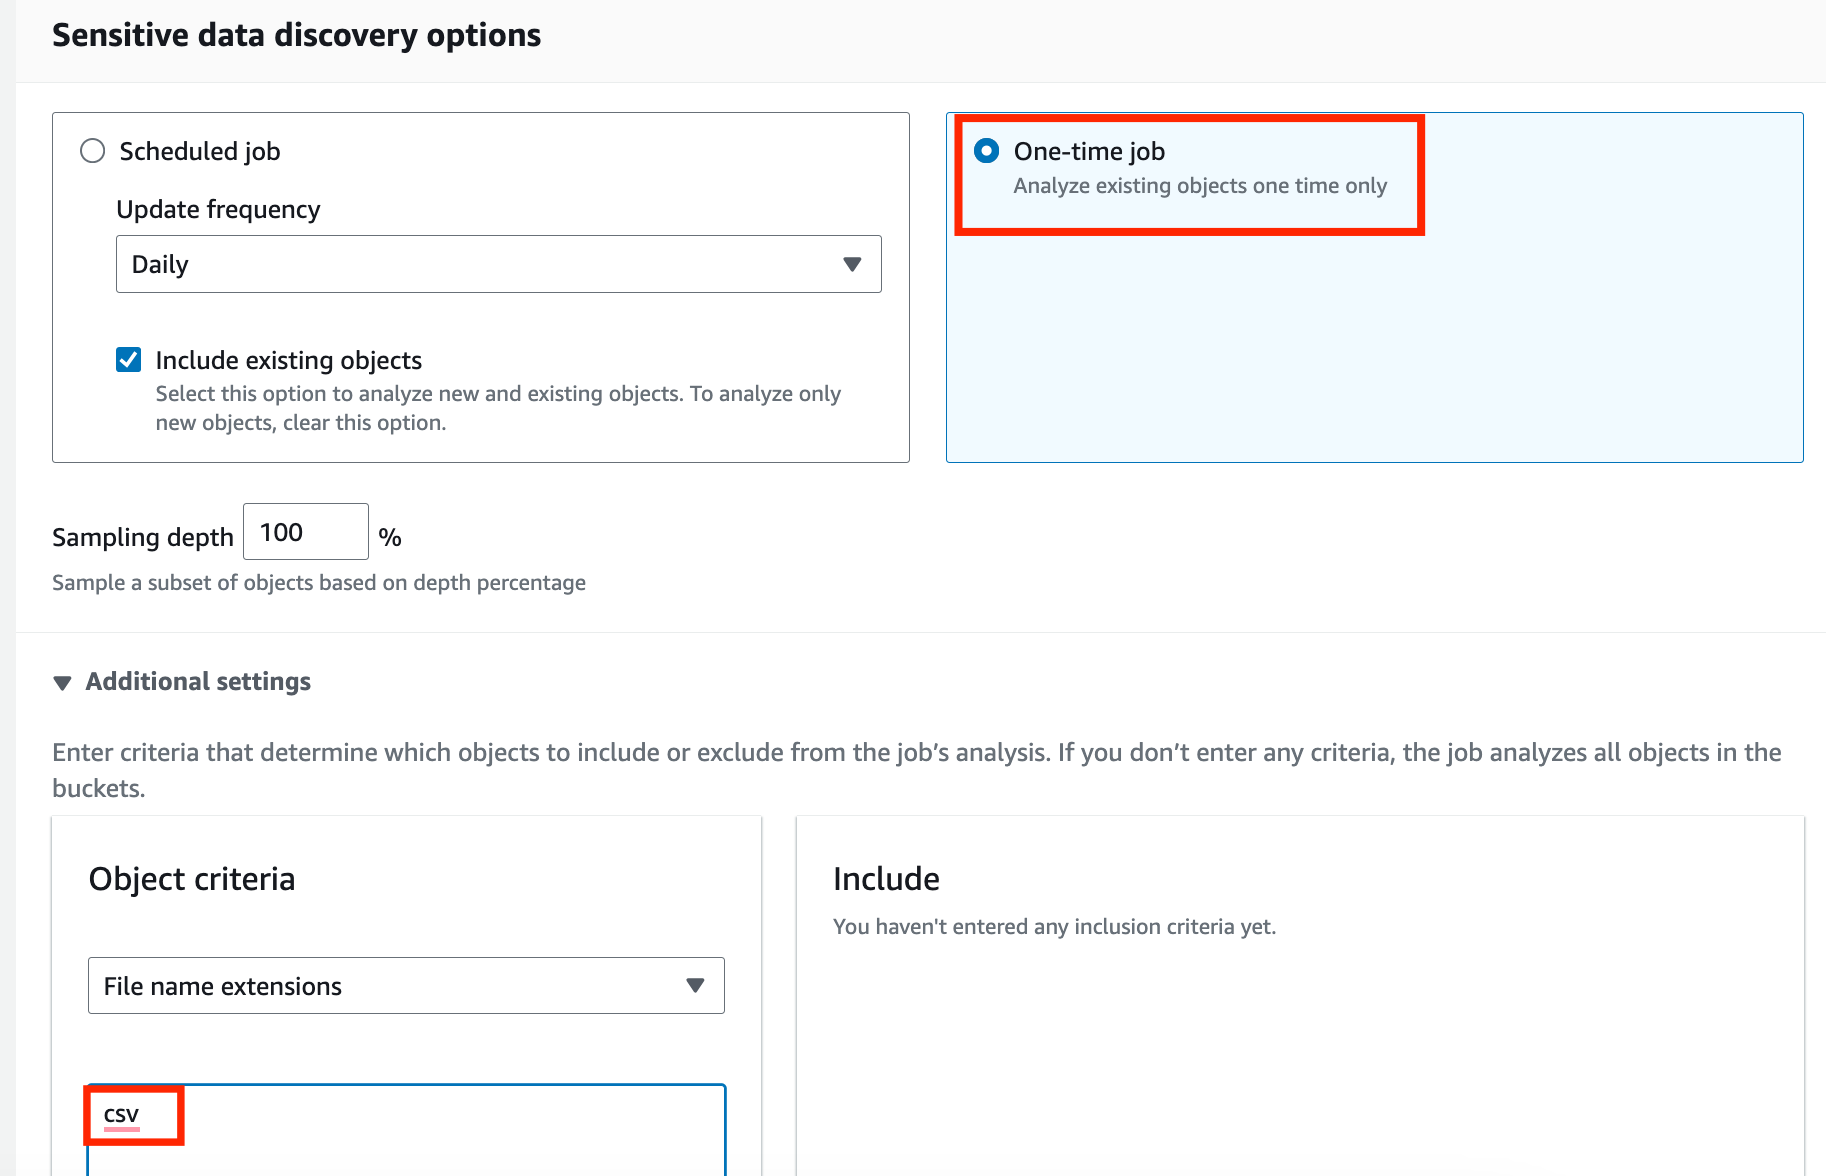
- For Step-3, Refine the scope,
- In Sensitive data discover options: Select One-time job
- Click on the arrow to expand the window of Additional settings
- Let the Object criteria be default as File name extensions.
- Write csv in the textbox and click on the Include button.
- Once done, click on the Next button to proceed.
- Task 3: Create a Macie job
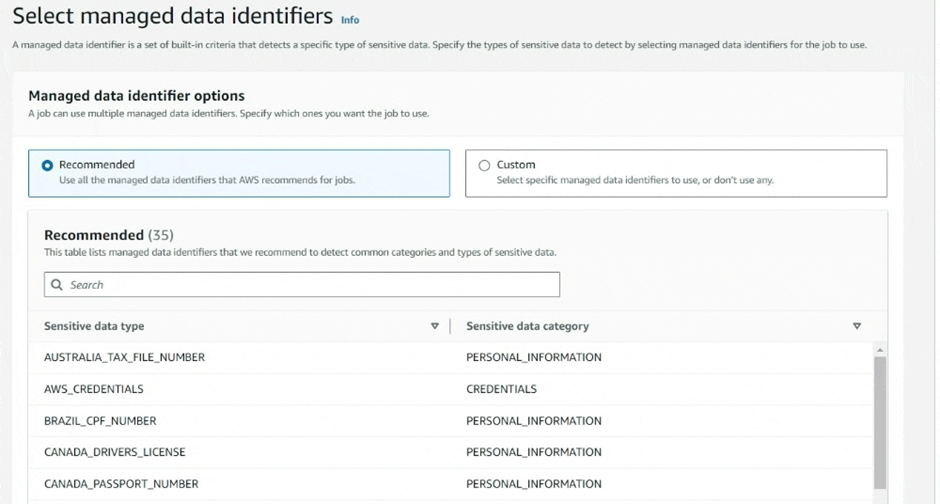
- For Step-4, Select managed data identifiers,
- Selection type: Choose Recommended
- Task 3: Create a Macie job
- Click on the Next button.
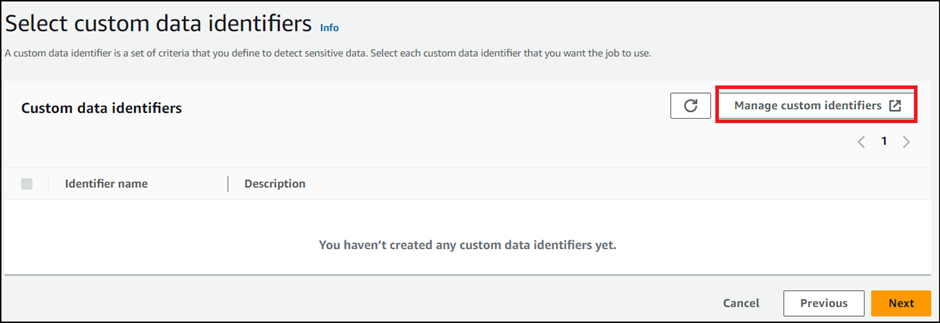
- For Step-5, Custom data identifiers,
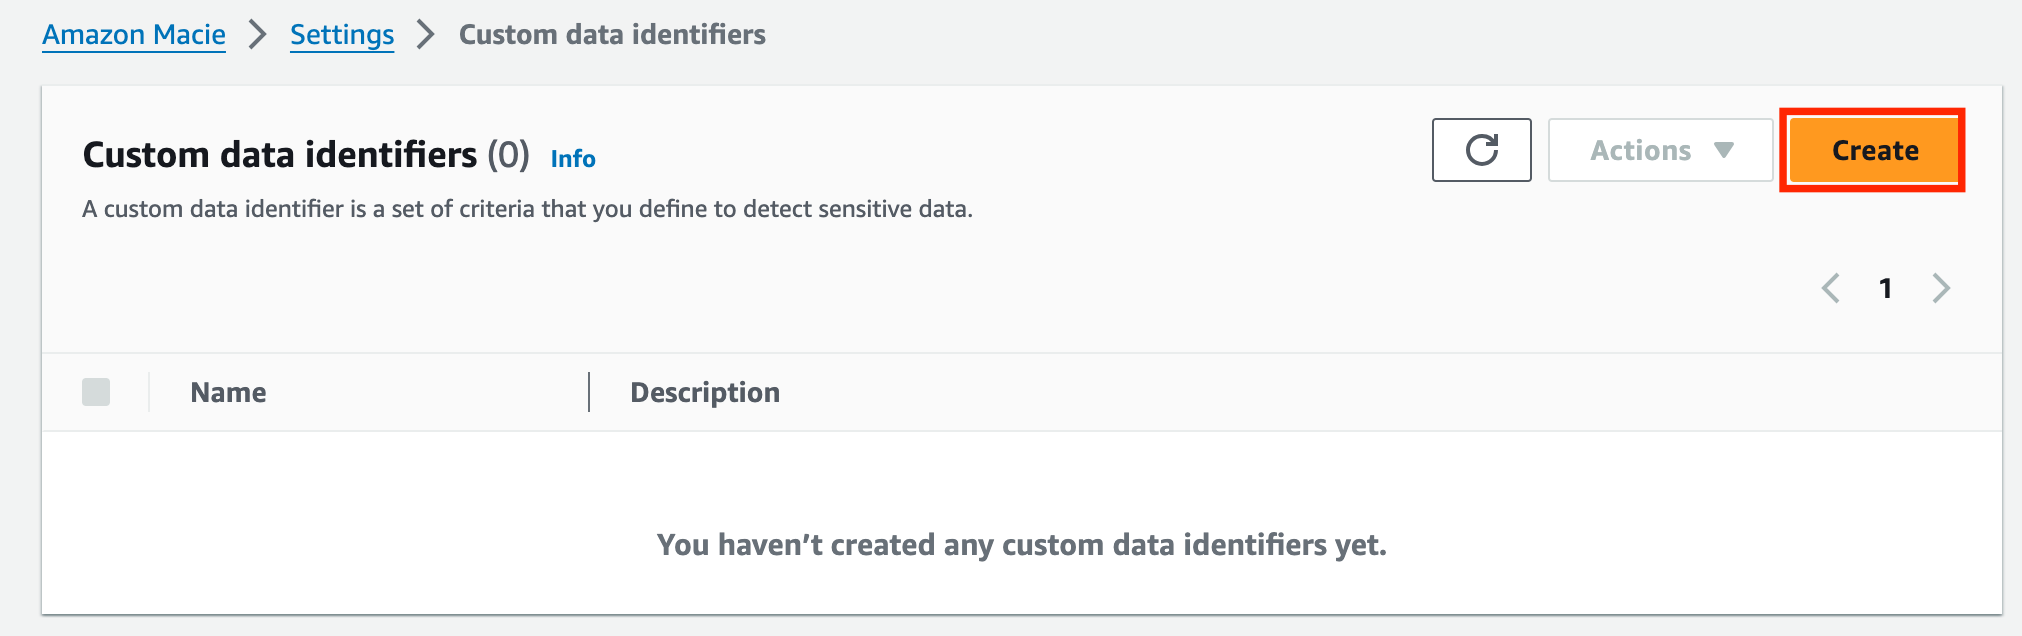
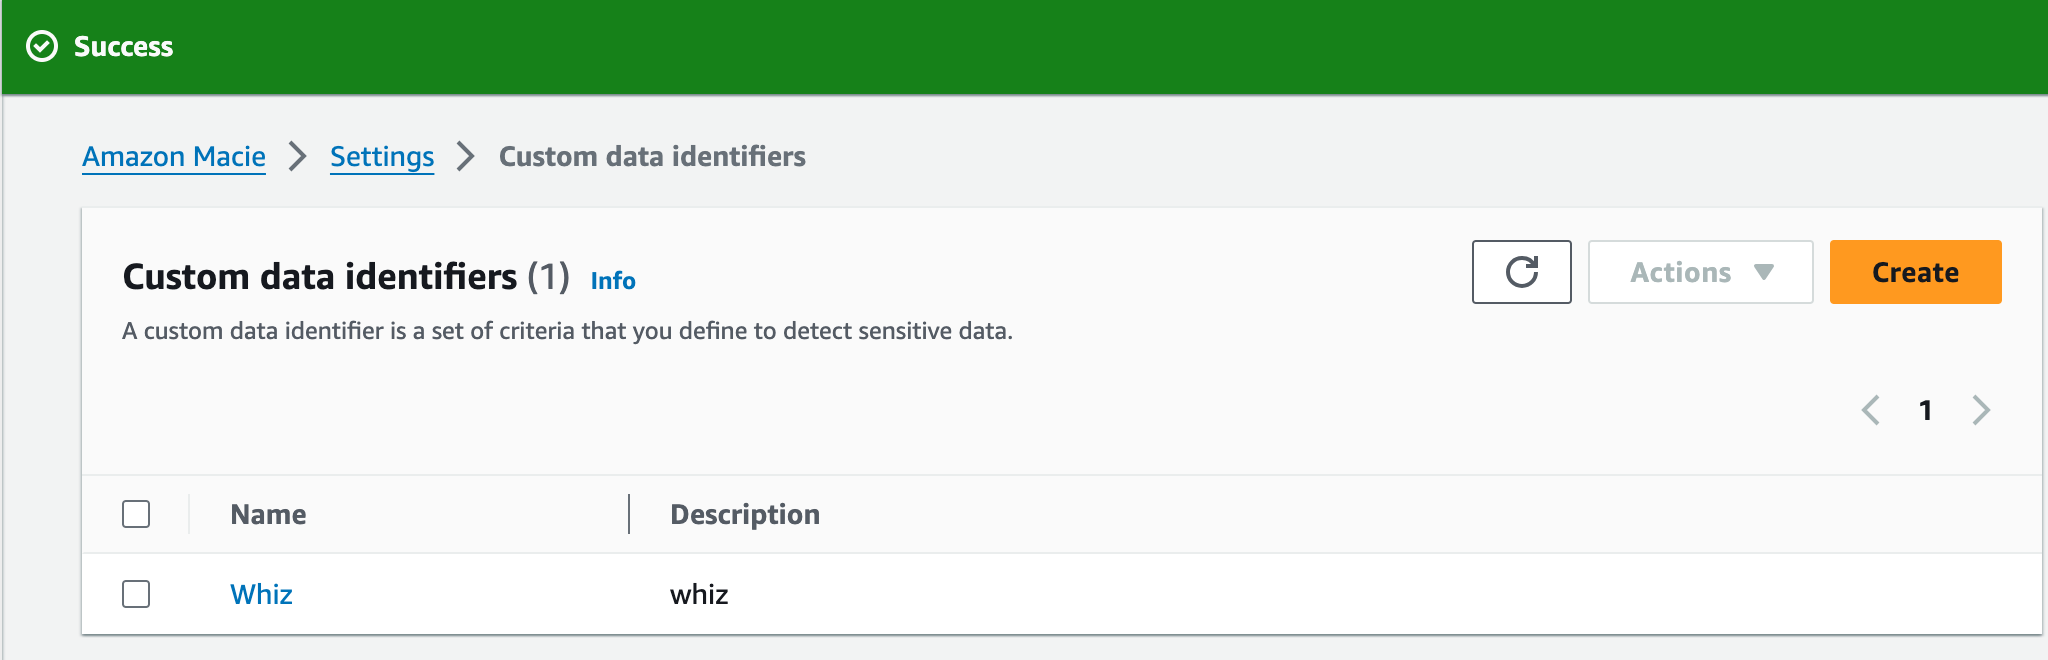
- Click on the Manage custom identifiers, to create one.
- Task 3: Create a Macie job
- Click on the Create option present on the top right.
- ?
- Fill in the details, as follows:
- Name: Enter Whiz
- Description: Enter This identifier finds the data present in the format of AB-01 i.e. two characters, dash and followed by two numbers.
- Regular expression: Enter [a-z]{2}-[0-9]{2}

- Task 3: Create a Macie job

- Keep all other options as default.
- Click on the Submit button to create the Custom identifier.
- Task 3: Create a Macie job
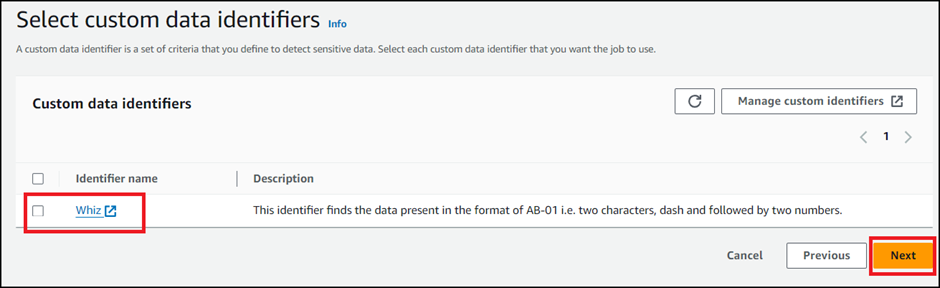
- Go back to the previous tab (Step 5 Select custom data identifiers ), and click on the refresh icon to see the newly created Custom identifier.
- Once refreshed, you will be able to see the Whiz identifier listed here. Click on the Next button.
- Task 3: Create a Macie job

- Select allow lists : Keep it default and click on Next button
- In General Setting : Enter a name and description,
- Name: Enter WhizJob
- Description: Enter This job scans the bucket with a name starting as lab and gathers its finding based on the regular expression pattern.
- Click on the Next button.
- Task 3: Create a Macie job

- For Step-8, Review and create,
- Review everything, click on the Submit button present below. Job is now created successfully.
- Task 3: Create a Macie job
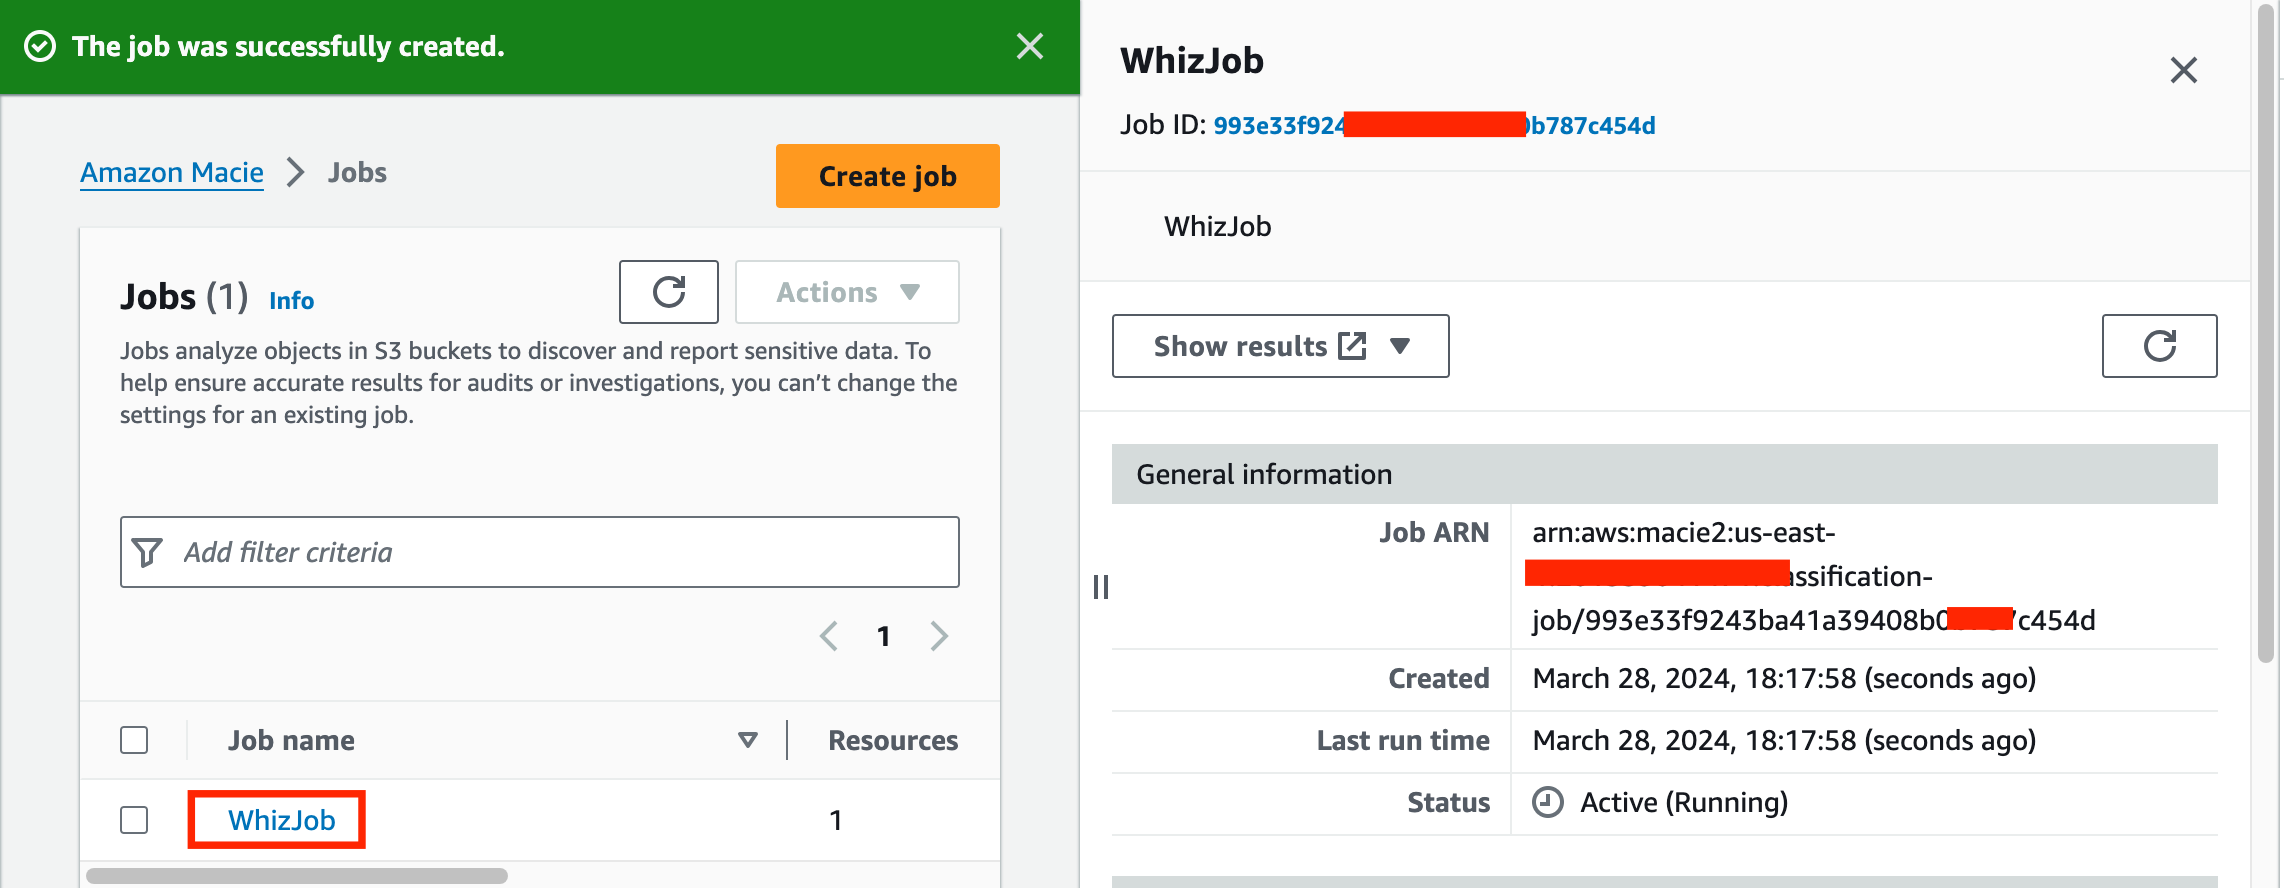
- Once the job is created, it will start running immediately.
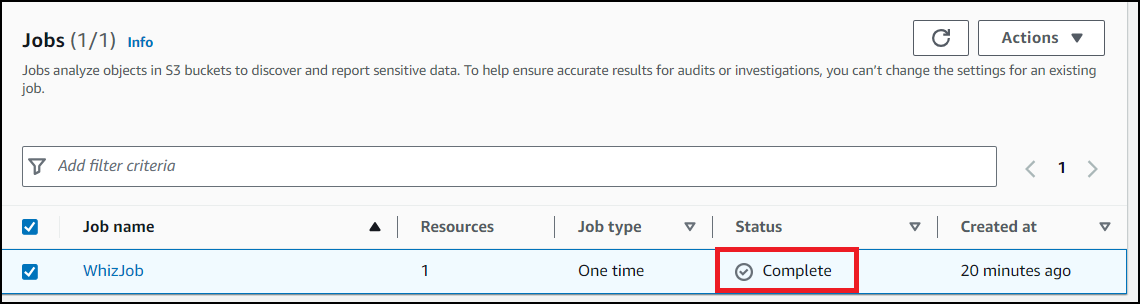
- The job runs for approximately 10 minutes and gathers the findings.
- After 10 minutes, the status is changed to Complete.

- Task 4: Macie job run and findings
- To view the Findings for the job, perform the following:
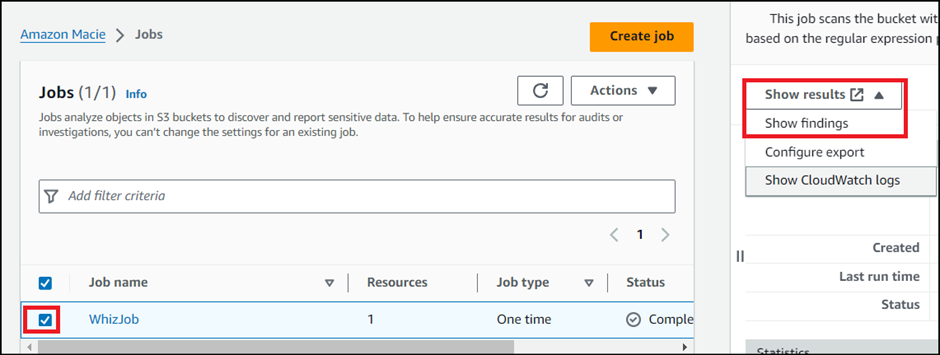
- Click on the Job present there.
- Select Show results
- And Choose Show findings
- Task 4: Macie job run and findings

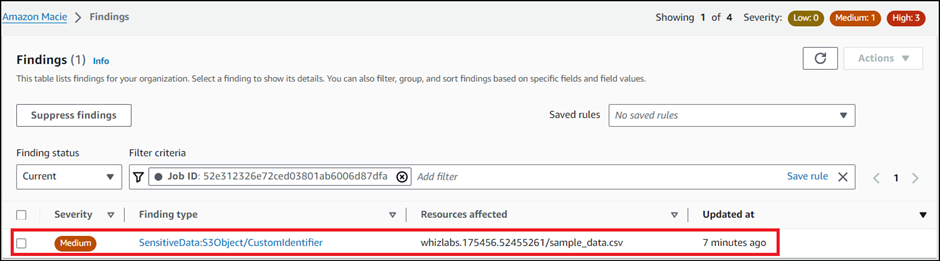
- To check the exact results, open the finding. Note : If you can not see findings wait for more 2 minutes and refresh the page.
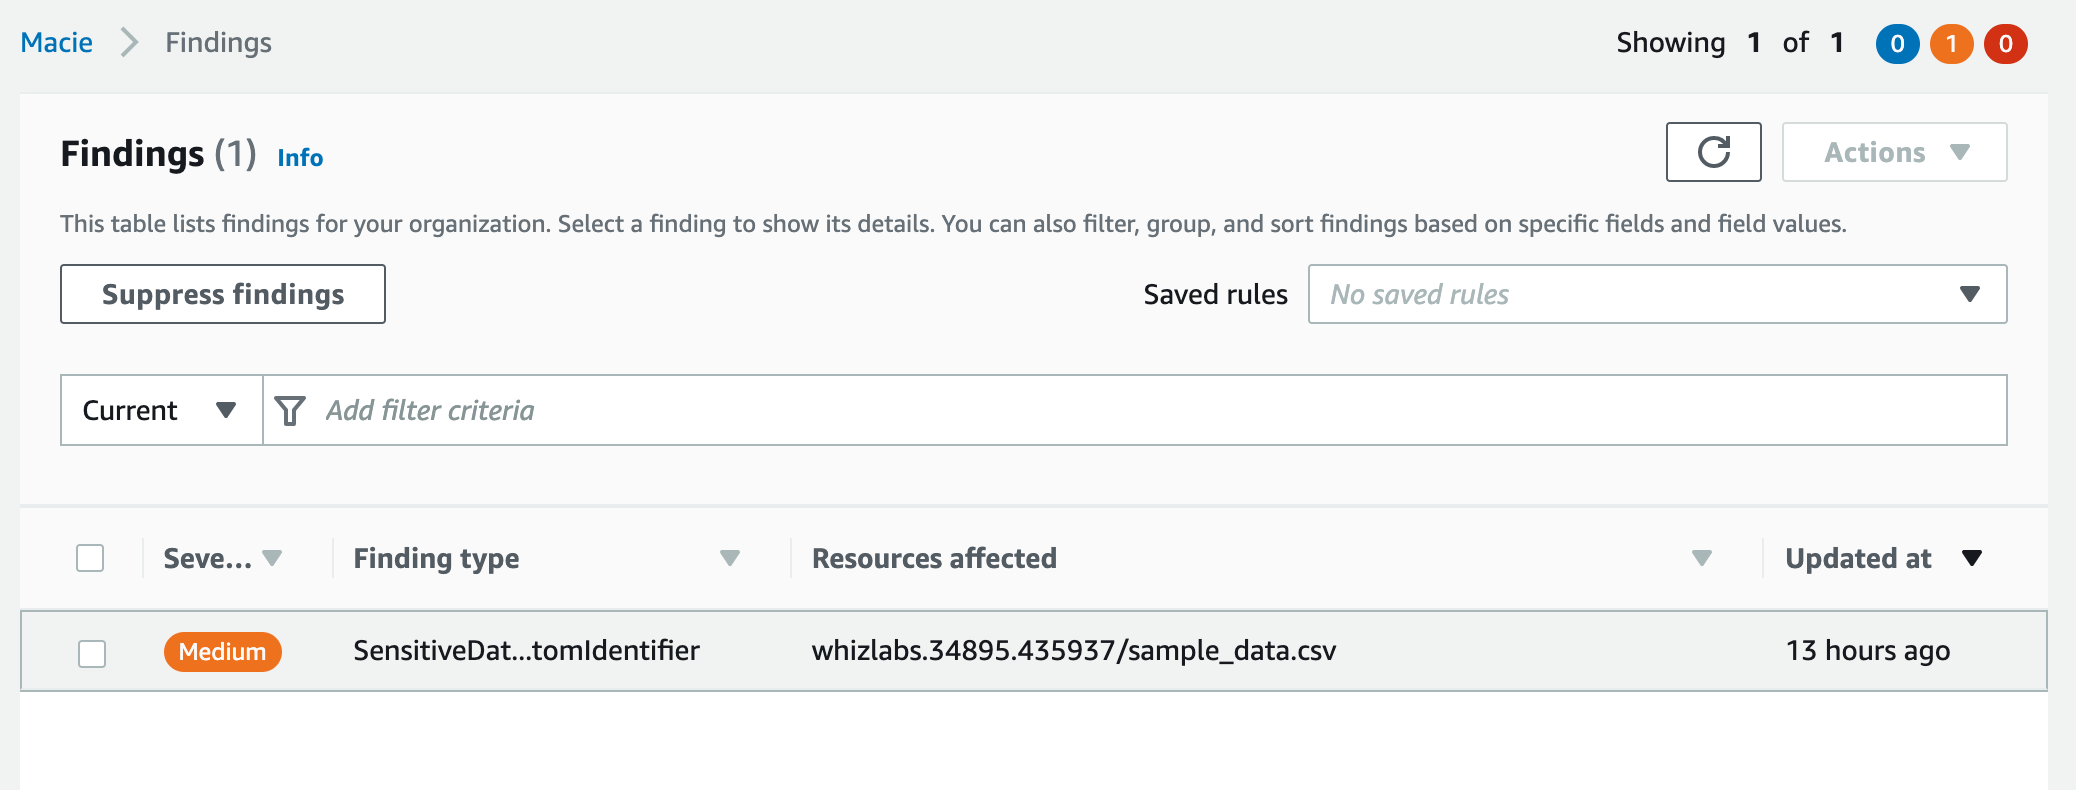
- To check the exact results, open the finding.
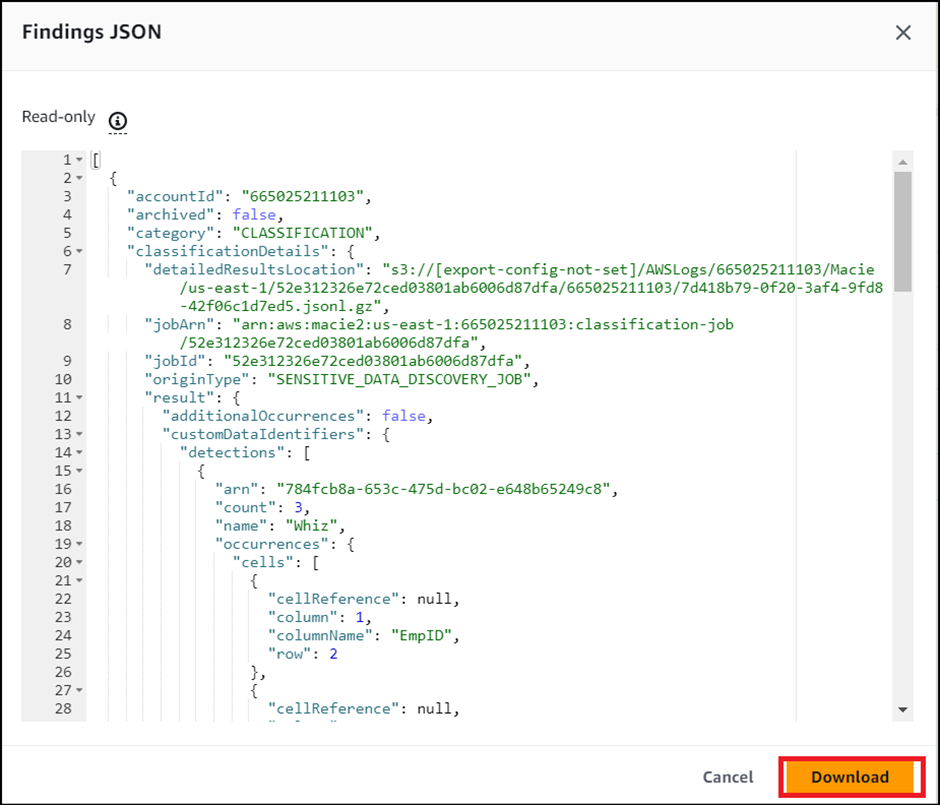
- Perform the following task: Select the present finding Click on the Actions button And, Choose Export (JSON) JSON present here is in Read-only format, you may choose to download the complete report.


- Perform the following task:
- Select the present finding
- Click on the Actions button
- And, Choose Export (JSON)

- Task 4: Macie job run and findings
- JSON present here is in Read-only format, you may choose to download the complete report.
- Task 4: Macie job run and findings

- Amazon Macie is an AWS service designed to enhance data security by automatically discovering, classifying, and protecting sensitive data in Amazon S3. It utilizes machine learning and natural language processing techniques to identify various types of sensitive information, such as personally identifiable information (PII), financial data, intellectual property, and more.
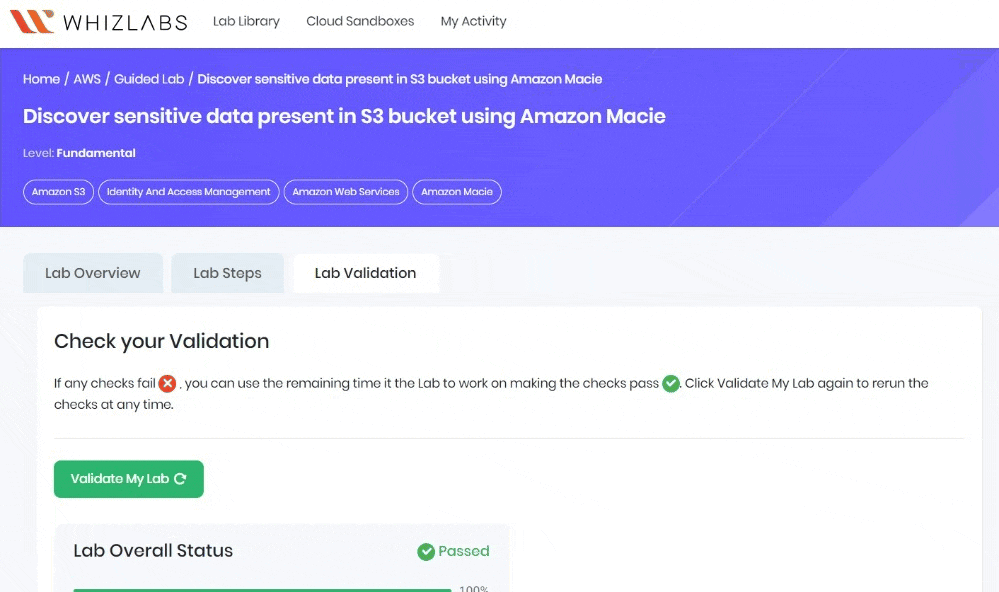
- Once the lab steps are completed, please click on the Validate button on the Right side panel.
- This will validate the resources in the AWS account and displays whether you have completed this lab successfully or not.
- Sample output :
- Task 5: Validation Test

- You have successfully enabled Amazon Macie.
- You have successfully created a Macie job.
- You have successfully run the Macie job and retrieved the data.
- Sign out of AWS Account.
- You have successfully completed the lab.
- Once you have completed the steps, click on End Lab from your lab lab console and wait till the process gets completed.