Intermediate00:30:00
Build Amazon VPC with Public and Private Subnets (from Scratch)
- Click on the Open Console button, and you will get redirected to AWS Console in a new browser tab.
- On the AWS sign-in page,
- Leave the Account ID as default. Never edit/remove the 12 digit Account ID present in the AWS Console. otherwise, you cannot proceed with the lab.
- Now copy your User Name and Password in the Lab Console to the IAM Username and Password in AWS Console and click on the Sign in button.
- Once Signed In to the AWS Management Console, Make the default AWS Region as US East (N. Virginia) us-east-1.
- Make sure you are in the US East (N. Virginia) us-east-1 Region.
- Navigate to VPC by clicking on Services on the top of AWS Console.
- Click on VPC (under Networking & Content Delivery section) or you can also search for VPC.
- Click on Your VPCs from the left menu.
- Here you can see the list of all VPC, No need to do anything with the existing and default VPCs, we will create a new VPC for this lab.
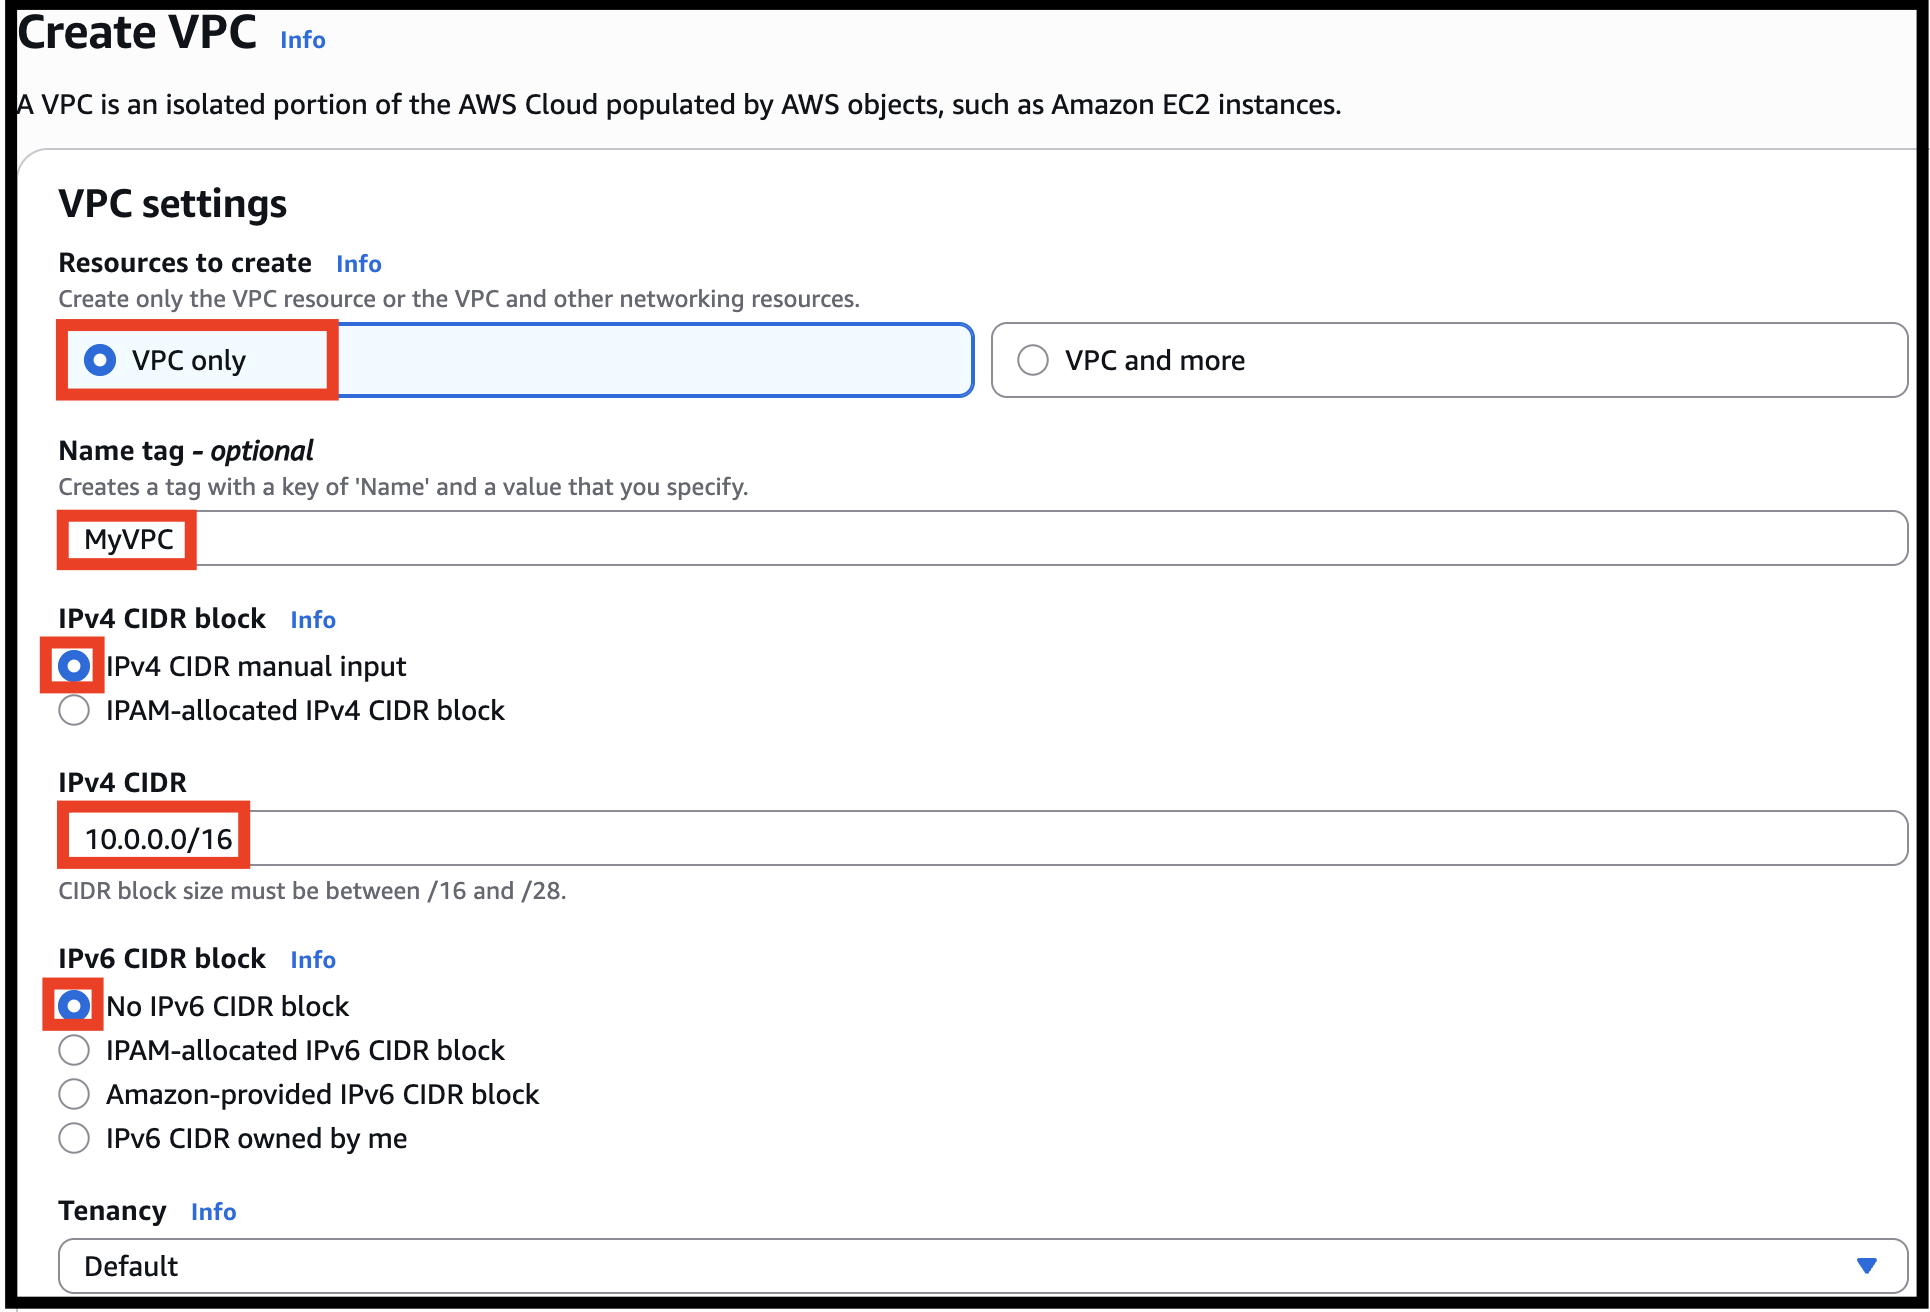
- Click on Create VPC button. Select VPC Only Name tag: Enter a VPC name for identification to your VPC. Ex: MyVPC IPv4 CIDR block: Enter 10.0.0.0/16 IPv6 CIDR block: No need to change this, make sure No IPv6 CIDR Block is checked. Tenancy: No need to change this, make sure Default is selected. Now click on Create VPC button.

- Click on Create VPC button.
- Select VPC Only
- Name tag: Enter a VPC name for identification to your VPC. Ex: MyVPC
- IPv4 CIDR block: Enter 10.0.0.0/16
- IPv6 CIDR block: No need to change this, make sure No IPv6 CIDR Block is checked.
- Tenancy: No need to change this, make sure Default is selected.
- Now click on Create VPC button.

- Task 2 : Creating New VPC
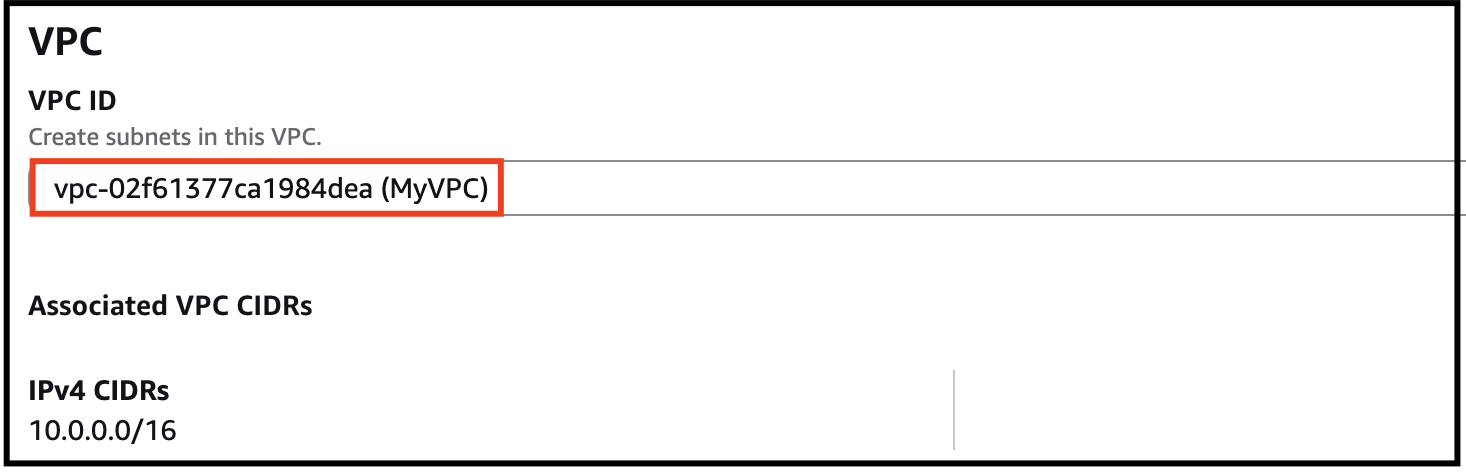
- Once VPC is created, it will appear with details as shown below:

- Task 2 : Creating New VPC

- In this lab, we will create one public subnet and a private subnet in us-east-1a and us-east-1b Availability Zones respectively as follows:
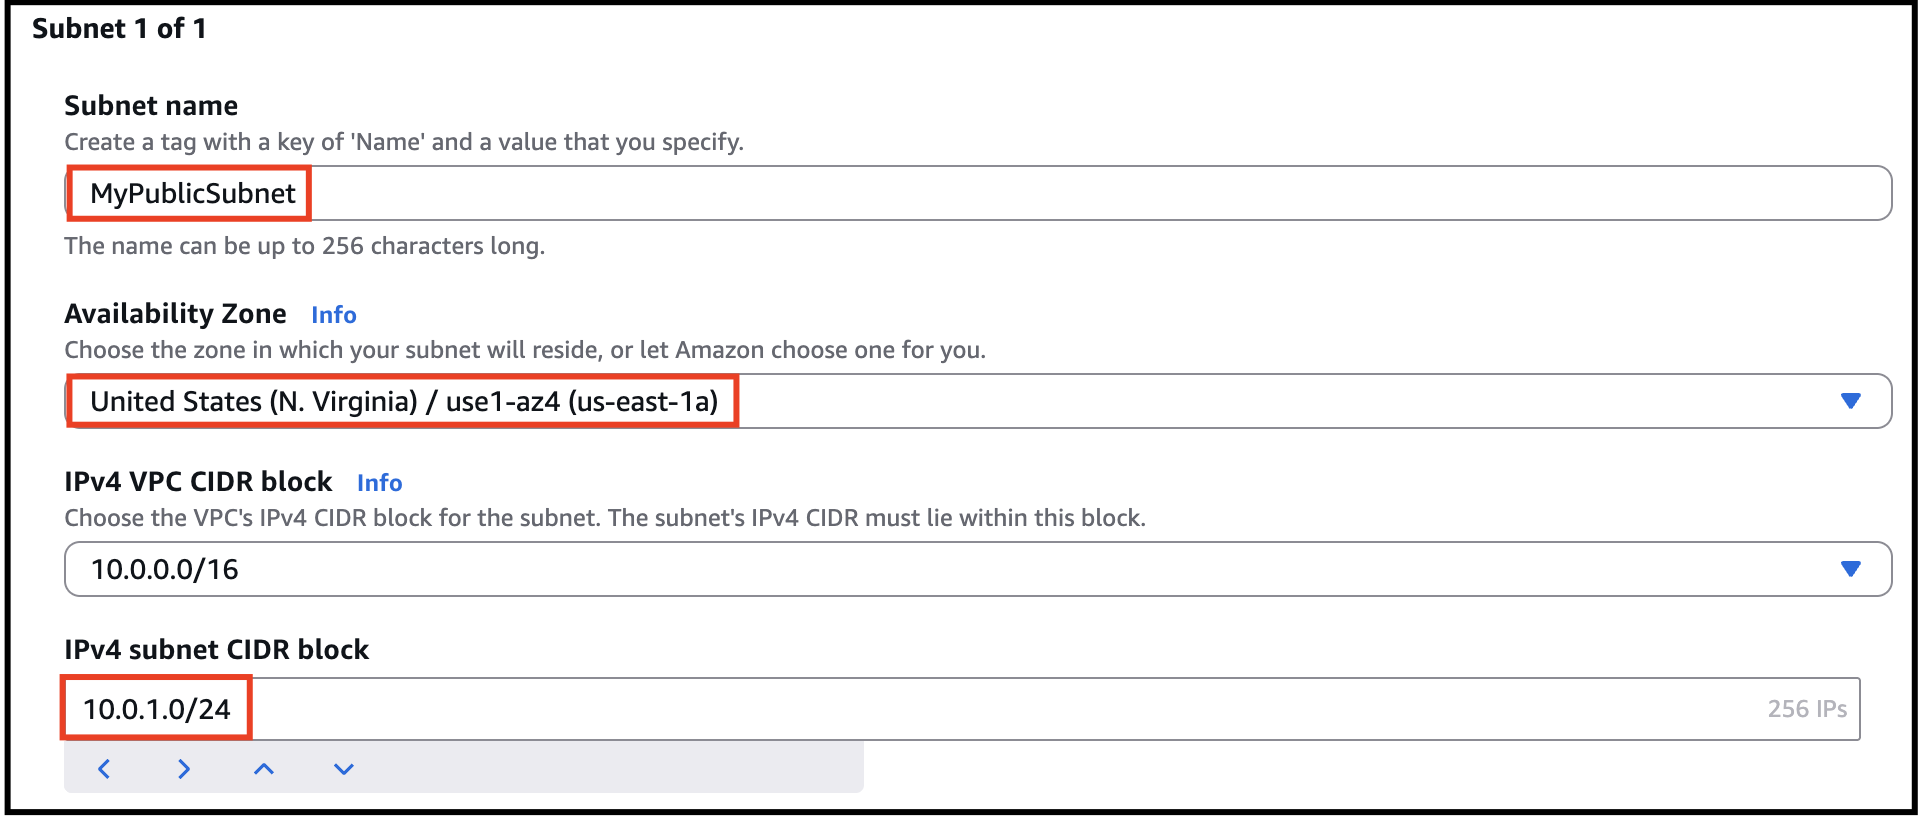
- For the Public Subnet, click on Subnets from the left menu and click on Create subnet button. VPC ID: Select MyVPC from the list you created earlier. Subnet Name: Enter Name MyPublicSubnet Availability Zone: Select us-east-1a IPv4 CIDR block: Enter the range 10.0.1.0/24 Click on Create subnet button.

- For the Public Subnet, click on Subnets from the left menu and click on Create subnet button.
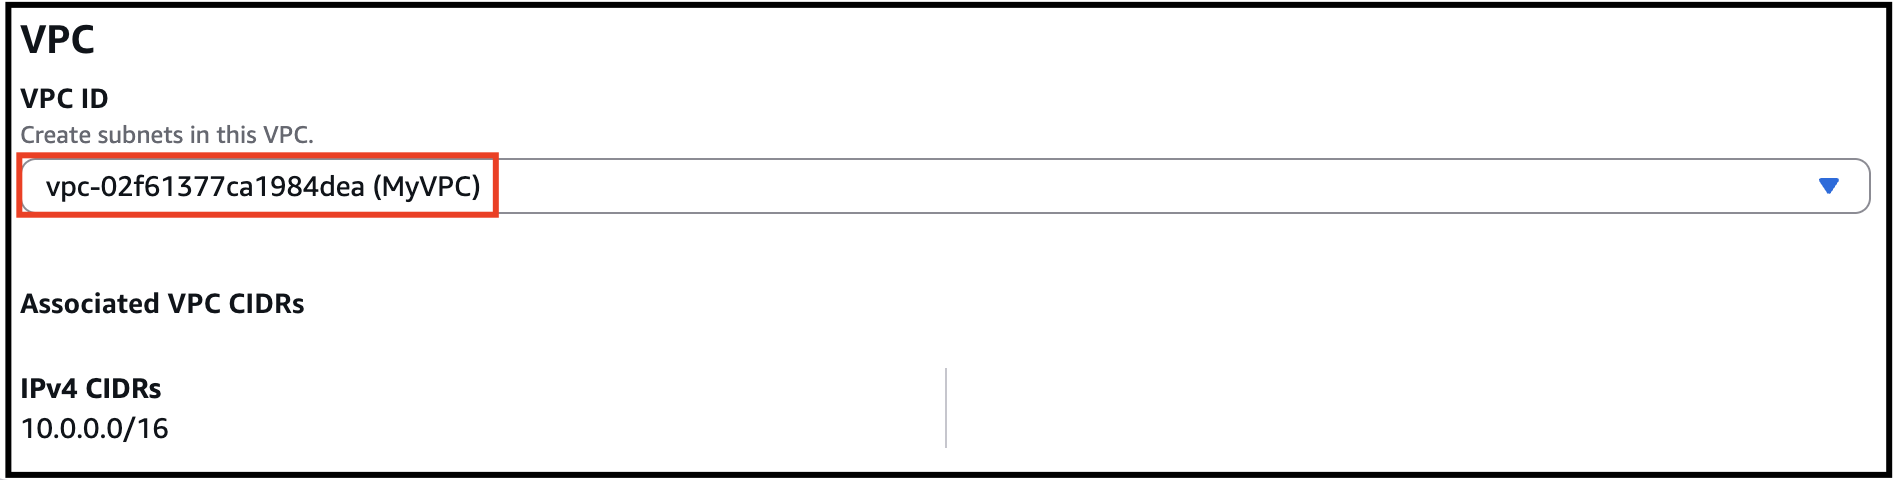
- VPC ID: Select MyVPC from the list you created earlier.

- Task 3 : Creating Subnets

- Subnet Name: Enter Name MyPublicSubnet
- Availability Zone: Select us-east-1a
- IPv4 CIDR block: Enter the range 10.0.1.0/24
- Click on Create subnet button.
- Task 3 : Creating Subnets

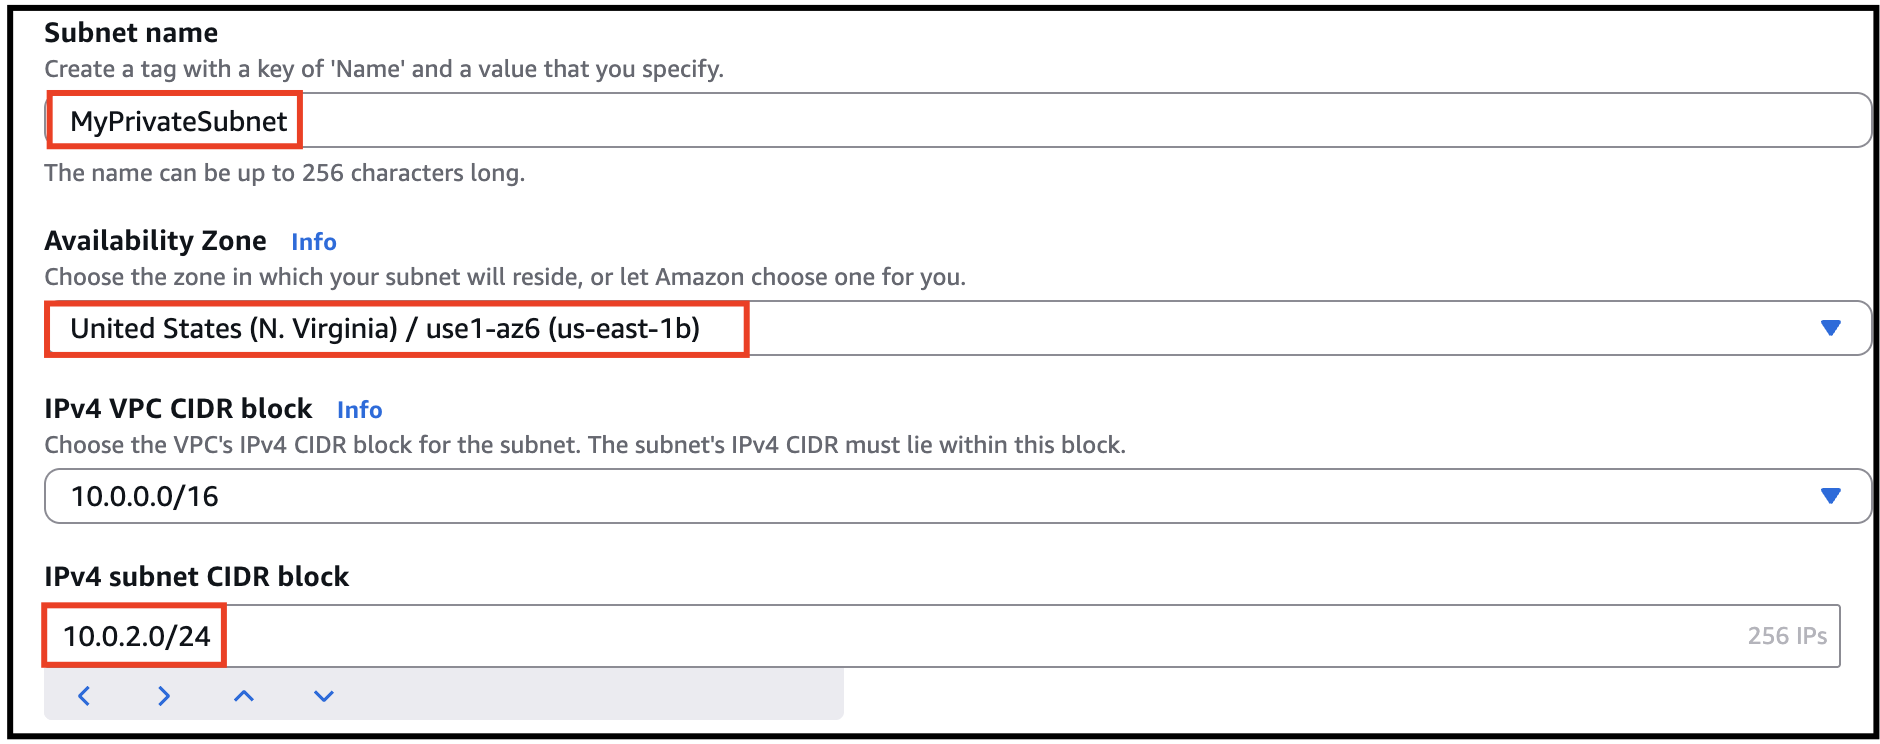
- For the Private Subnet, click on Create subnet again. VPC ID : Select MyVPC from the list you created earlier. Subnet Name : Enter Name MyPrivateSubnet Availability Zone : Select us-east-1b IPv4 CIDR block : Enter the range 10.0.2.0/24 Click on Create subnet button.


- For the Private Subnet, click on Create subnet again.
- VPC ID : Select MyVPC from the list you created earlier.

- Task 3 : Creating Subnets
- Subnet Name : Enter Name MyPrivateSubnet
- Availability Zone : Select us-east-1b
- IPv4 CIDR block : Enter the range 10.0.2.0/24
- Click on Create subnet button.
- Task 3 : Creating Subnets

- In this task, we are going to create an internet gateway and configure it with the VPC.
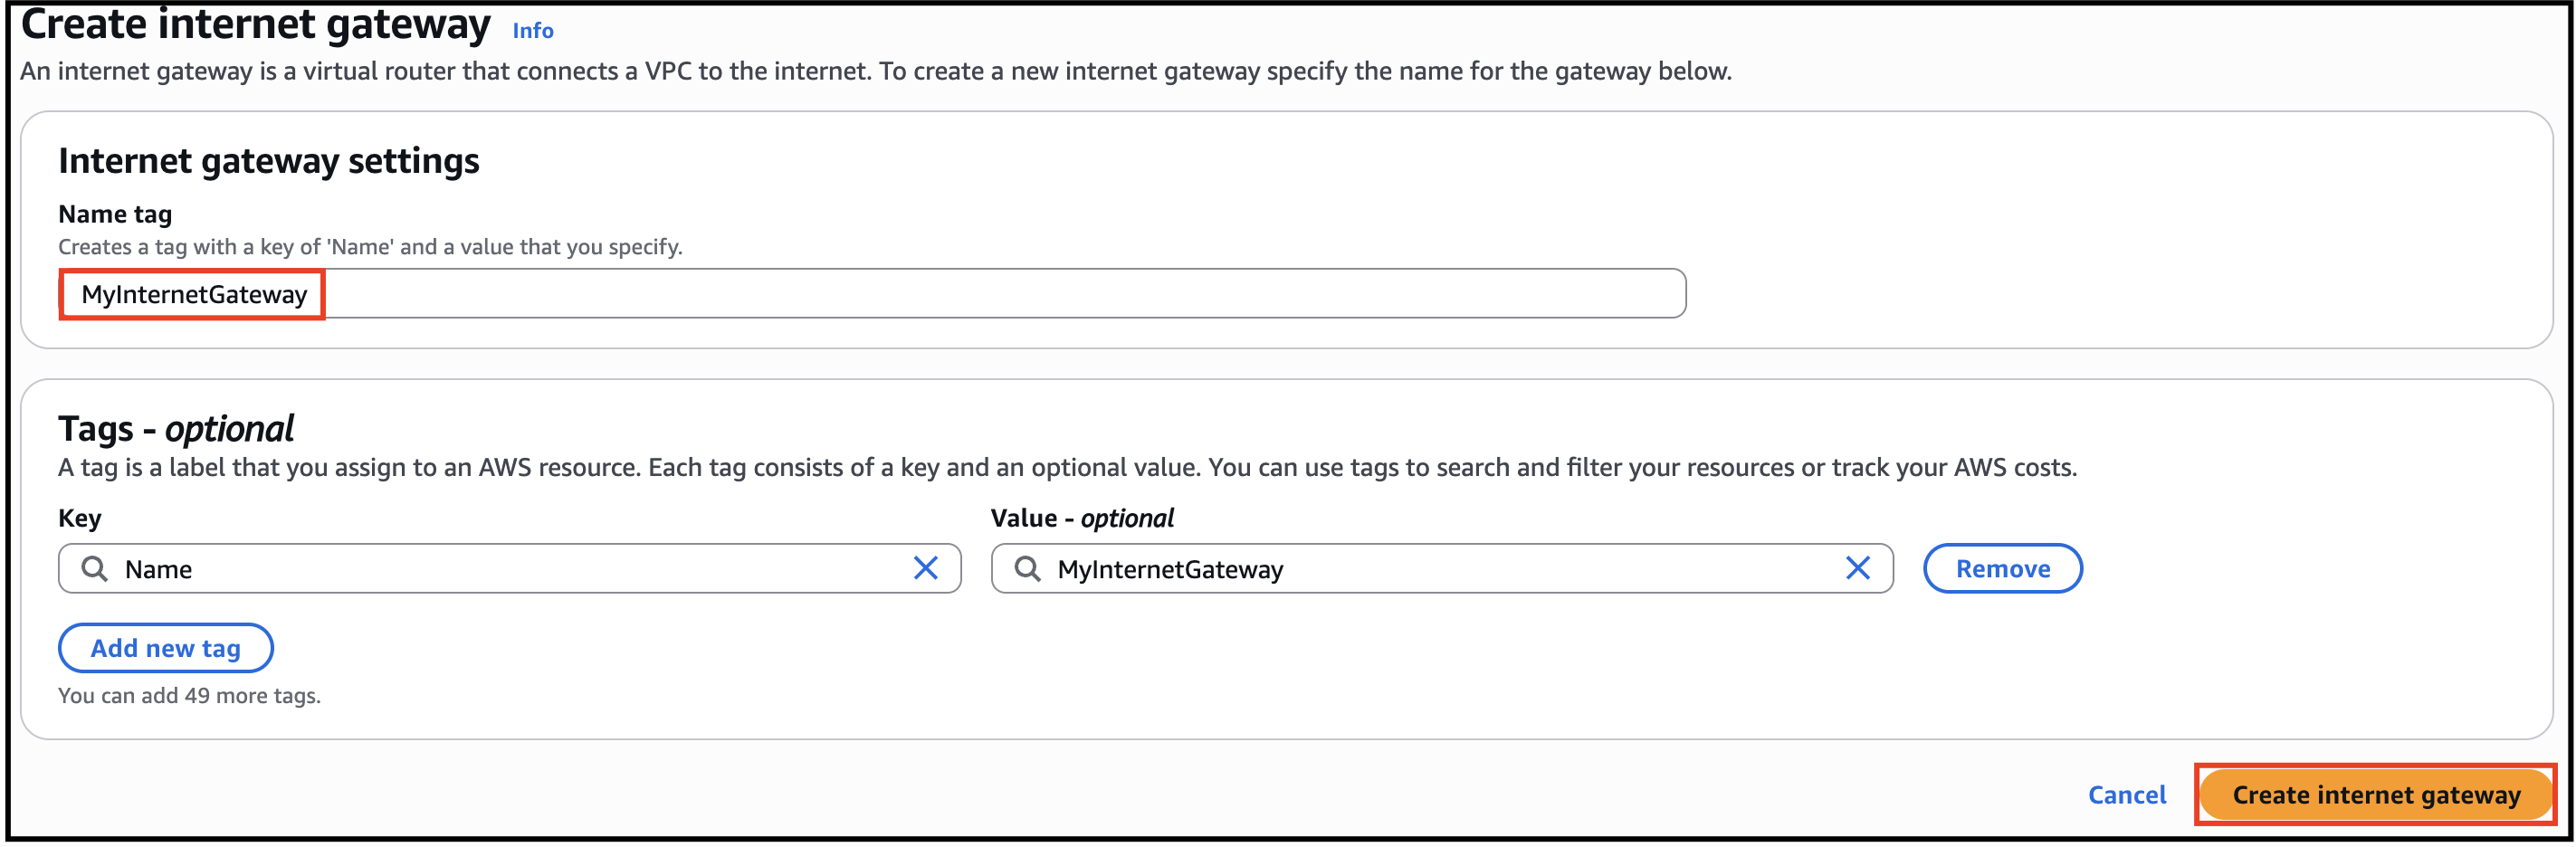
- Click on Internet Gateways from the left menu and click on Create internet gateway button. Name Tag: Enter MyInternetGateway Click on Create internet gateway button.

- Click on Internet Gateways from the left menu and click on Create internet gateway button.
- Name Tag: Enter MyInternetGateway
- Click on Create internet gateway button.
- Task 4: Create and configure Internet Gateway

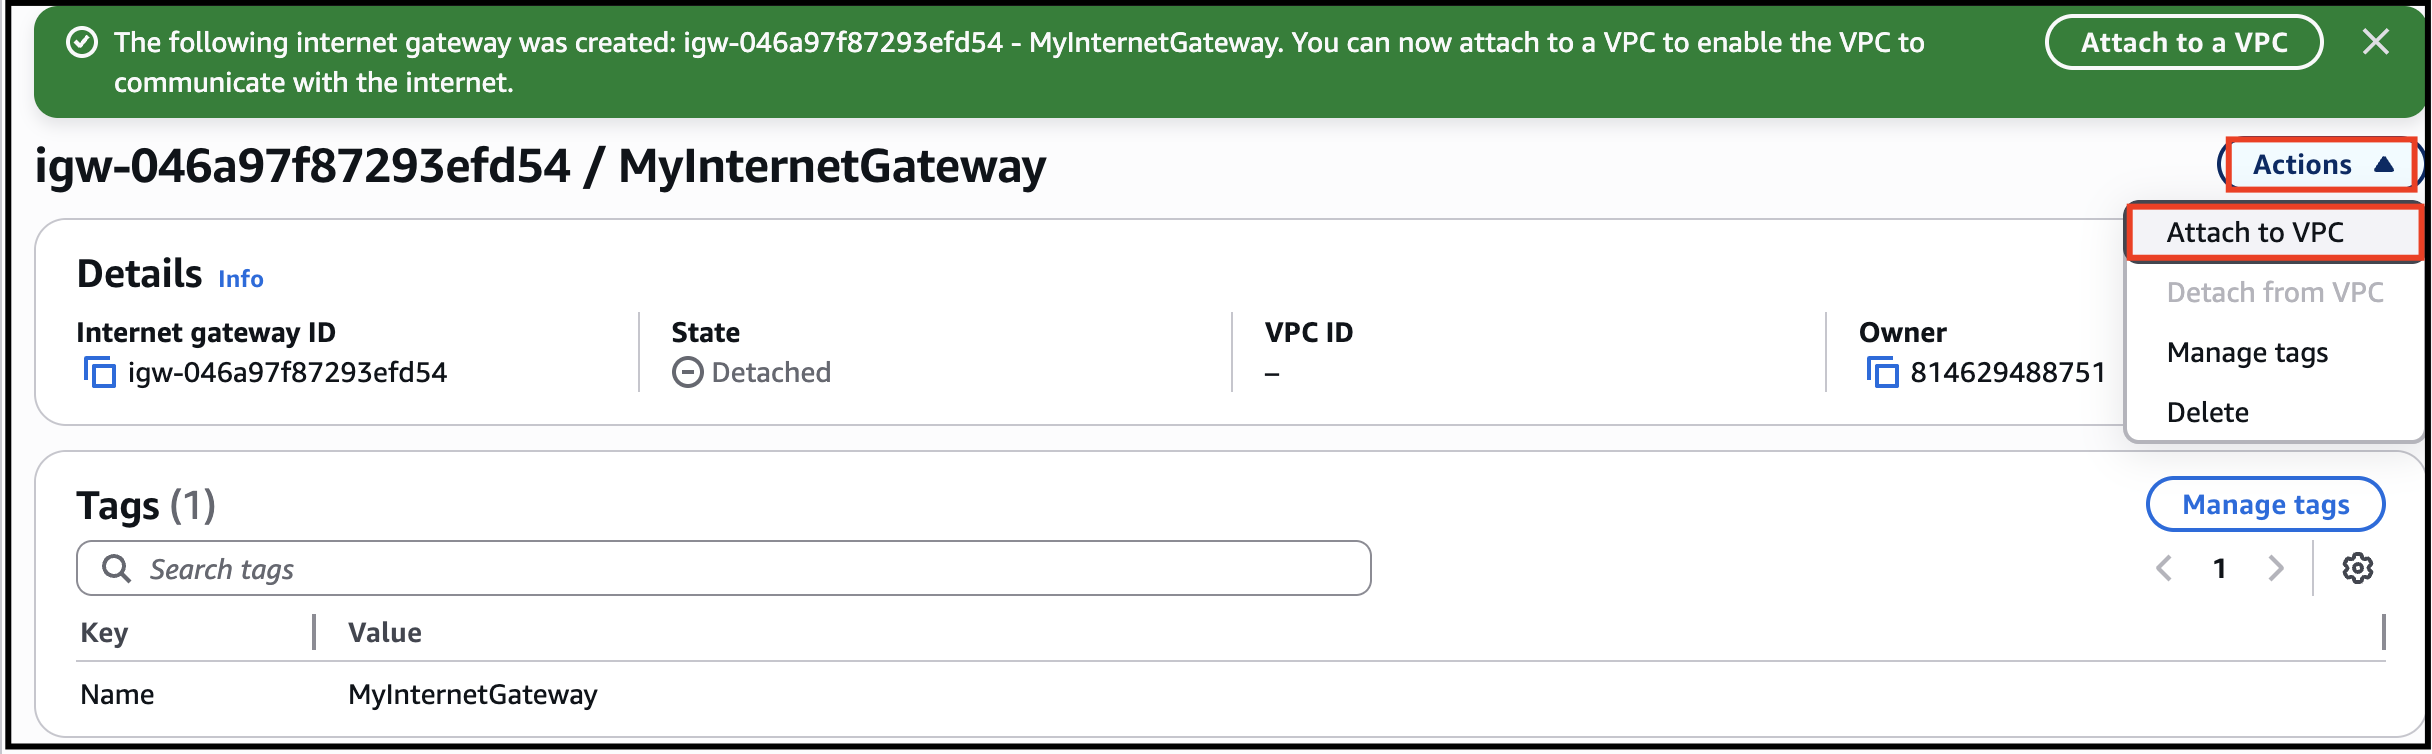
- Select the Internet gateway you created from the list Click on Actions. Click on Attach to VPC. Select MyVPC which you created from the list and click on Attach internet gateway button.


- Select the Internet gateway you created from the list
- Click on Actions.
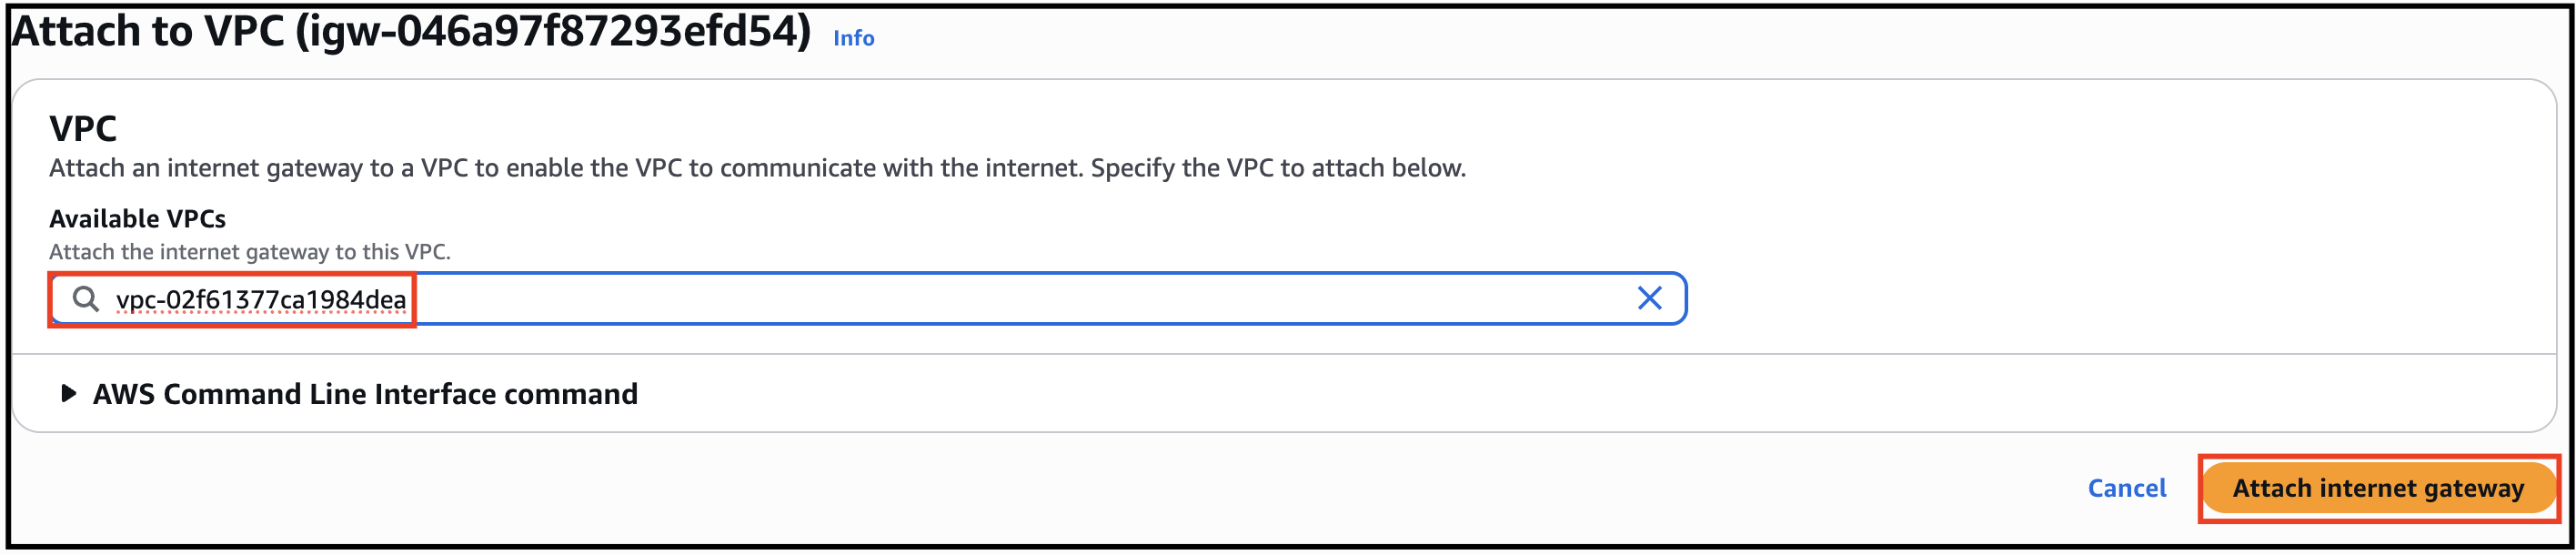
- Click on Attach to VPC.

- Task 4: Create and configure Internet Gateway
- Select MyVPC which you created from the list and click on Attach internet gateway button.
- Task 4: Create and configure Internet Gateway

- In this task, we are going to create two route tables and associate them with their respective subnets.
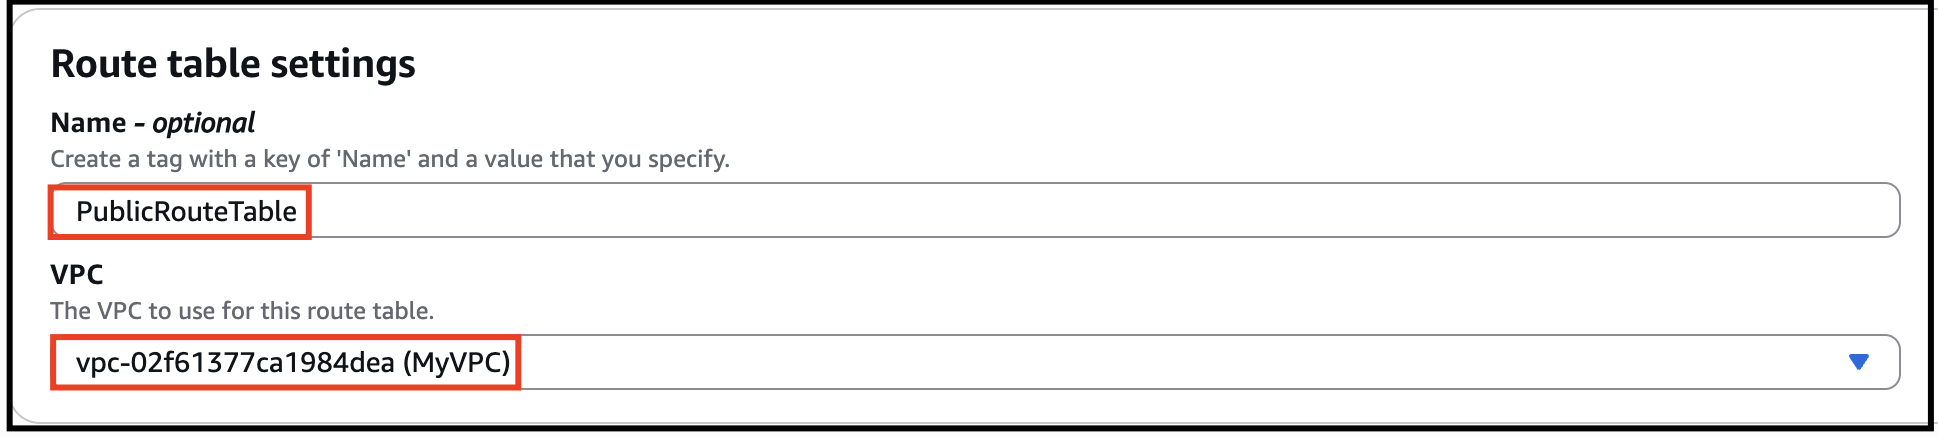
- Go to Route Tables from the left menu and click on Create route table button. Name: Enter PublicRouteTable VPC: Select MyVPC from the list. Click on Create route table button.

- Go to Route Tables from the left menu and click on Create route table button.
- Name: Enter PublicRouteTable
- VPC: Select MyVPC from the list.
- Click on Create route table button.

- Task 5: Create Route Tables
- Repeat the same steps to create a route table for the Private subnet. Name: Enter PrivateRouteTable VPC: Select MyVPC from the list. Click on Create route table button.
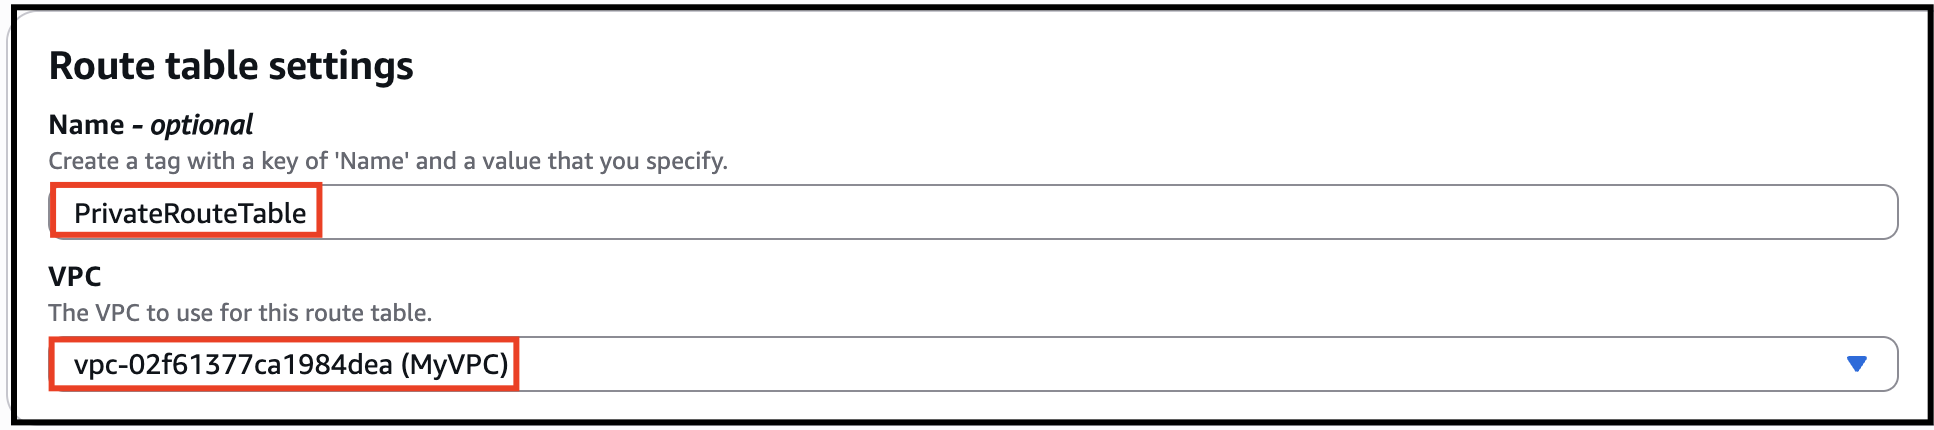

- Repeat the same steps to create a route table for the Private subnet.
- Name: Enter PrivateRouteTable
- VPC: Select MyVPC from the list.
- Click on Create route table button.


- Task 5: Create Route Tables


- Now we will associate the subnets to the route tables.
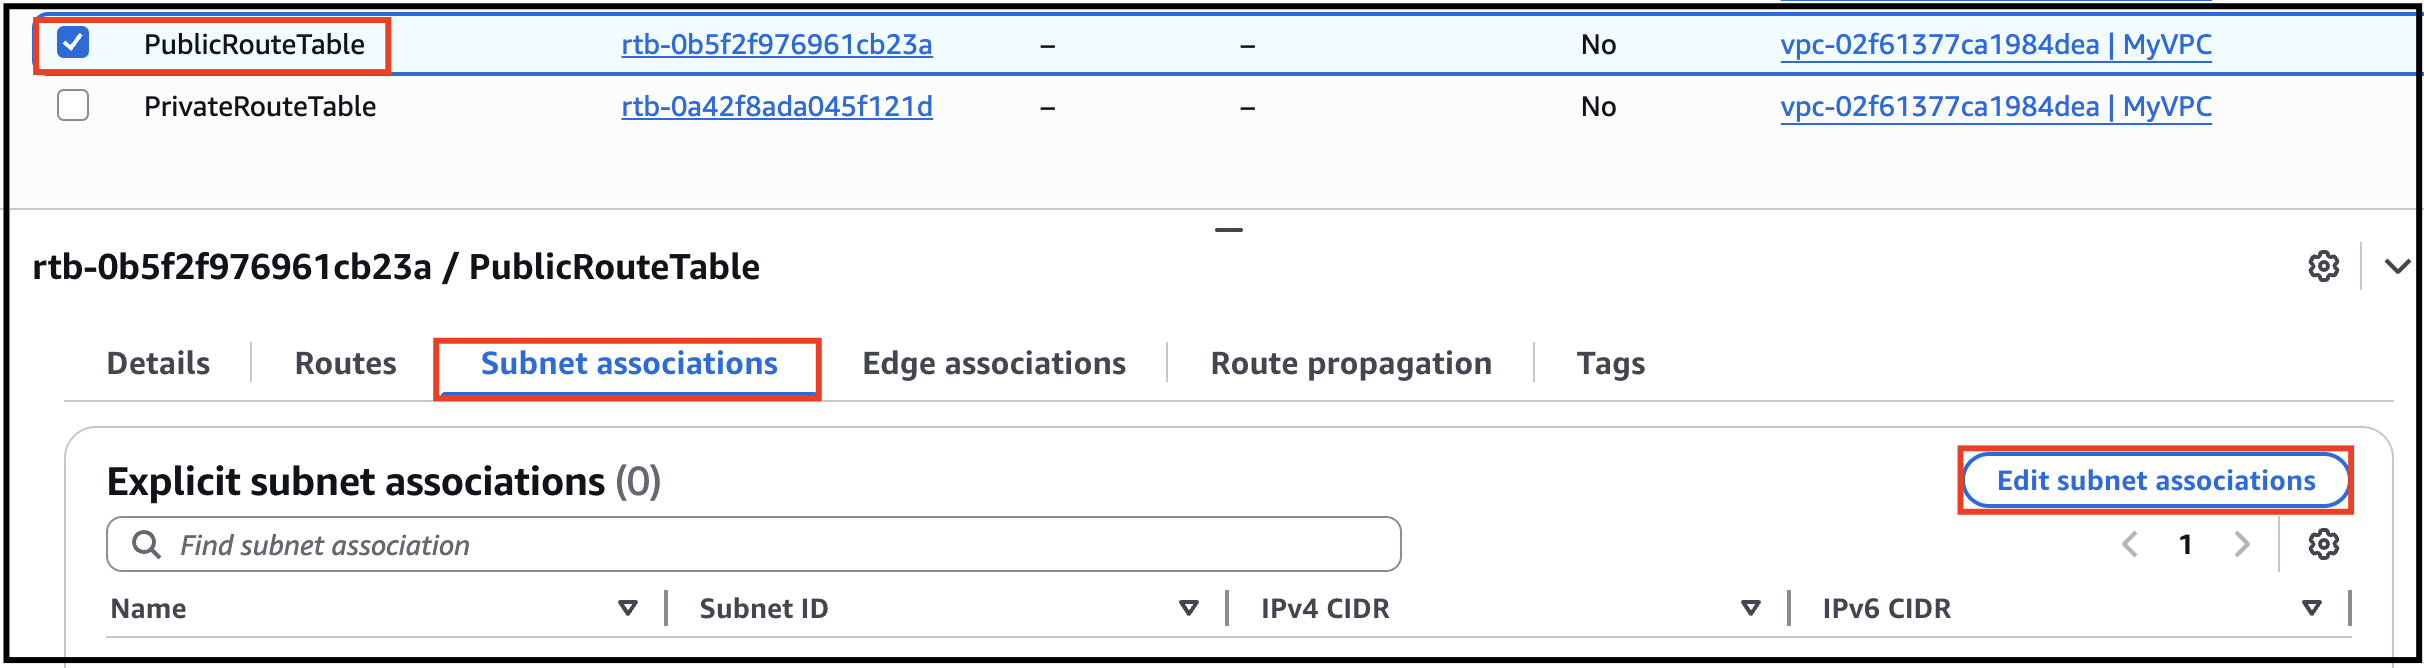
- Select the PublicRouteTable and go to the Subnet Associations tab. Click on Edit subnet associations. Select MyPublicSubnet from the list. Click on Save associations button.

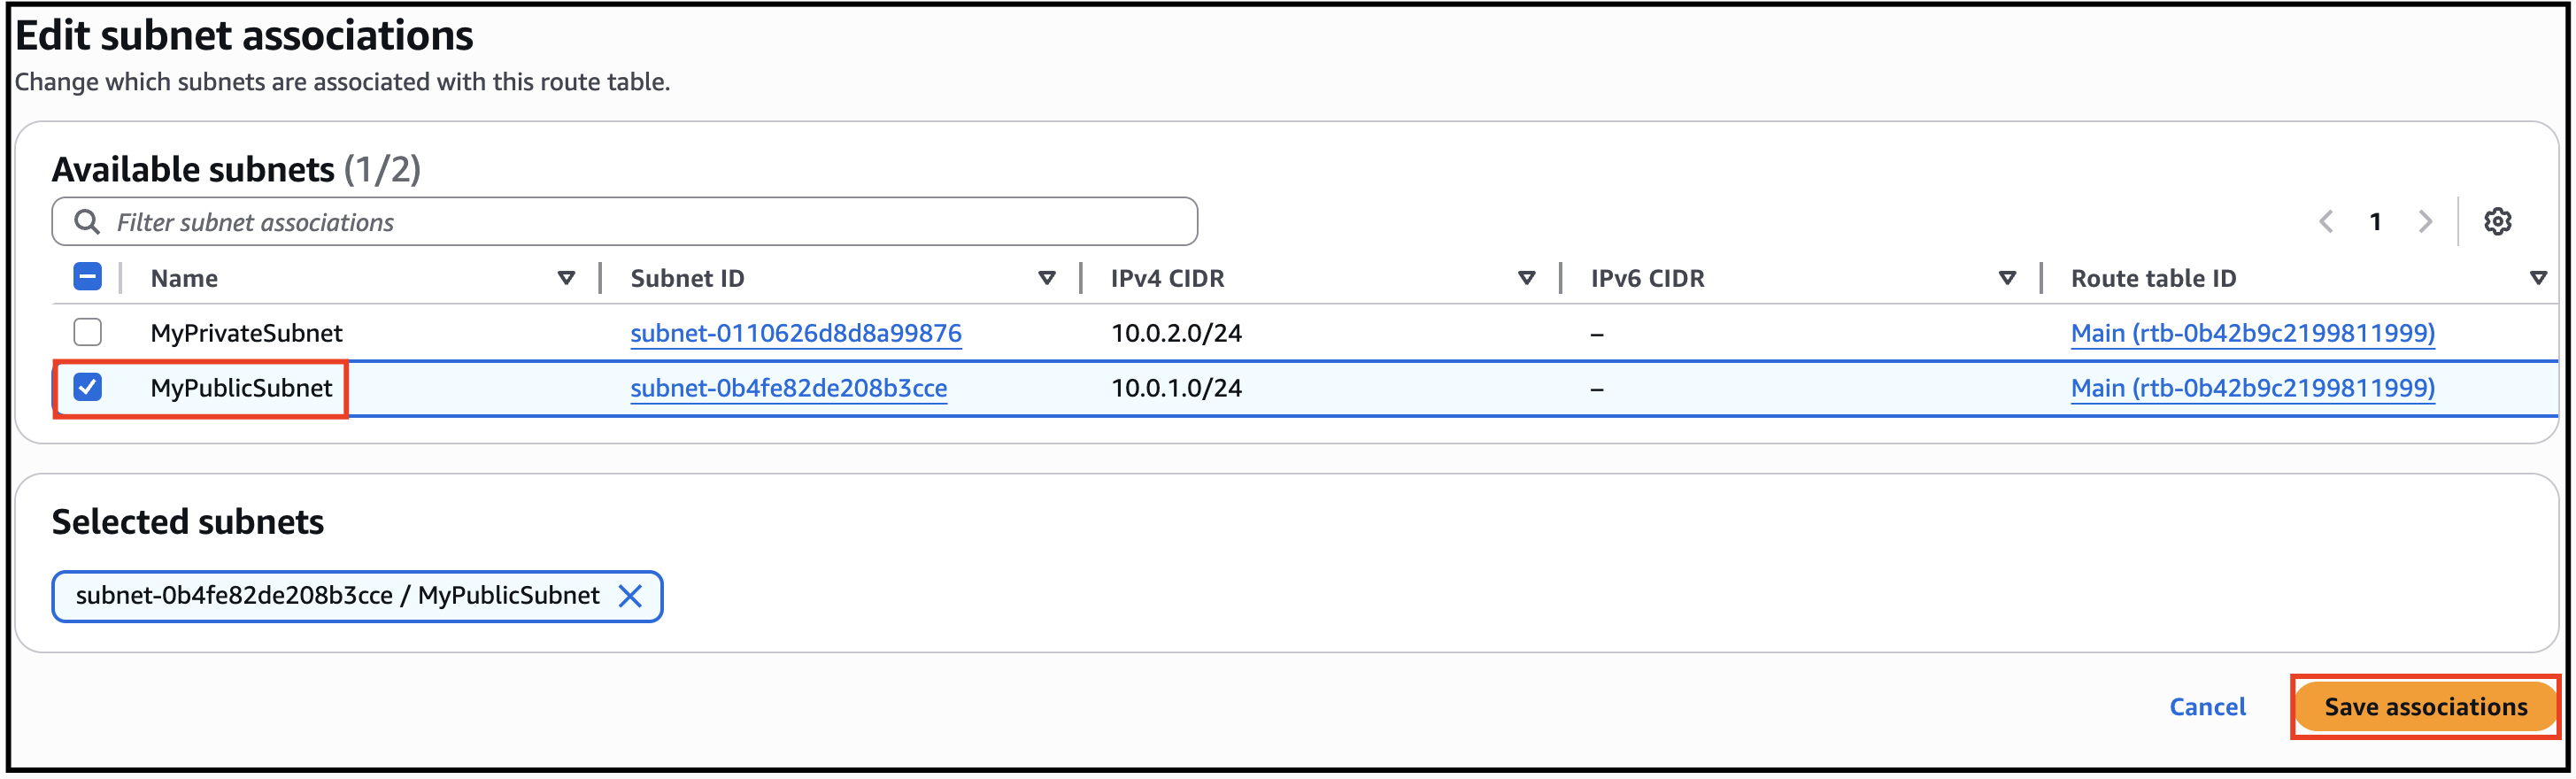
- Select the PublicRouteTable and go to the Subnet Associations tab.
- Click on Edit subnet associations.
- Task 5: Create Route Tables

- Select MyPublicSubnet from the list.
- Click on Save associations button.

- Task 5: Create Route Tables

- Select the PrivateRouteTable and go to the Subnet Associations tab. Click on Edit subnet associations. Select MyPrivateSubnet from the list. Click on Save associations button.


- Select the PrivateRouteTable and go to the Subnet Associations tab.
- Click on Edit subnet associations.
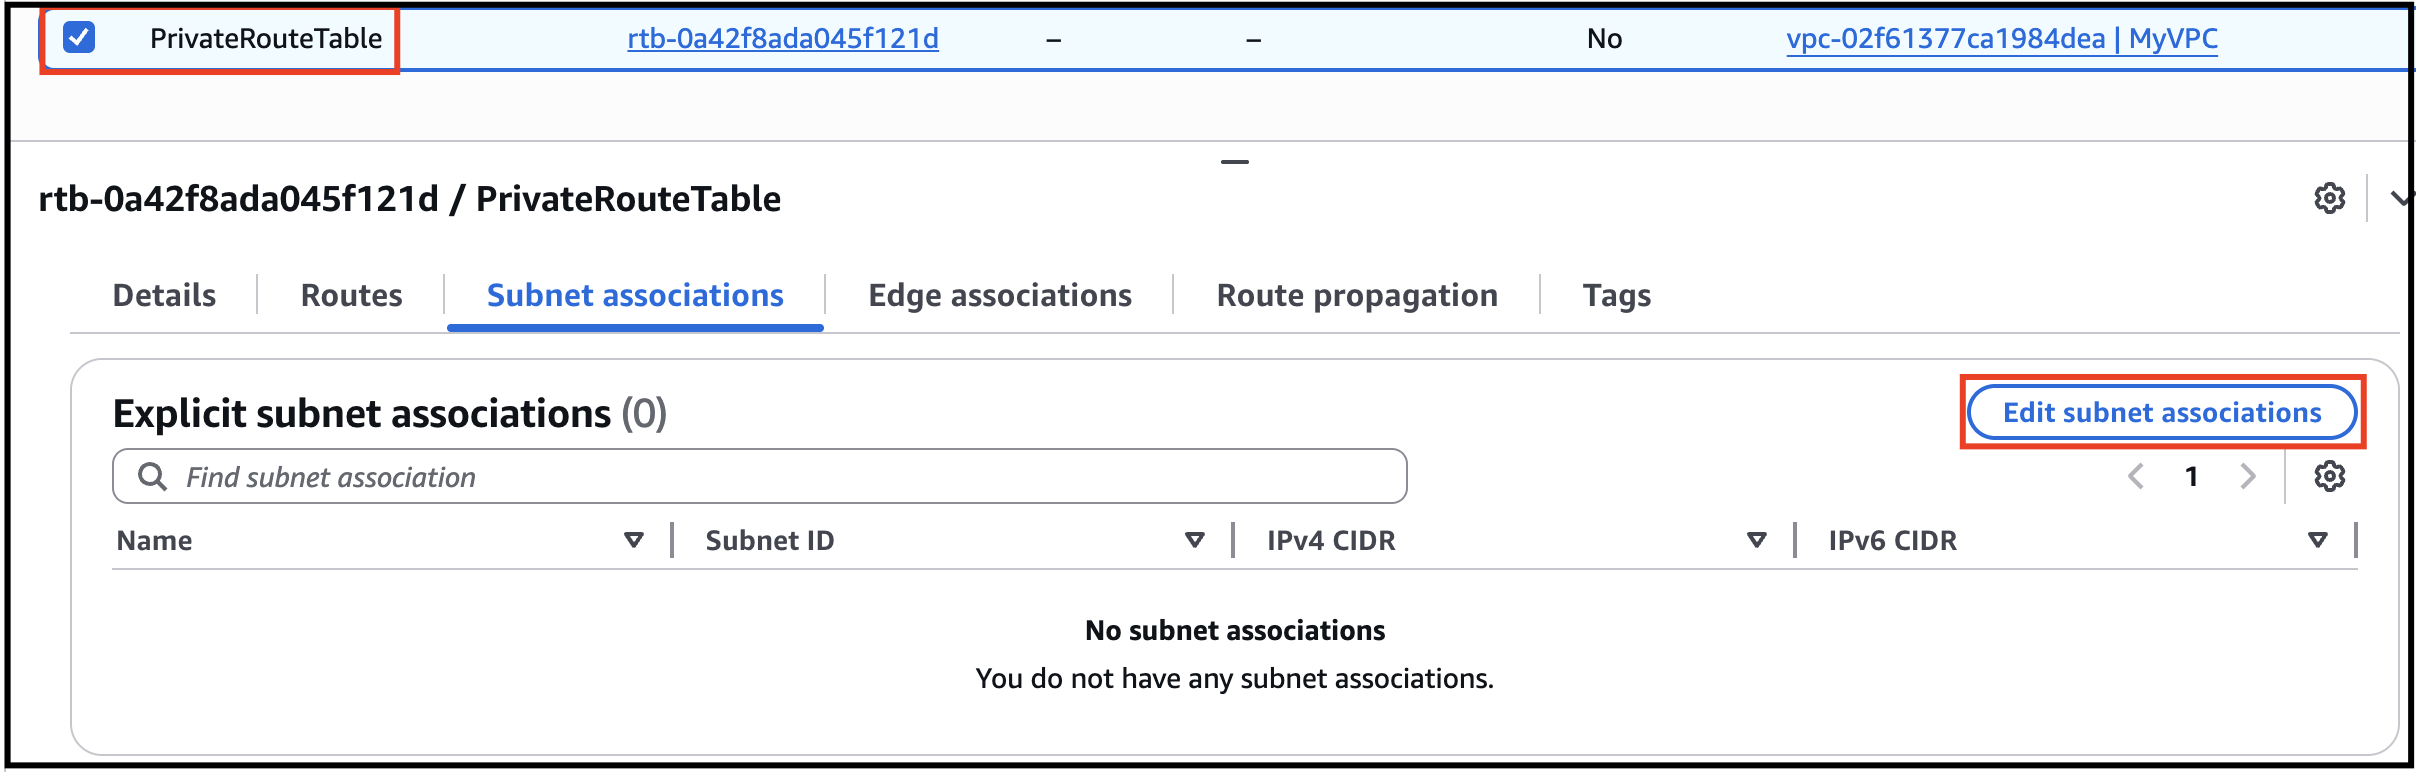
- Task 5: Create Route Tables

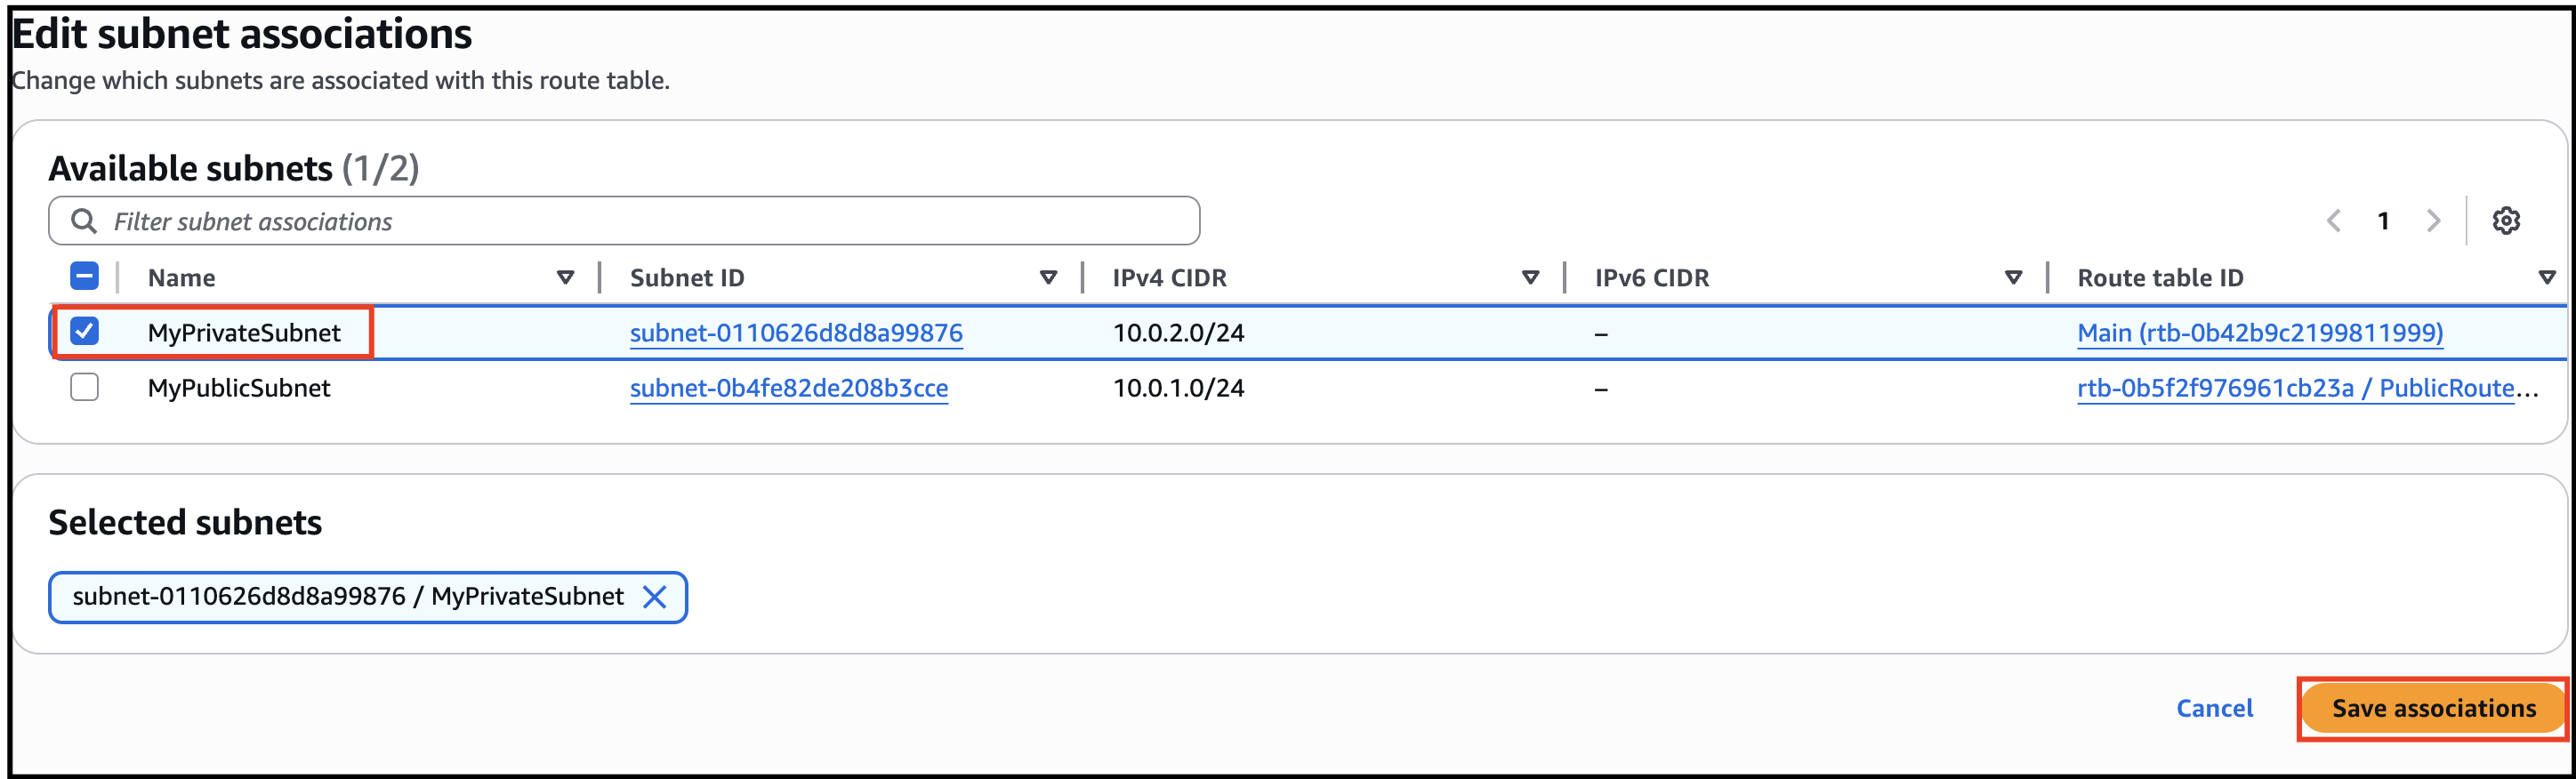
- Select MyPrivateSubnet from the list.
- Click on Save associations button.

- Task 5: Create Route Tables
- Make sure not to associate any subnets with the Main Route Table.
- PublicRouteTable: Add a route to allow Internet traffic to the VPC. Select PublicRouteTable. Go to Routes tab, click on Edit routes. Click on Add route button, Specify the following values: Destination: Enter 0.0.0.0/0 Target: Select Internet Gateway from the dropdown menu to select MyInternetGateway. Click on Save changes button.
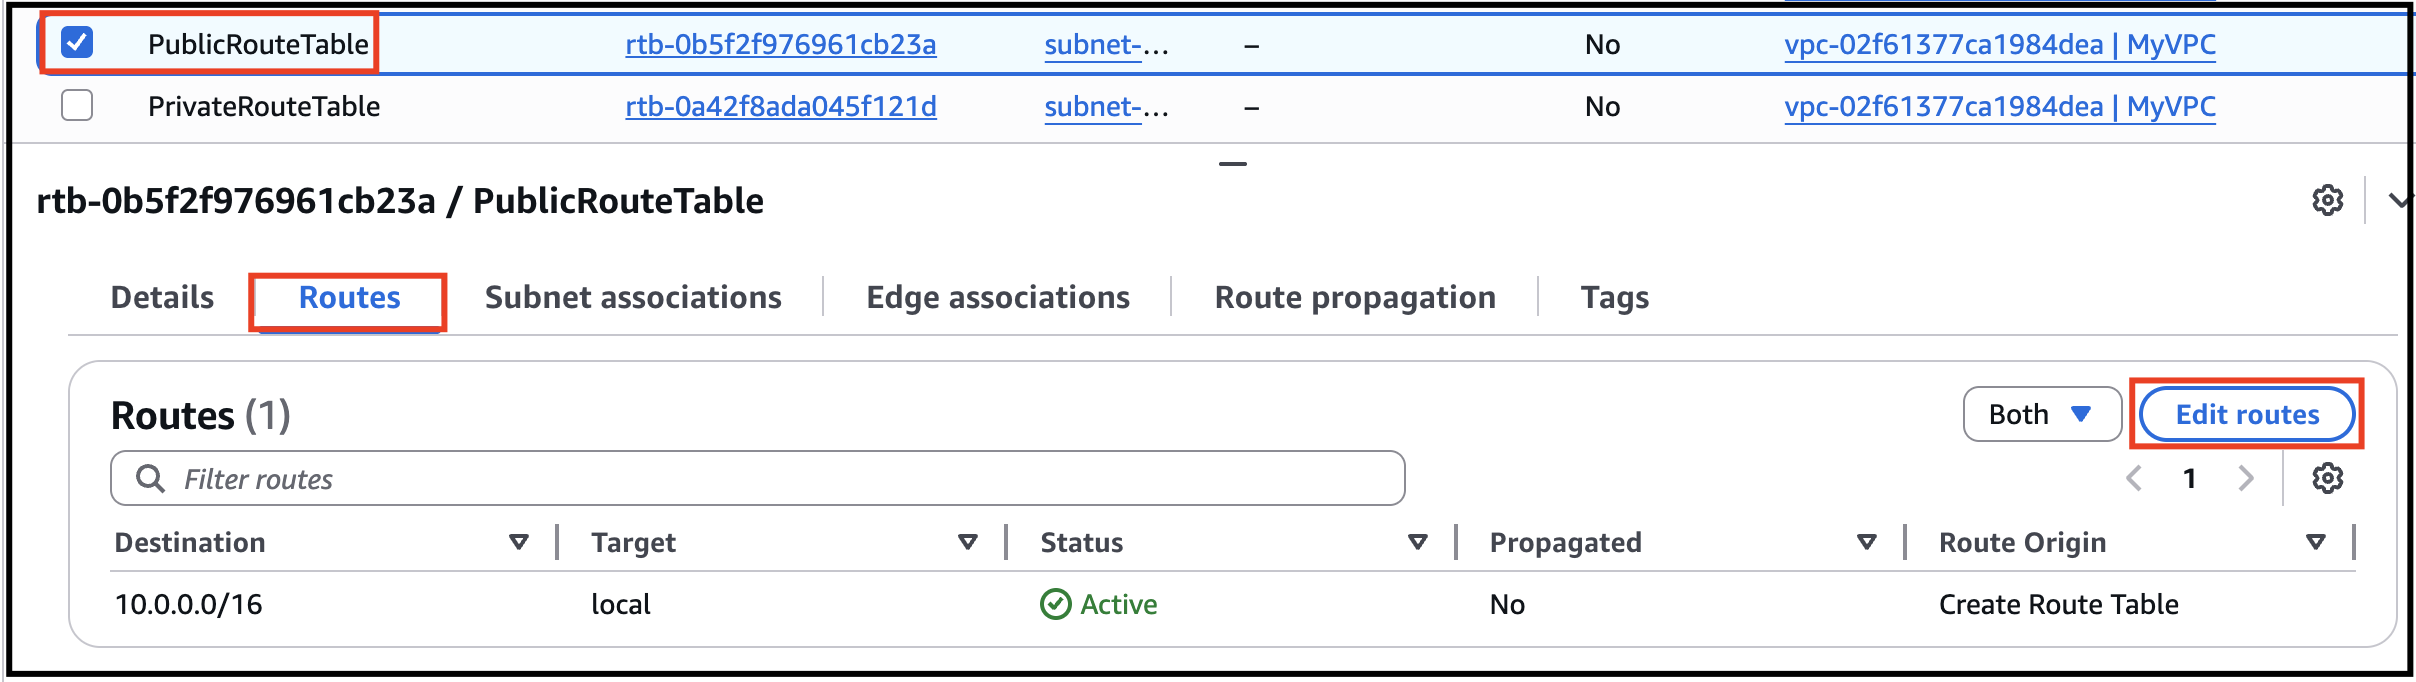

- PublicRouteTable: Add a route to allow Internet traffic to the VPC.
- Select PublicRouteTable.
- Go to Routes tab, click on Edit routes.

- Task 5: Create Route Tables

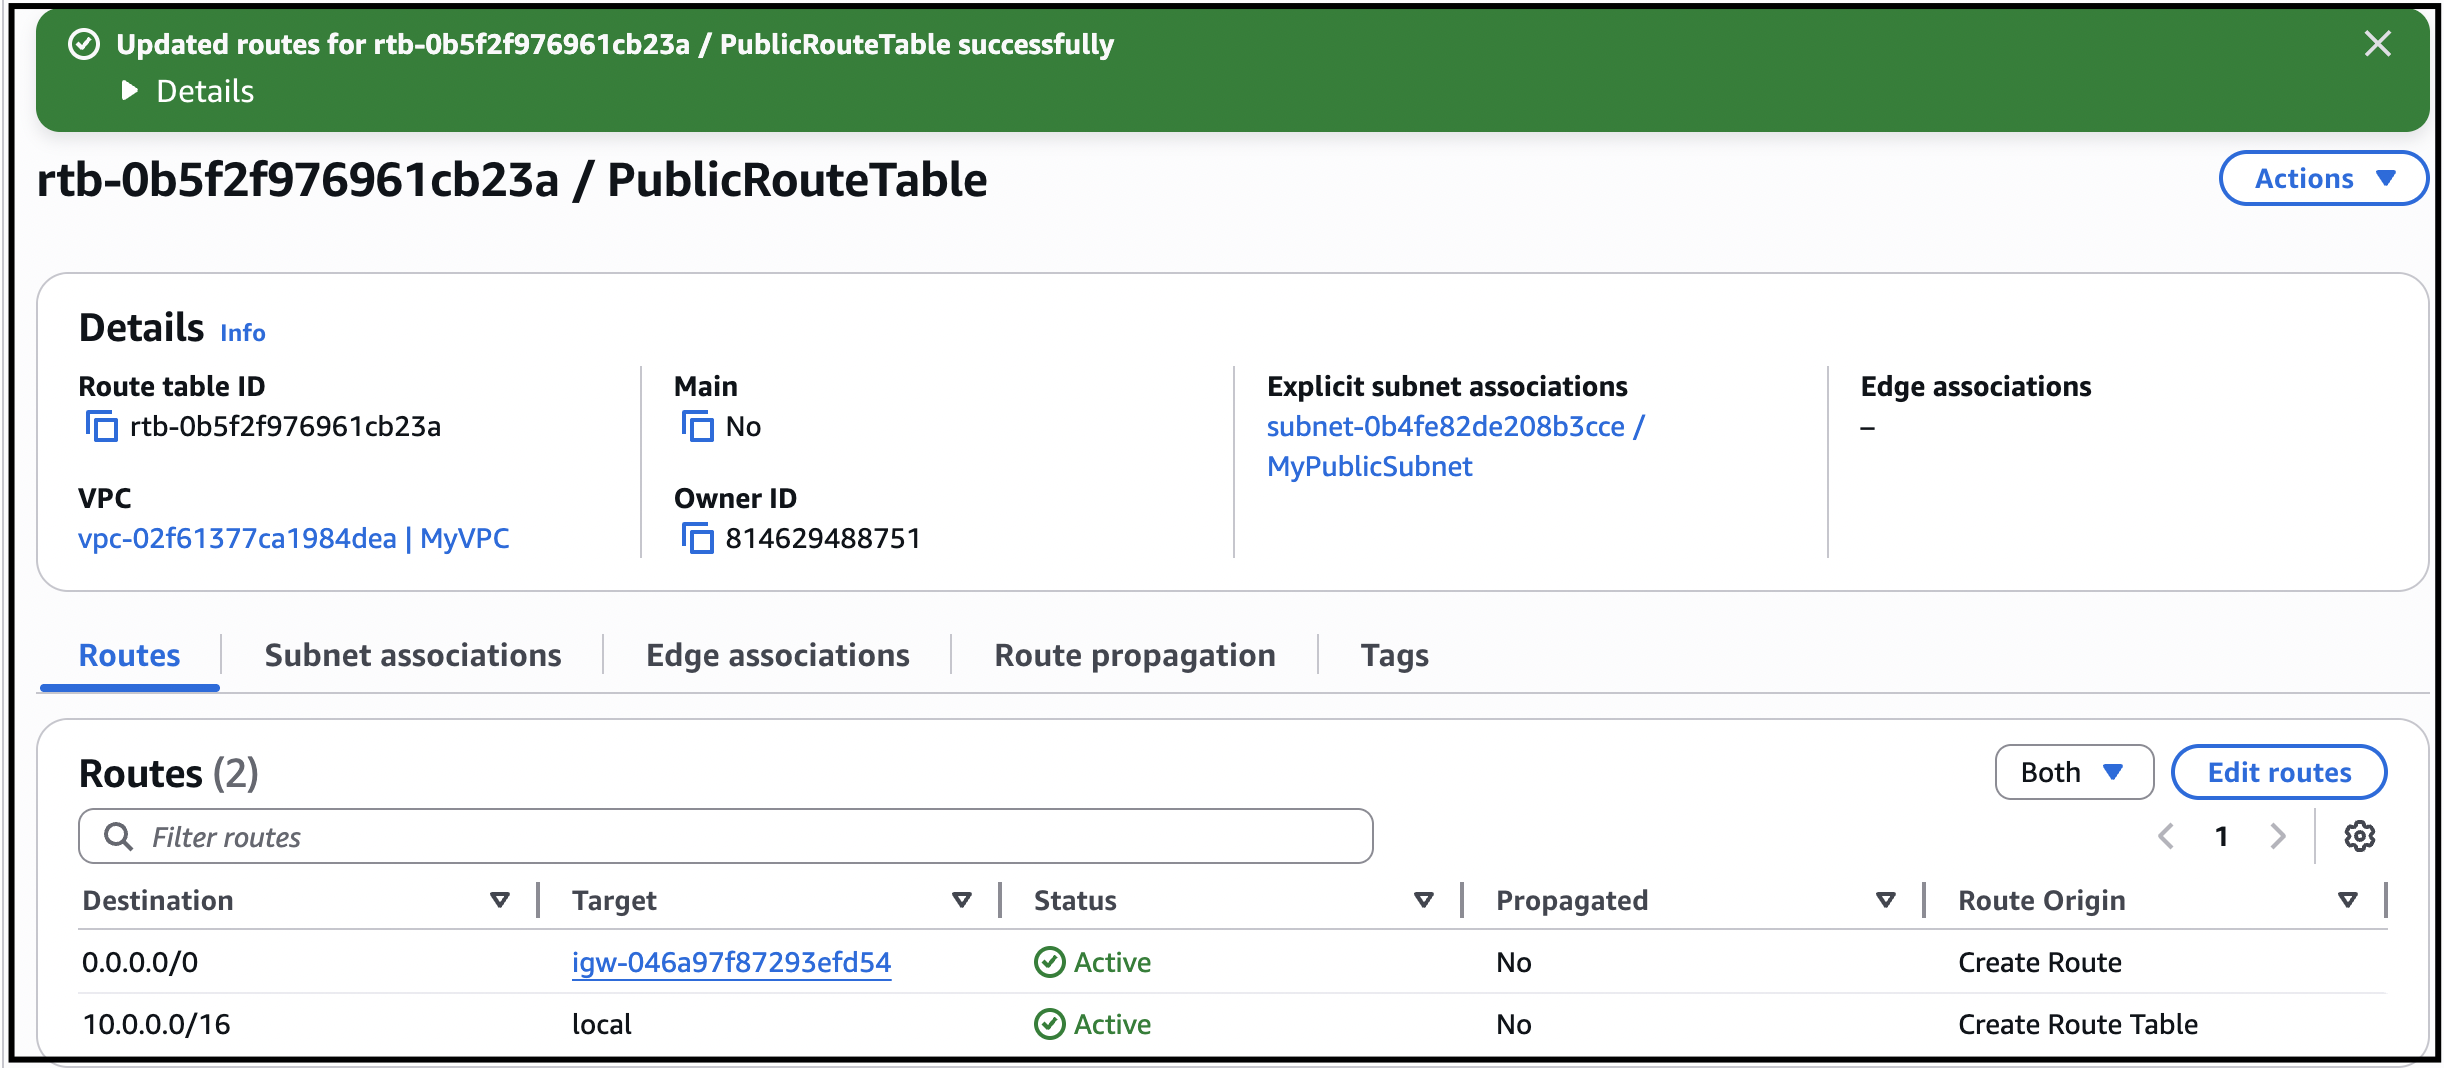
- Click on Add route button, Specify the following values: Destination: Enter 0.0.0.0/0 Target: Select Internet Gateway from the dropdown menu to select MyInternetGateway. Click on Save changes button.
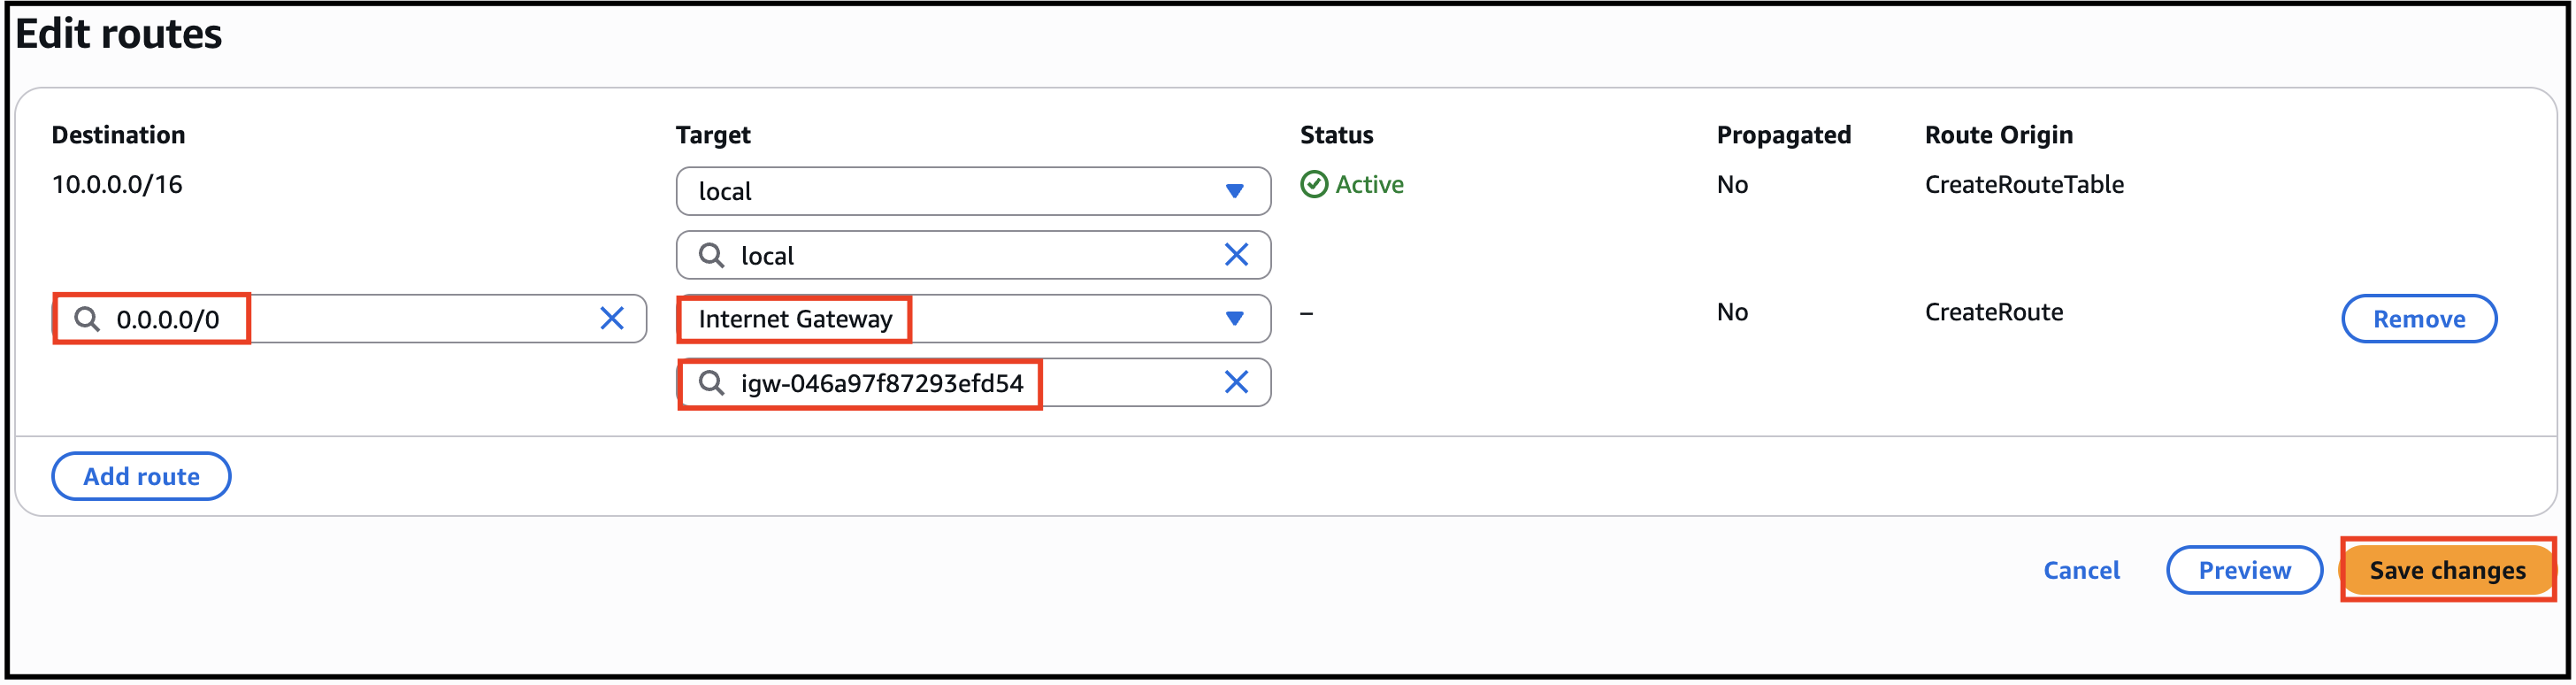

- Click on Add route button, Specify the following values:
- Destination: Enter 0.0.0.0/0
- Target: Select Internet Gateway from the dropdown menu to select MyInternetGateway.
- Click on Save changes button.


- Task 5: Create Route Tables


- VPC Flow Logs capture information about the IP traffic flowing in and out of your VPC. It provides detailed insights into network traffic patterns, helping you analyze and troubleshoot connectivity issues, monitor security, and meet compliance requirements.
- Once the lab steps are completed, please click on the Validation button on the left side panel.
- This will validate the resources in the AWS account and shows you whether you have completed this lab successfully or not.
- Sample output :
- Task 6 : Validation Test
- You have successfully completed and learned how to create public and private subnets.
- You have learned how to create an Internet Gateway and associate it to VPC.
- You now understand how public and private subnets are different (through associating Internet Gateway or not).
- The instances launched inside the public subnet will be able to access the internet and instances launched inside the private subnet will not have access to the internet.
- Sign out from the AWS Management Console.
- Click on End Lab button from the lab console and wait till the process gets completed