Advanced01:30:00
Access S3 from Private EC2 instance using VPC Endpoint
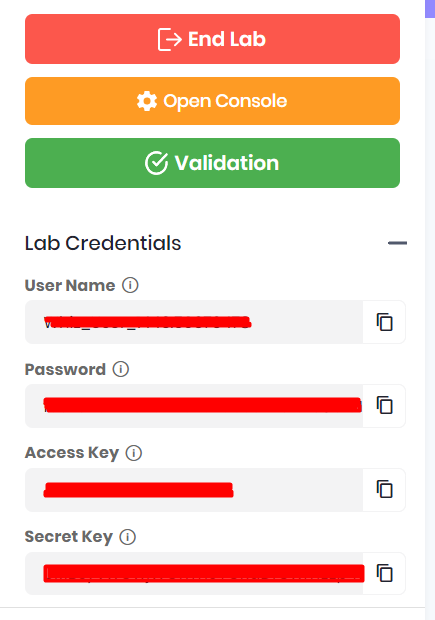
- Click on the Open Console button, and you will get redirected to AWS Console in a new browser tab.
- On the AWS sign-in page,
- Leave the Account ID as default. Never edit/remove the 12 digit Account ID present in the AWS Console. otherwise, you cannot proceed with the lab.
- Now copy your User Name and Password in the Lab Console to the IAM Username and Password in AWS Console and click on the Sign in button
- Once Signed In to the AWS Management Console, Make the default AWS Region as US East (N. Virginia) us-east-1.
- Make sure you are in the N.Virginia Region.
- Navigate to VPC by clicking on the Services menu at the top, then click on VPC in the Network and Content Delivery section.
- To create a VPC click on Your VPCs the present in the VIRTUAL PRIVATE CLOUD section on the left sidebar.
- Create a new VPC by clicking on the Create VPC button.
- Task 2: Create a VPC

- Select VPC only.
- Name tag - optional:Enter MyVPC
- IPv4 CIDR block: Enter 192.168.0.0/26
- IPv6 CIDR block: No IPv6 CIDR block
- Tenancy: Default
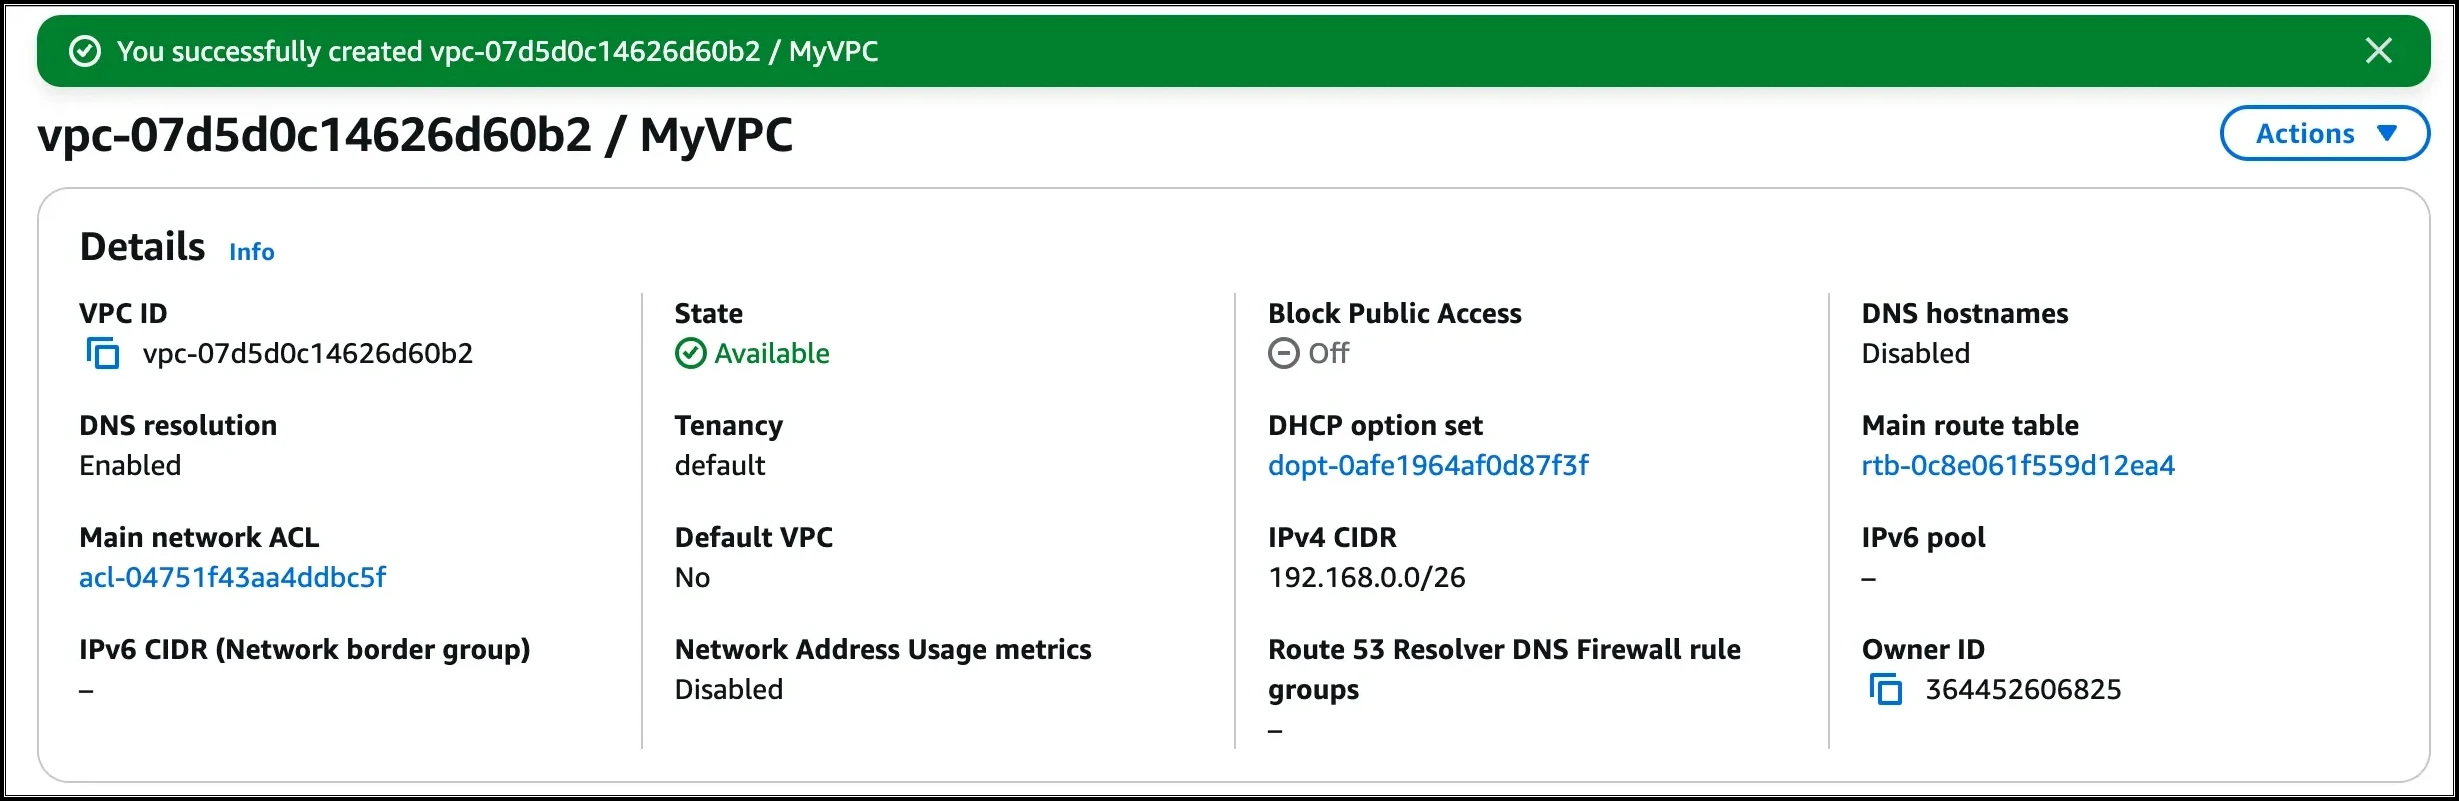
- Click on the Create VPC button to create the MyVPC.
- VPC is now created.
- Task 2: Create a VPC
- By default, instances that are launched in a VPC cannot communicate with the Internet. To enable Internet access, an Internet gateway needed to be attached to the VPC.
- Click on Internet Gateways from the left menu and click on Create internet gateway.

- Task 3: Create and attach an Internet Gateway with custom VPC

- Name Tag : Enter MyInternetGateway
- Click on Create internet gateway.
- Select the Internet gateway you created from the list.
- Click on Actions.
- Select the Attach to VPC.
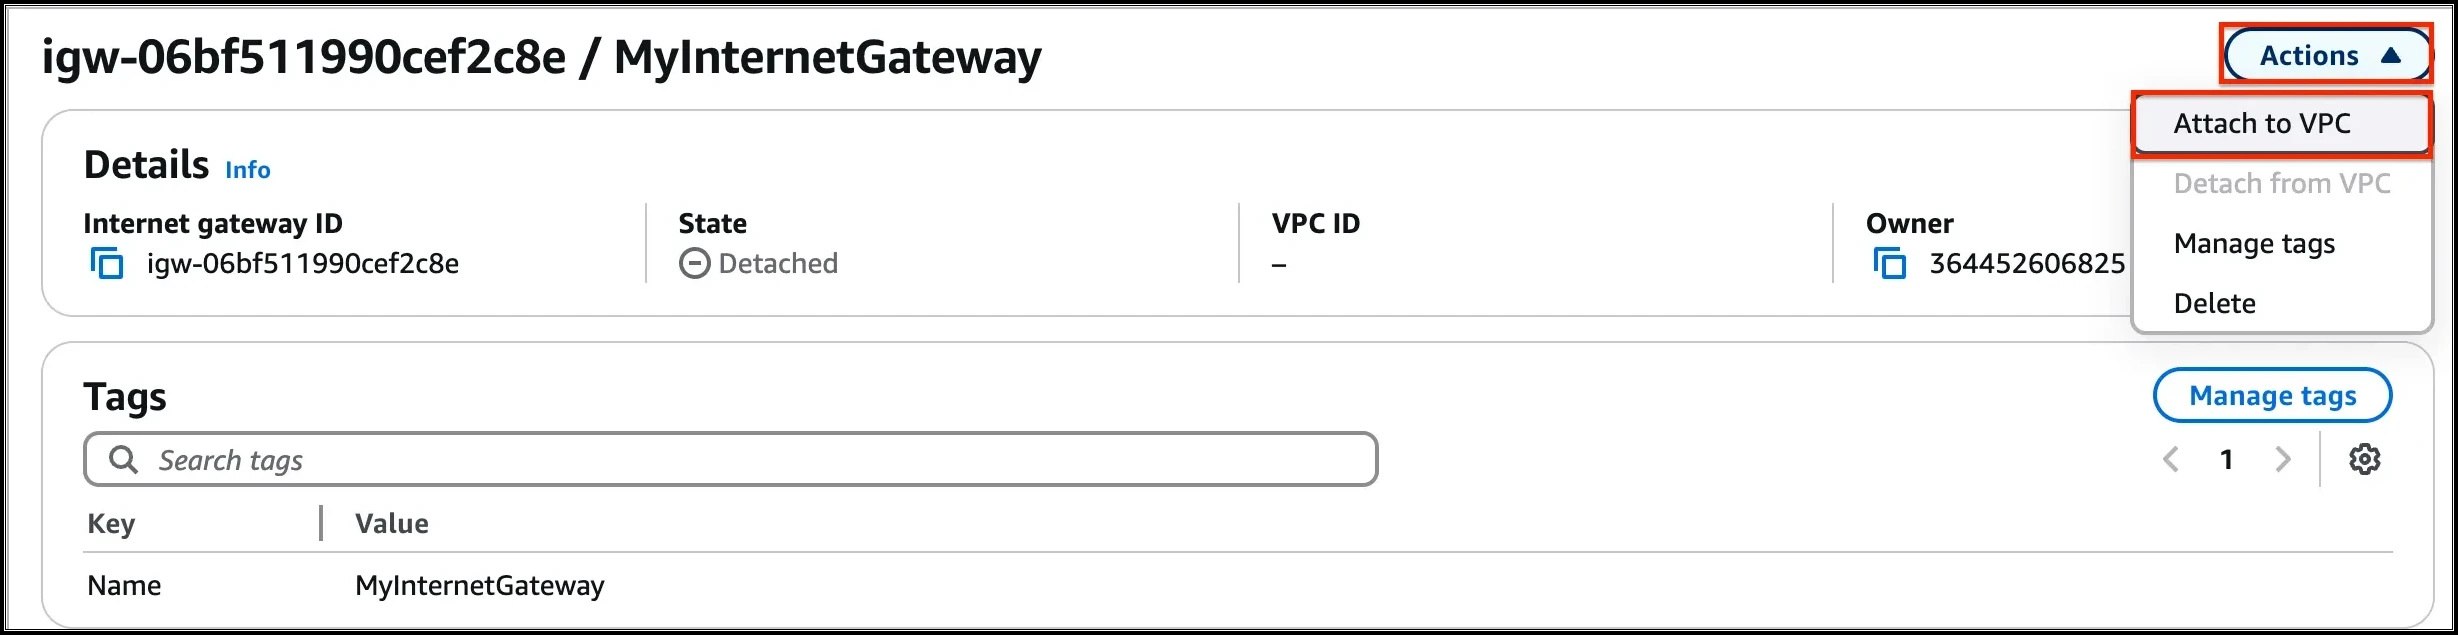
- Task 3: Create and attach an Internet Gateway with custom VPC

- Available VPCs: Select the MyVPC
- Task 3: Create and attach an Internet Gateway with custom VPC

- And click on the Attach internet gateway button.
- The Internet gateway is now attached with MyVPC.
- Task 3: Create and attach an Internet Gateway with custom VPC

- To create a subnet click on Subnets the present in the VIRTUAL PRIVATE CLOUD section on the left sidebar.
- Click on the Create Subnet button.

- Task 4: Create a Public and Private Subnet

- In the VPC ID, select MyVPC.
- Task 4: Create a Public and Private Subnet
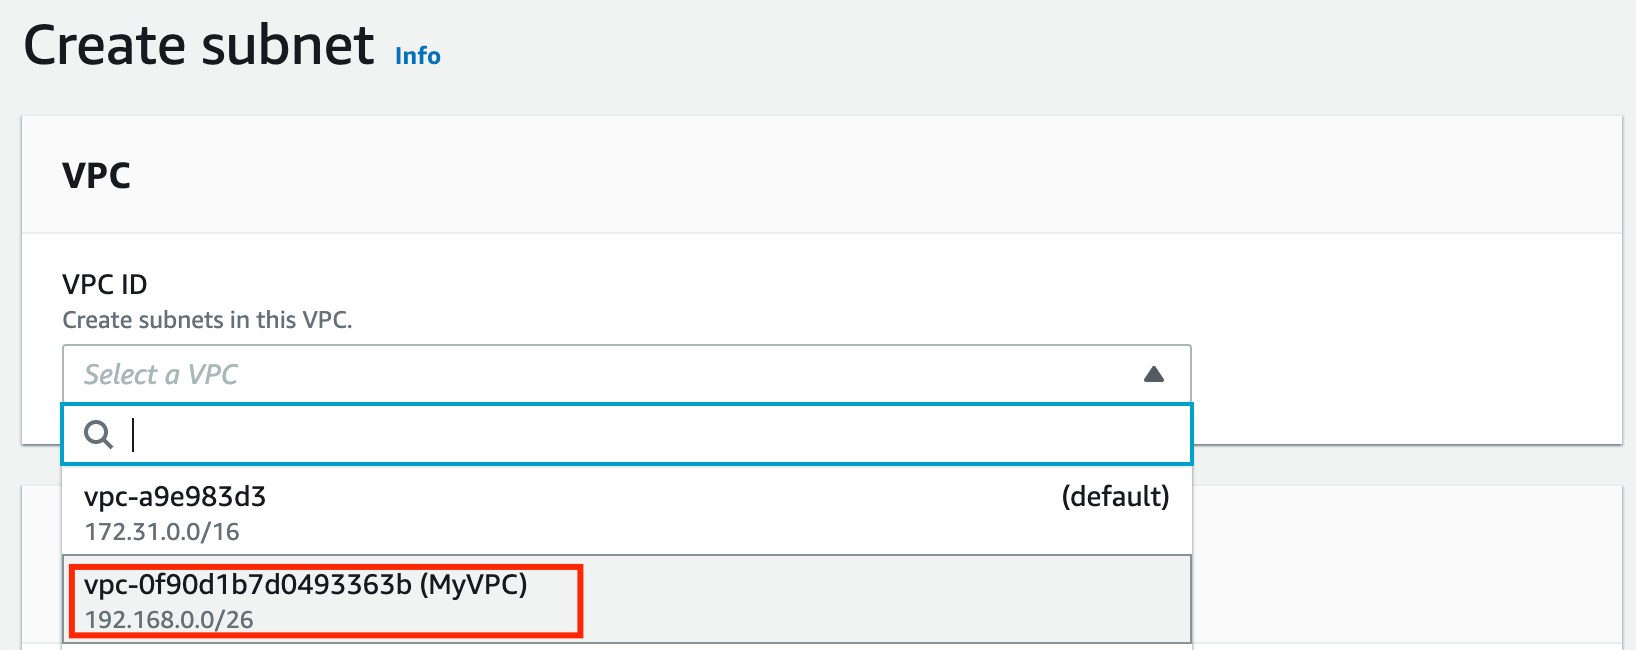
- Create the first subnet, you will use this subnet to launch public instances, this subnet will be associated with the main route table of the VPC:
- Select the MyVPC from the drop-down.
- Subnet name: Enter Public subnet
- Availability Zone: Select US East (N. Virginia) / us-east-1a
- IPV4 CIDR block: Enter 192.168.0.1/27
- Click on the Create subnet button to create the subnet.
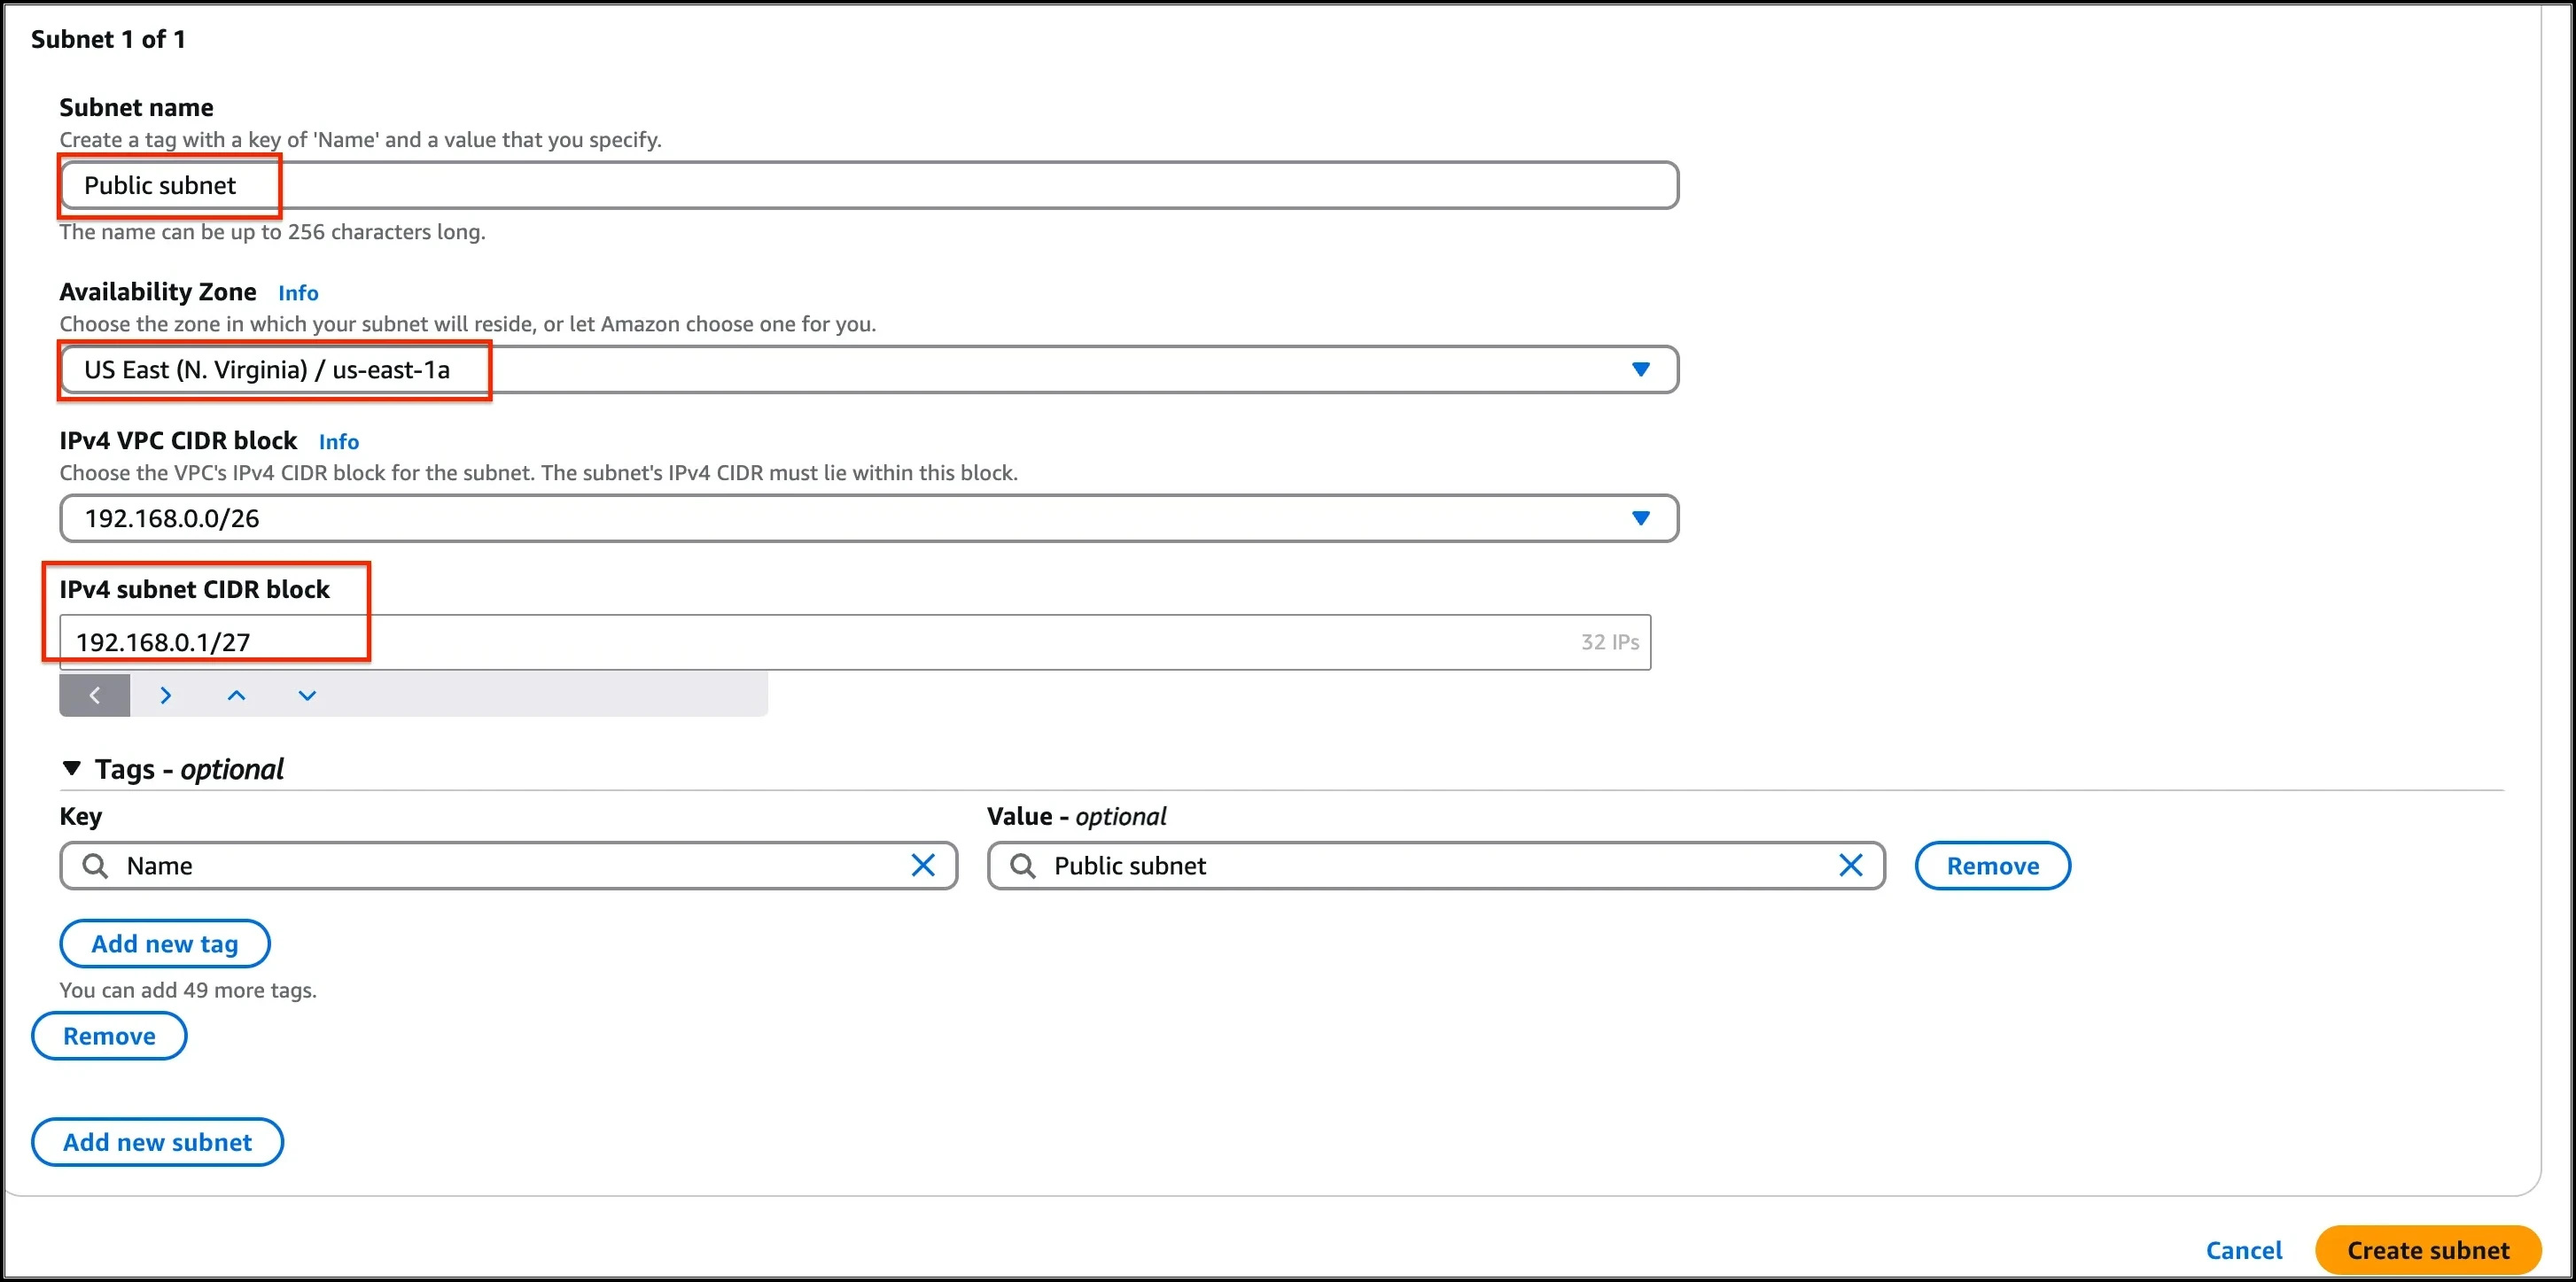
- Task 4: Create a Public and Private Subnet

- Create another subnet, click on the Create subnet button.
- The second will be called Private subnet, you will use this subnet to launch private instances, this subnet will be associated with a custom route table of the same VPC:
- Select the MyVPC from the drop-down.
- Subnet name: Enter Private subnet
- Availability Zone: Select US East (N. Virginia) / us-east-1b
- IPV4 CIDR block: Enter 192.168.0.32/27
- Finally, click on the Create Subnet button.
- Both the subnets are now created.
- Task 4: Create a Public and Private Subnet

- To modify the auto-assign IP settings for the Public subnet, do the following: Select the Public subnet Click on the Actions button Choose Edit subnet settings from the options.

- To modify the auto-assign IP settings for the Public subnet, do the following:
- Select the Public subnet
- Click on the Actions button
- Choose Edit subnet settings from the options.

- Check the option Enable auto-assign public IPv4 address under Auto-assign IP settings.
- Task 5: Configure the Public subnet to enable auto-assign public IPv4 address
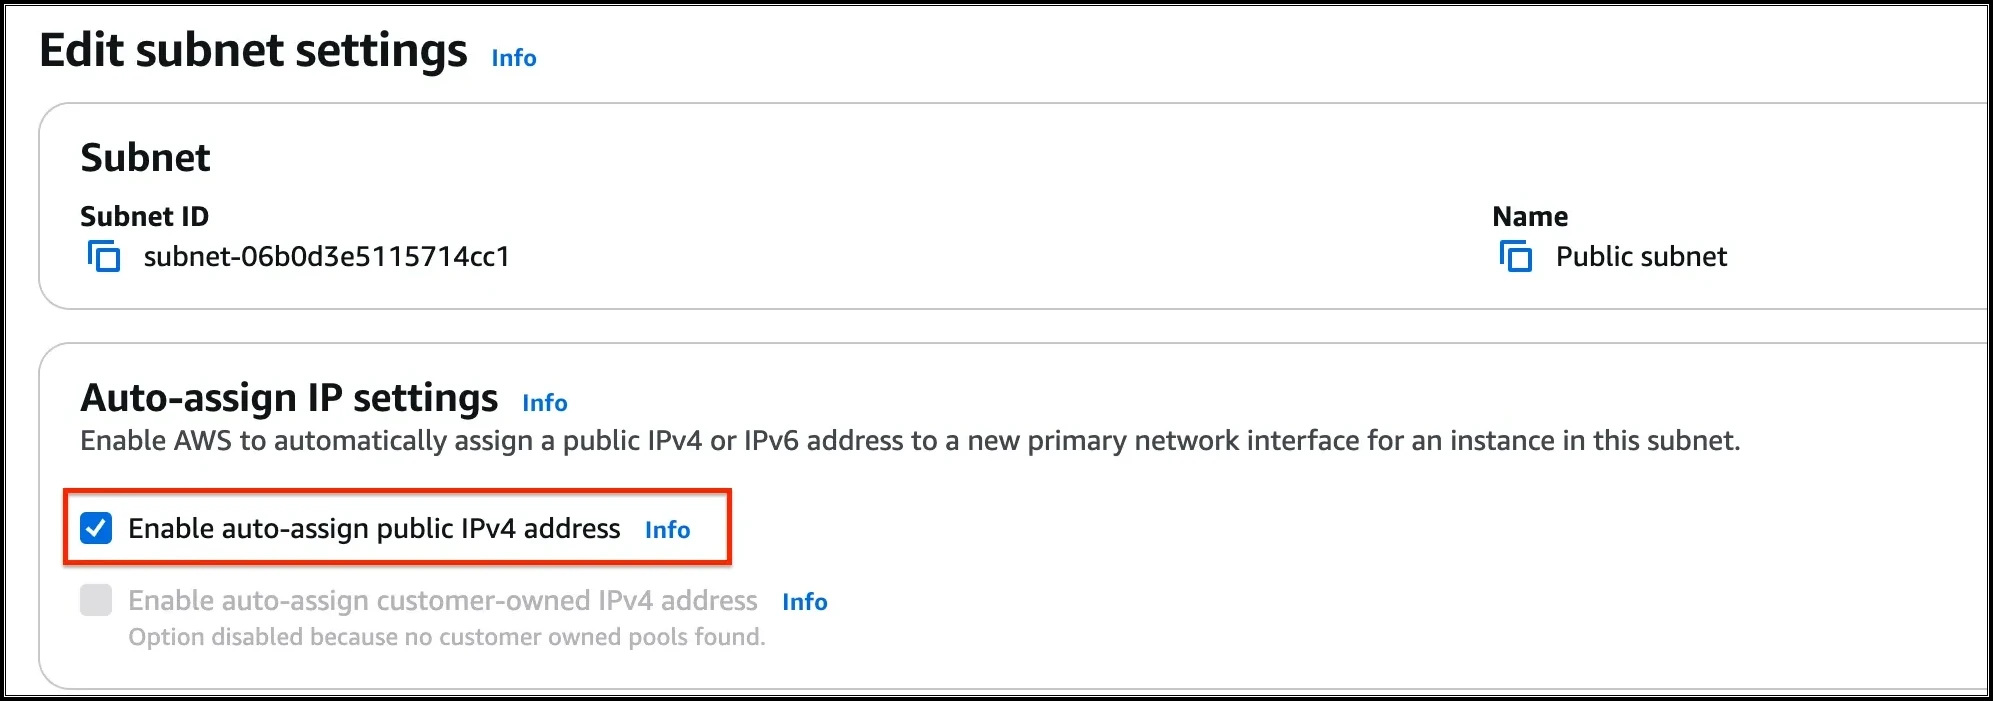
- Click on Save button and modification is done now.
- Task 5: Configure the Public subnet to enable auto-assign public IPv4 address

- In this task, we are going to create public route tables and associate it with the subnet.
- Go to Route Tables from the left menu and click on Create route table button.Name: Enter PublicRouteTableVPC: Select MyVPC from the list.Click on Create route table button.

- Go to Route Tables from the left menu and click on Create route table button.
- Name: Enter PublicRouteTable
- VPC: Select MyVPC from the list.
- Click on Create route table button.
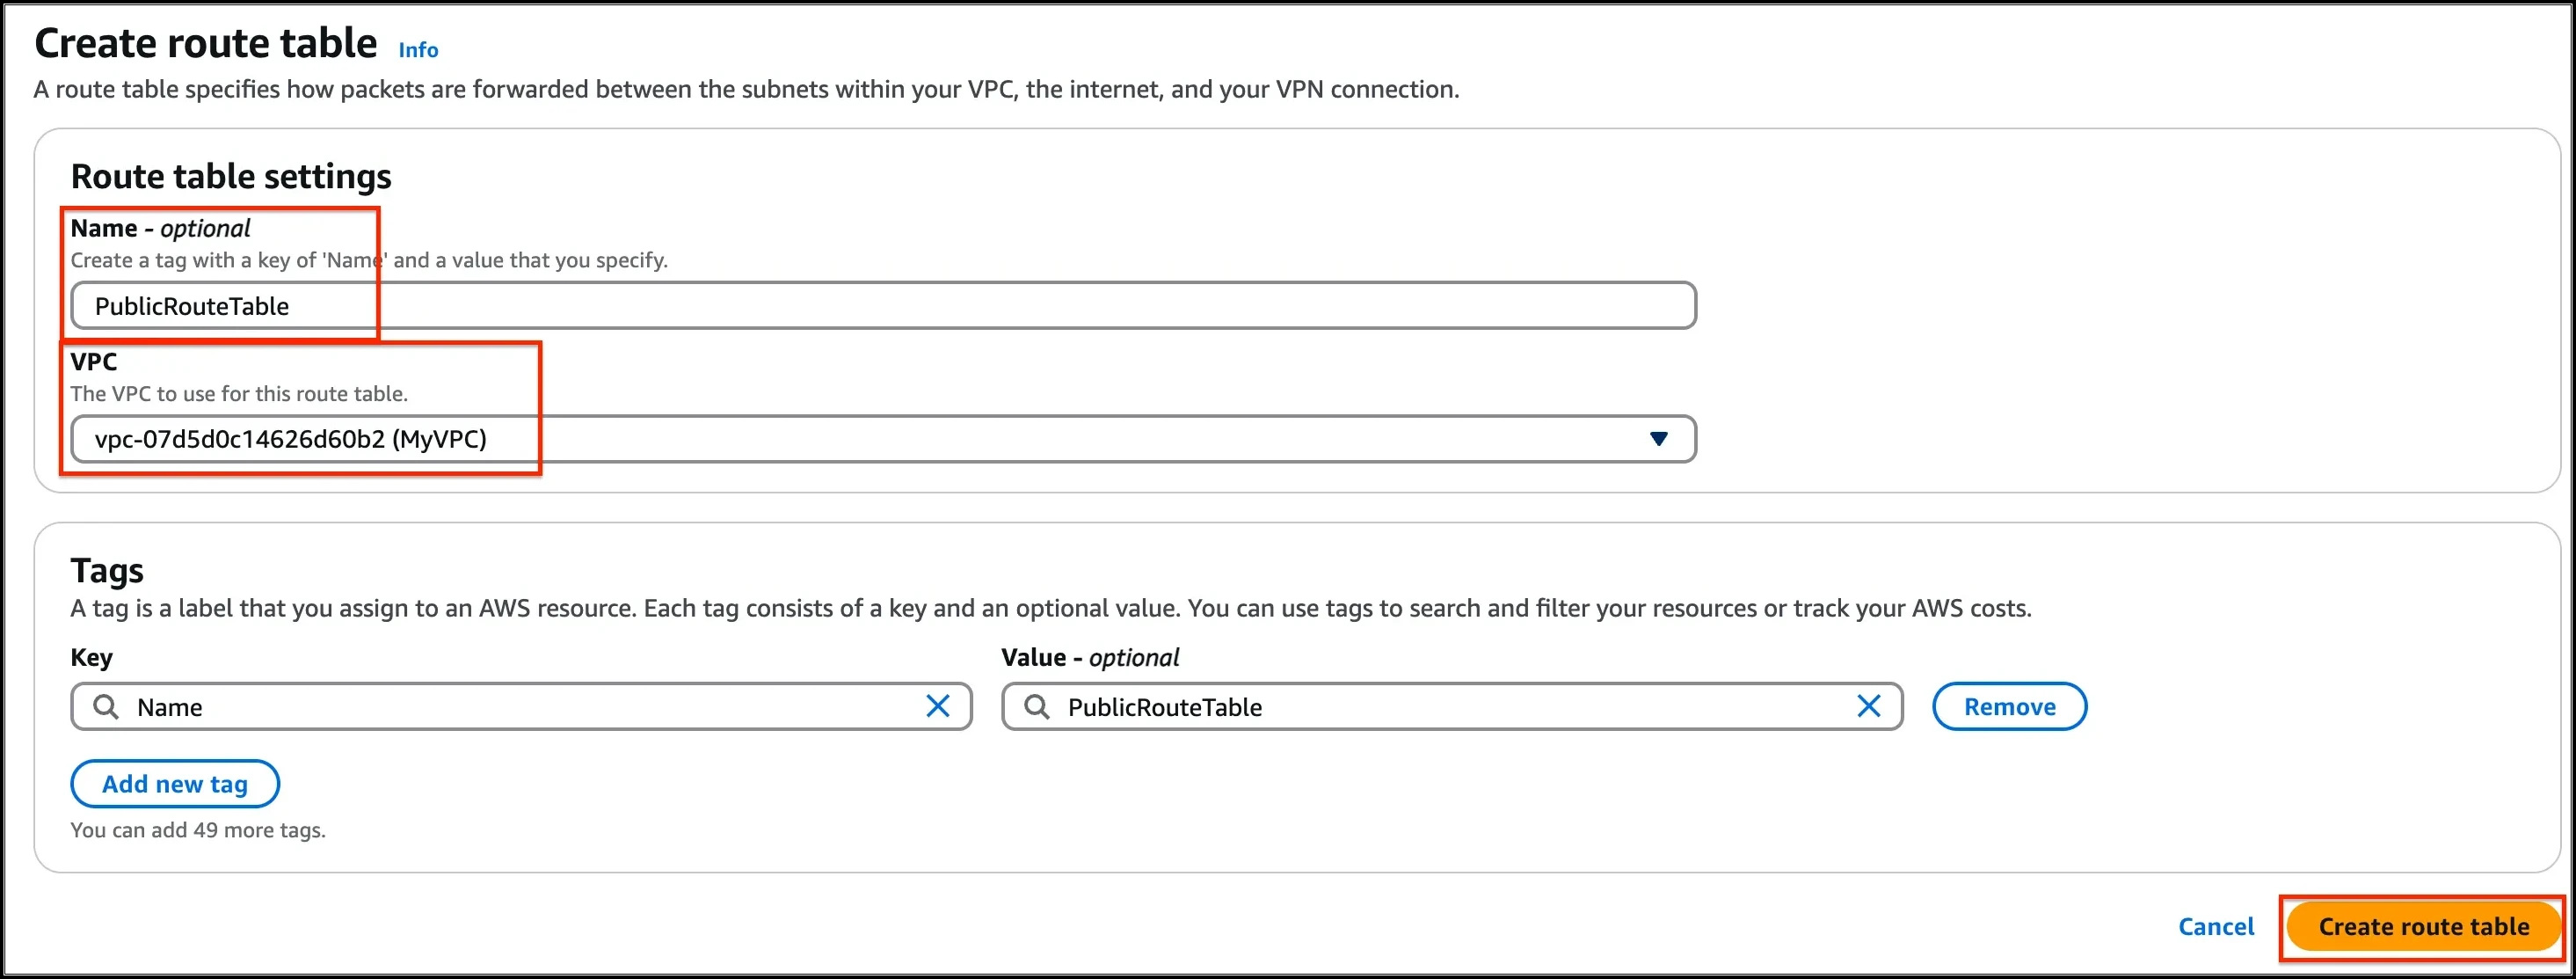
- Task 6: Create a Route Table for the Public subnet

- Repeat the same steps to create a route table for the Private subnet.Name: Enter PrivateRouteTableVPC: Select MyVPC from the list.Click on Create route table button.
- Repeat the same steps to create a route table for the Private subnet.
- Name: Enter PrivateRouteTable
- VPC: Select MyVPC from the list.
- Click on Create route table button.
- Now we will associate the subnets to the route tables.
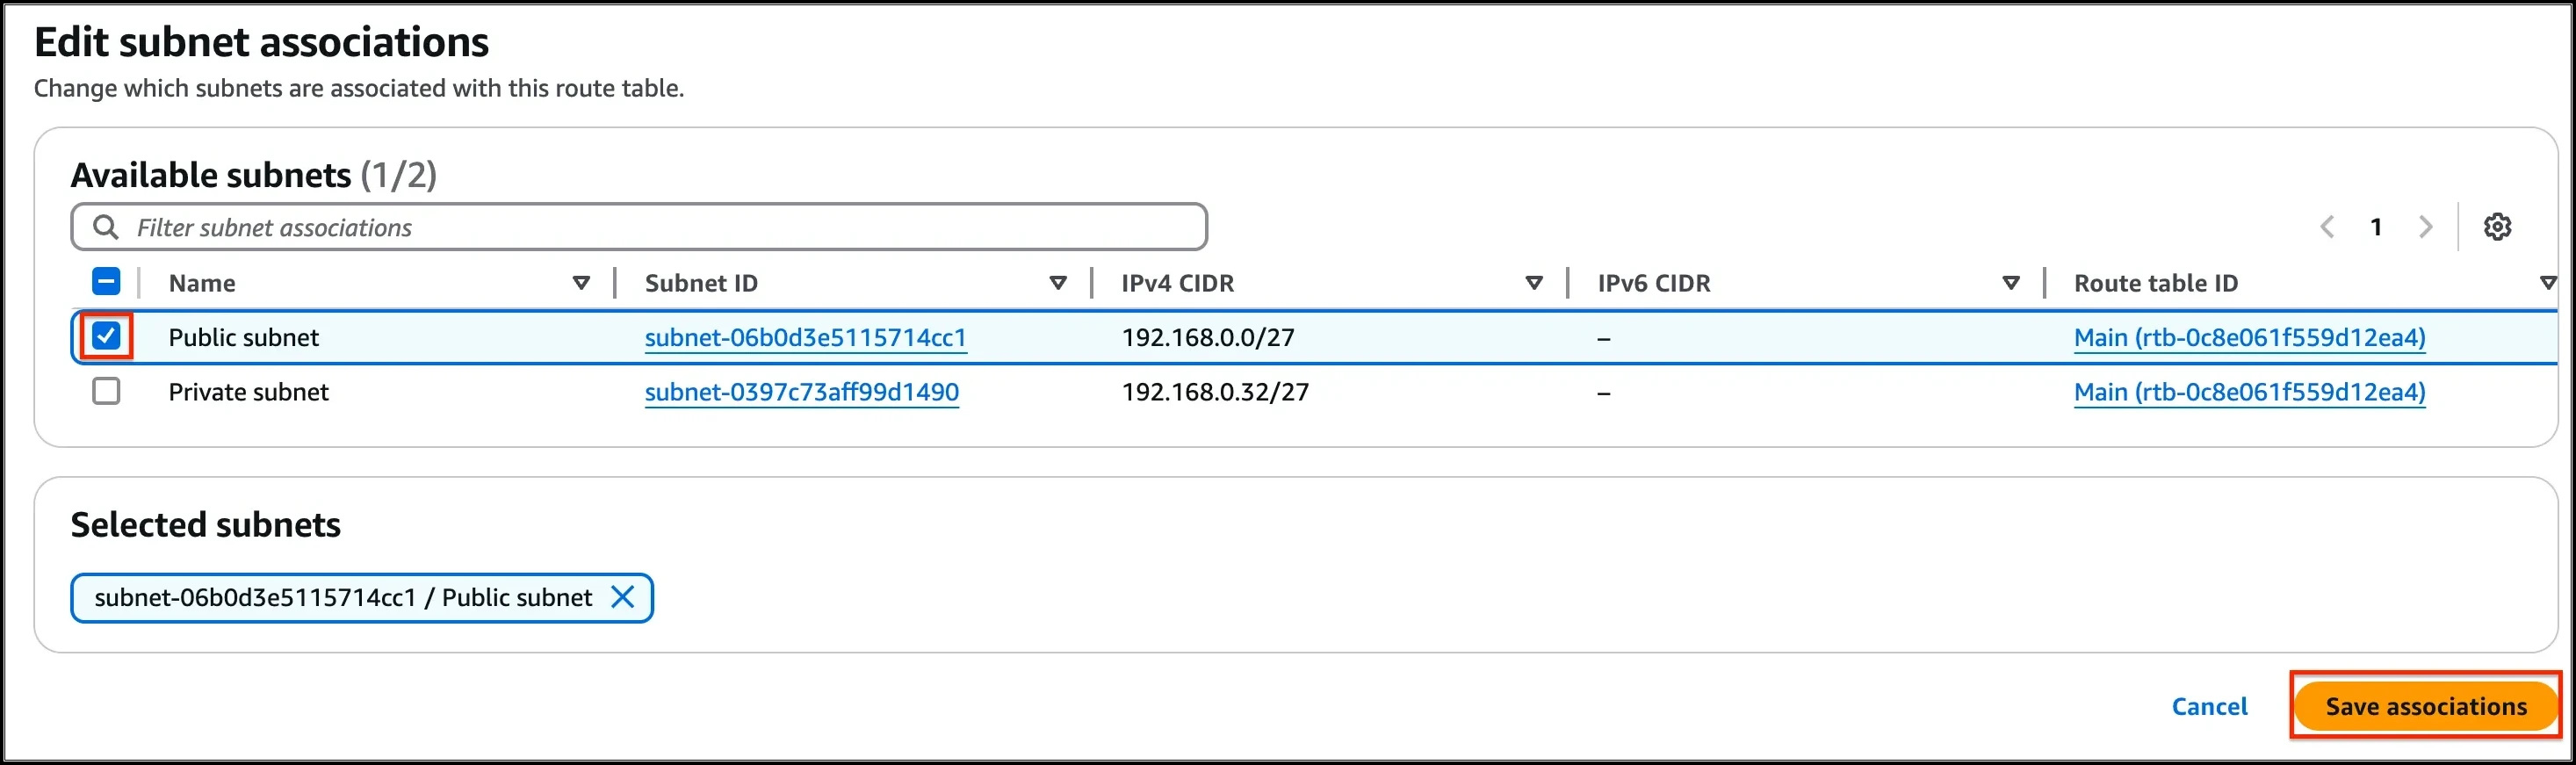
- Select the PublicRouteTable and go to the Subnet Associations tab.Click on Edit subnet associations.Select MyPublicSubnet from the list.Click on Save associations button.

- Select the PublicRouteTable and go to the Subnet Associations tab.
- Click on Edit subnet associations.
- Select MyPublicSubnet from the list.
- Click on Save associations button.

- Task 6: Create a Route Table for the Public subnet
- Select the PrivateRouteTable and go to the Subnet Associations tab.Click on Edit subnet associations.Select MyPrivateSubnet from the list.Click on Save associations button.
- Select the PrivateRouteTable and go to the Subnet Associations tab.
- Click on Edit subnet associations.
- Select MyPrivateSubnet from the list.
- Click on Save associations button.
- Make sure not to associate any subnets with the Main Route Table.
- PublicRouteTable: Add a route to allow Internet traffic to the VPC.Select PublicRouteTable.Go to Routes tab, click on Edit routes and on the next page, click on Add route button.Specify the following values: Destination: Enter 0.0.0.0/0Target: Select Internet Gateway from the dropdown menu to select MyInternetGateway.Click on Save changes button.
- PublicRouteTable: Add a route to allow Internet traffic to the VPC.
- Select PublicRouteTable.
- Go to Routes tab, click on Edit routes and on the next page, click on Add route button.
- Specify the following values: Destination: Enter 0.0.0.0/0Target: Select Internet Gateway from the dropdown menu to select MyInternetGateway.Click on Save changes button.
- Specify the following values:
- Destination: Enter 0.0.0.0/0
- Target: Select Internet Gateway from the dropdown menu to select MyInternetGateway.
- Click on Save changes button.
- In this lab, we will create two security groups, the first one will be used for Bastion host and the second one for private instance having access to VPC Endpoint for S3.
- To get started with creating security groups, click on the Security groups , present in the SECURITY section in the left sidebar.
- Click on the Create Security group button
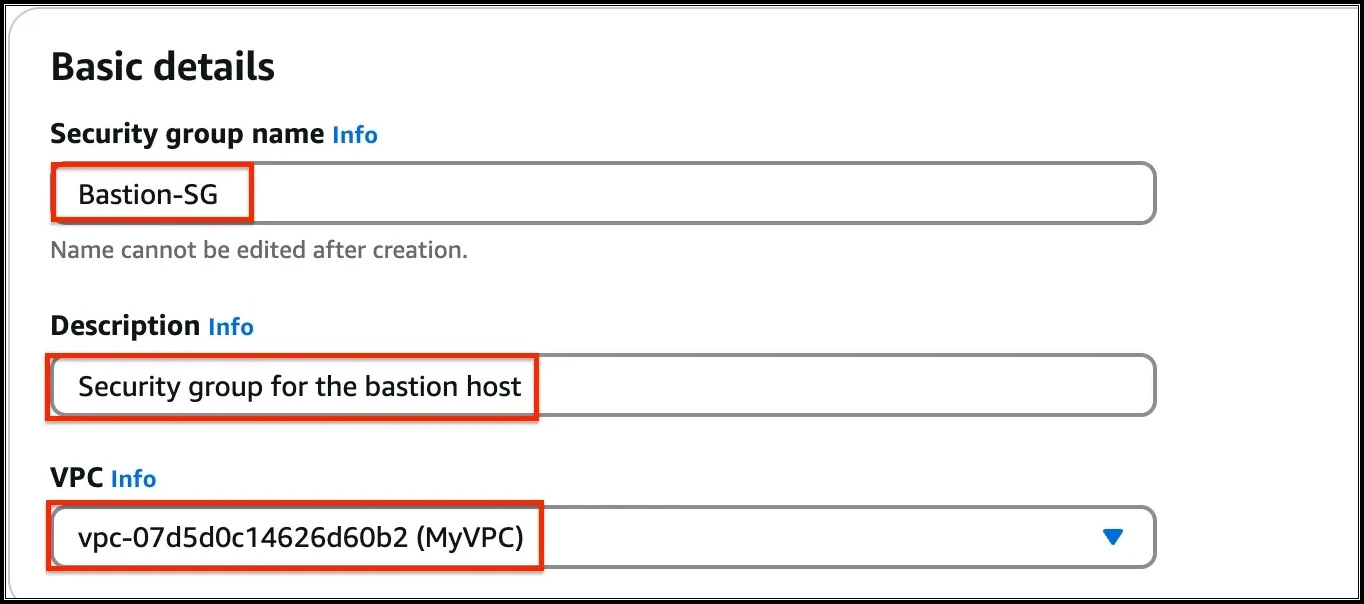
- Fill in the below details under Basic details:
- Enter Security group name as Bastion-SG
- Enter Description as Security group for the bastion host
- Select the MyVPC under the VPC field.

- Task 7: Create Security groups
- By default, no inbound rule will be allowed, and when you check in the outbound rules, there is only one rule present that has a Type with All traffic because Security groups are Stateful in nature, when inbound is allowed outbound is also allowed.
- To add the Inbound rules for the same, click on the Add rule button.
- We will add 3 rules for the Bastion host security group i.e. SSH, HTTP, and HTTPS.
- For the first rule, Select the Type as SSH, Source as Anywhere-IPv4 and enter 0.0.0.0/0
- For the second rule, click on the Add rule button. Select the Type as HTTP, Source as Anywhere-IPv4 and enter 0.0.0.0/0
- For the third rule, click on the Add rule button. Select the Type as HTTPS, Source as Anywhere-IPv4 and enter 0.0.0.0/0
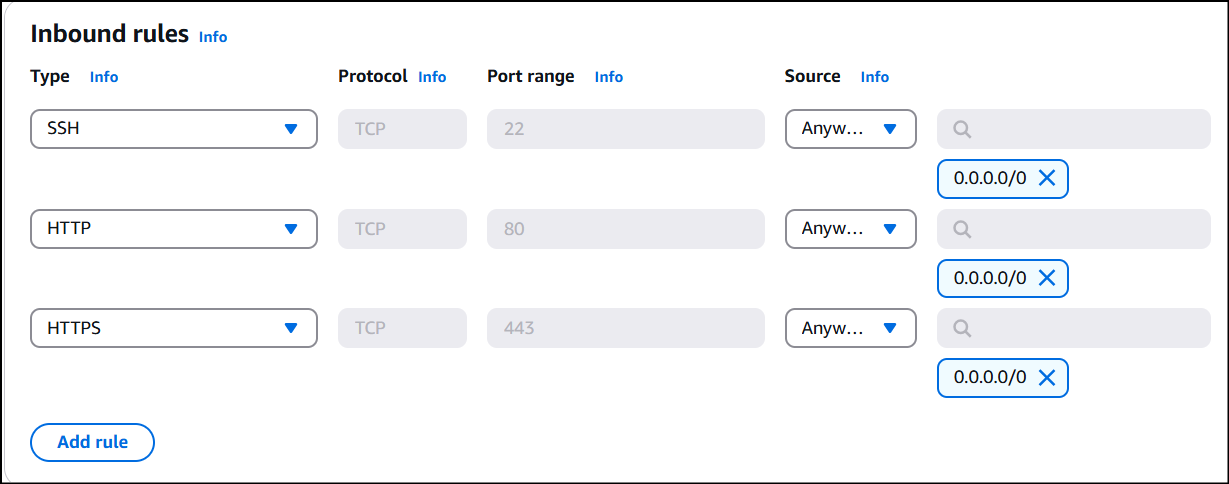
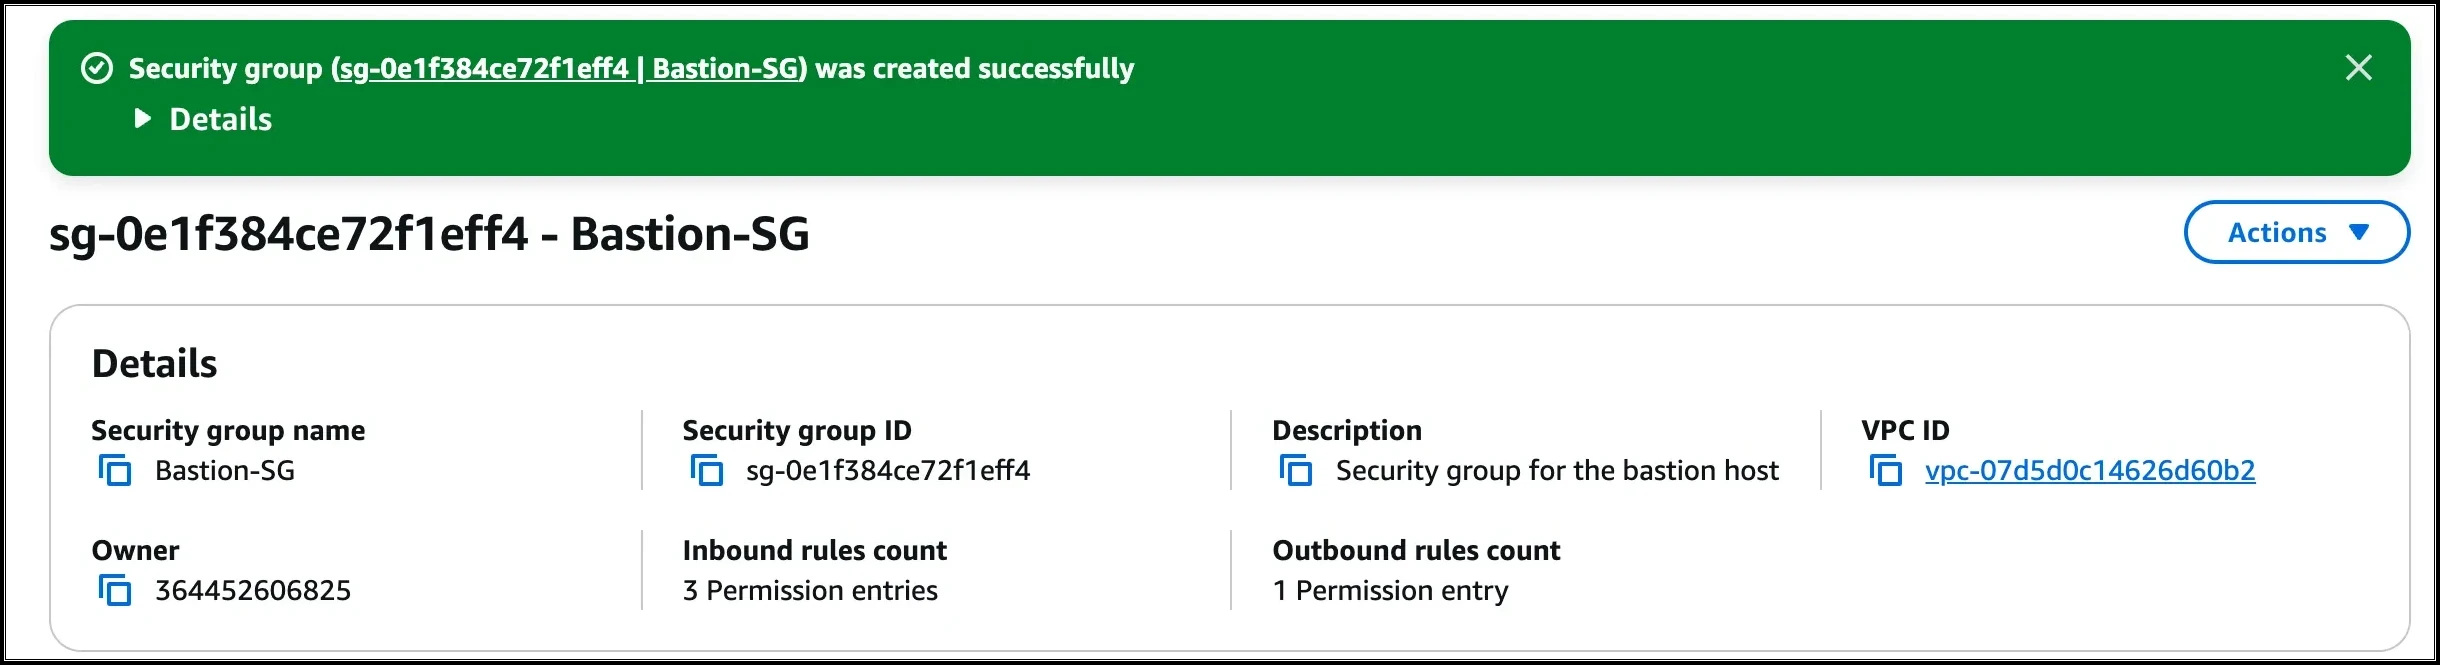
- Finally, click on the Create Security group button.
- The security group for the Bastion host is now created.
- Task 7: Create Security groups
- Click on the Security groups button, present in the SECURITY section in the left sidebar.
- To create the second security group, click on the Create Security Group button.
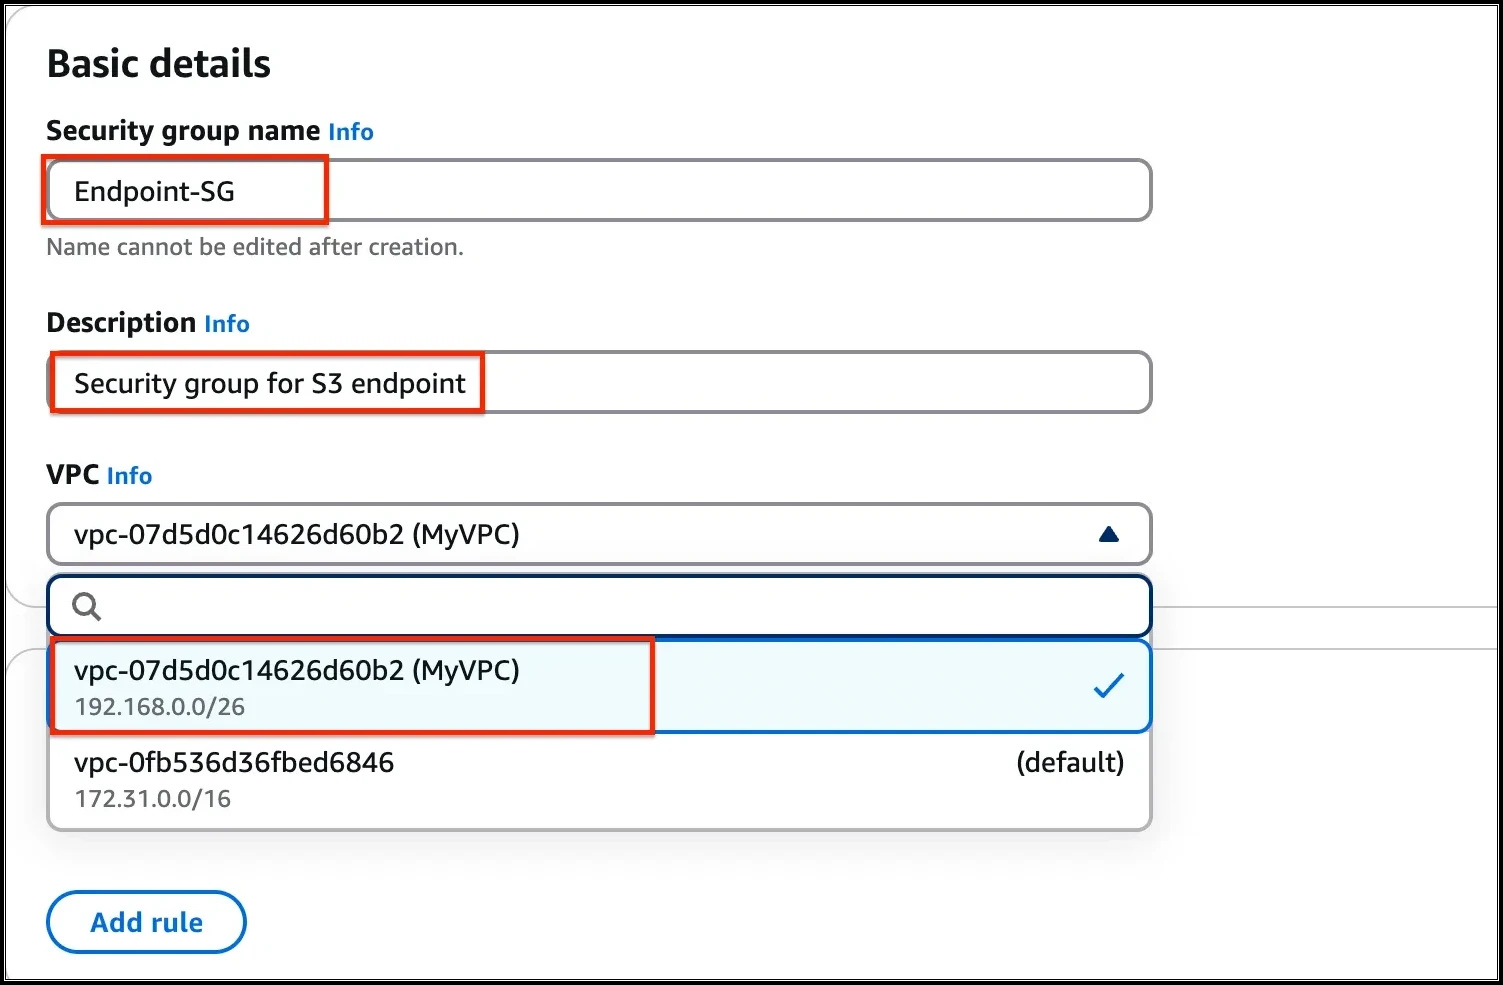
- Fill in the below details under Basic details:
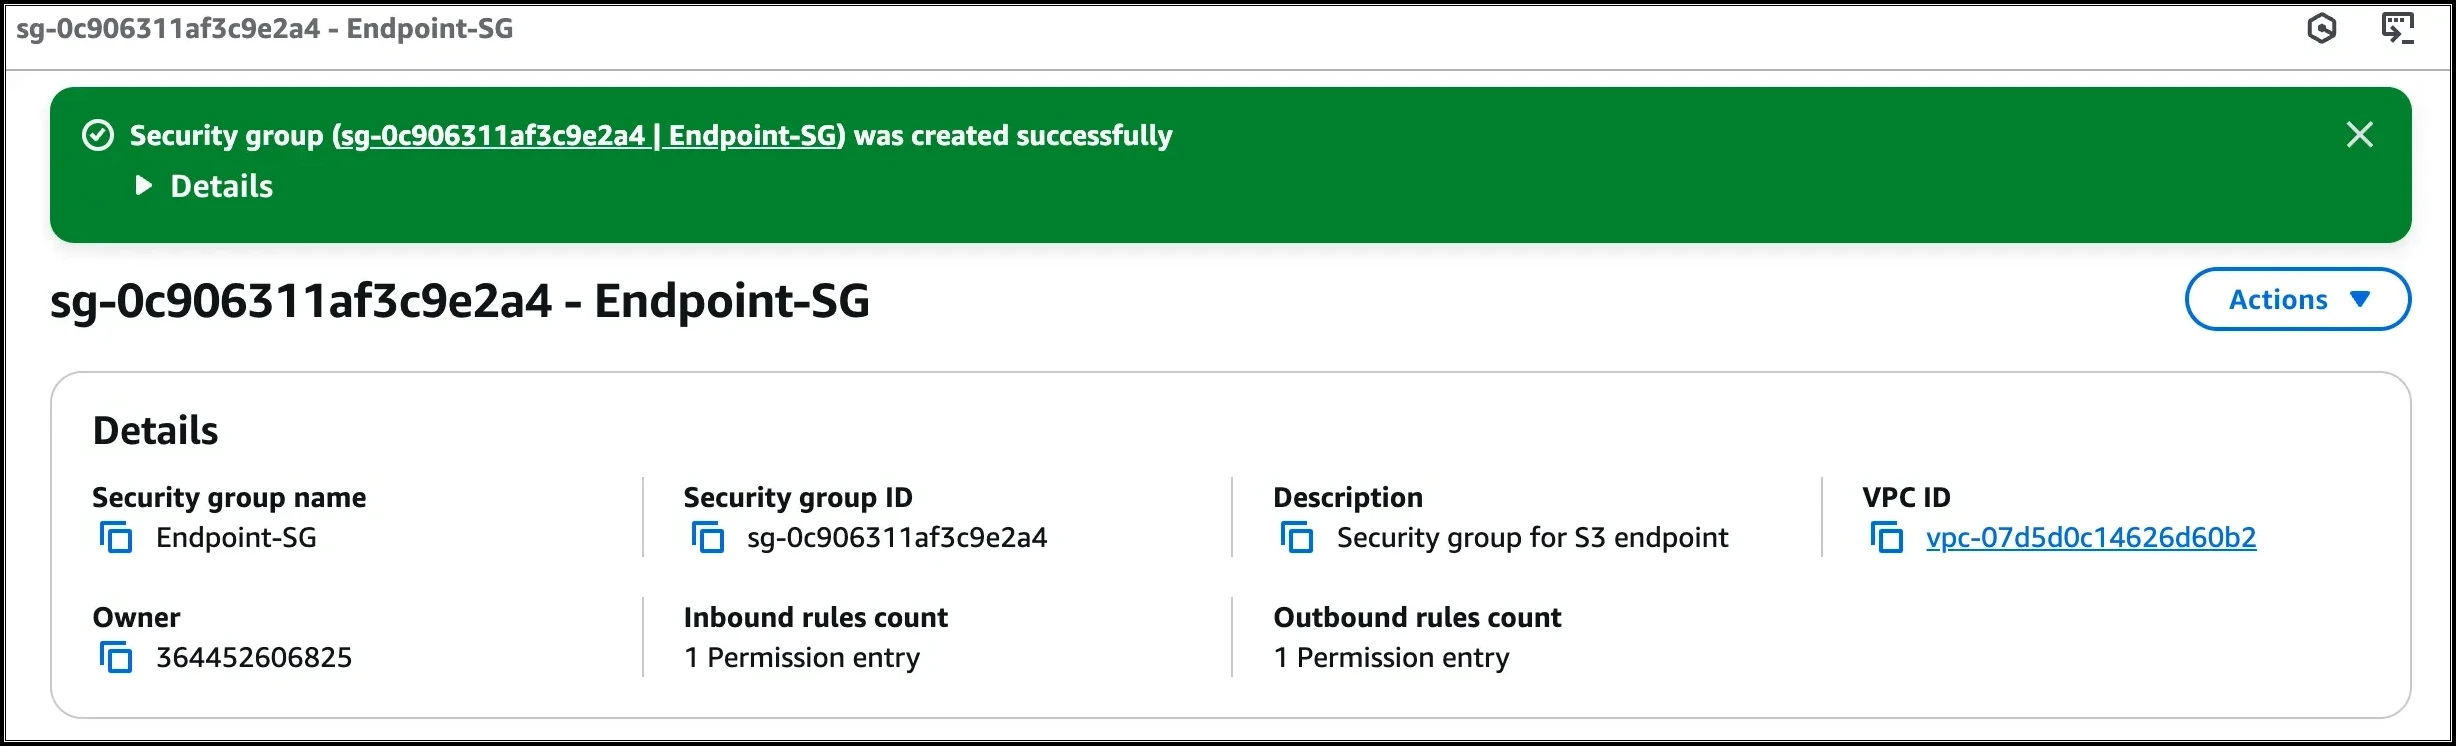
- Enter Security group name as Endpoint-SG
- Enter Description as Security group for S3 endpoint
- Select the MyVPC under the VPC field.

- Task 7: Create Security groups
- To add the Inbound rules for the same, click on the Add rule button.
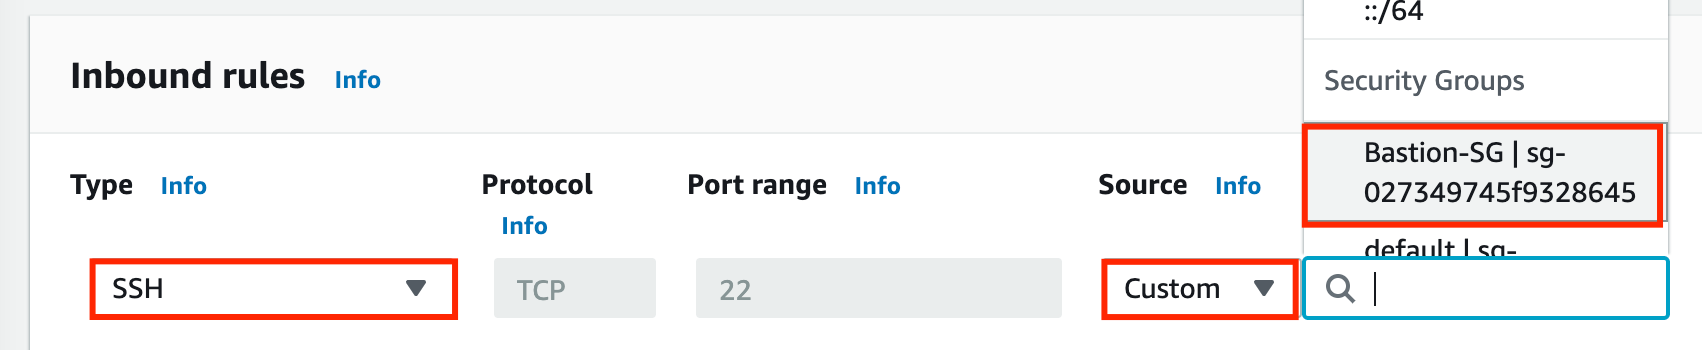
- We will add 1 rule for the S3 endpoint security group i.e. SSH only. But here our source will be Bastion host security group,
- you will select the ID of Bastion-SG security group.
- For the rule, select the Type as SSH, Source as Custom, and type Bastion, Bastion hosts security group will be shown, select that Security group.
- Task 7: Create Security groups
- Finally, click on the Create Security group button.
- The security group for the Bastion host is now created. And, it will be listed there.
- Task 7: Create Security groups
- Navigate to EC2 by clicking on the Services menu at the top, then click on EC2 in the Compute section.
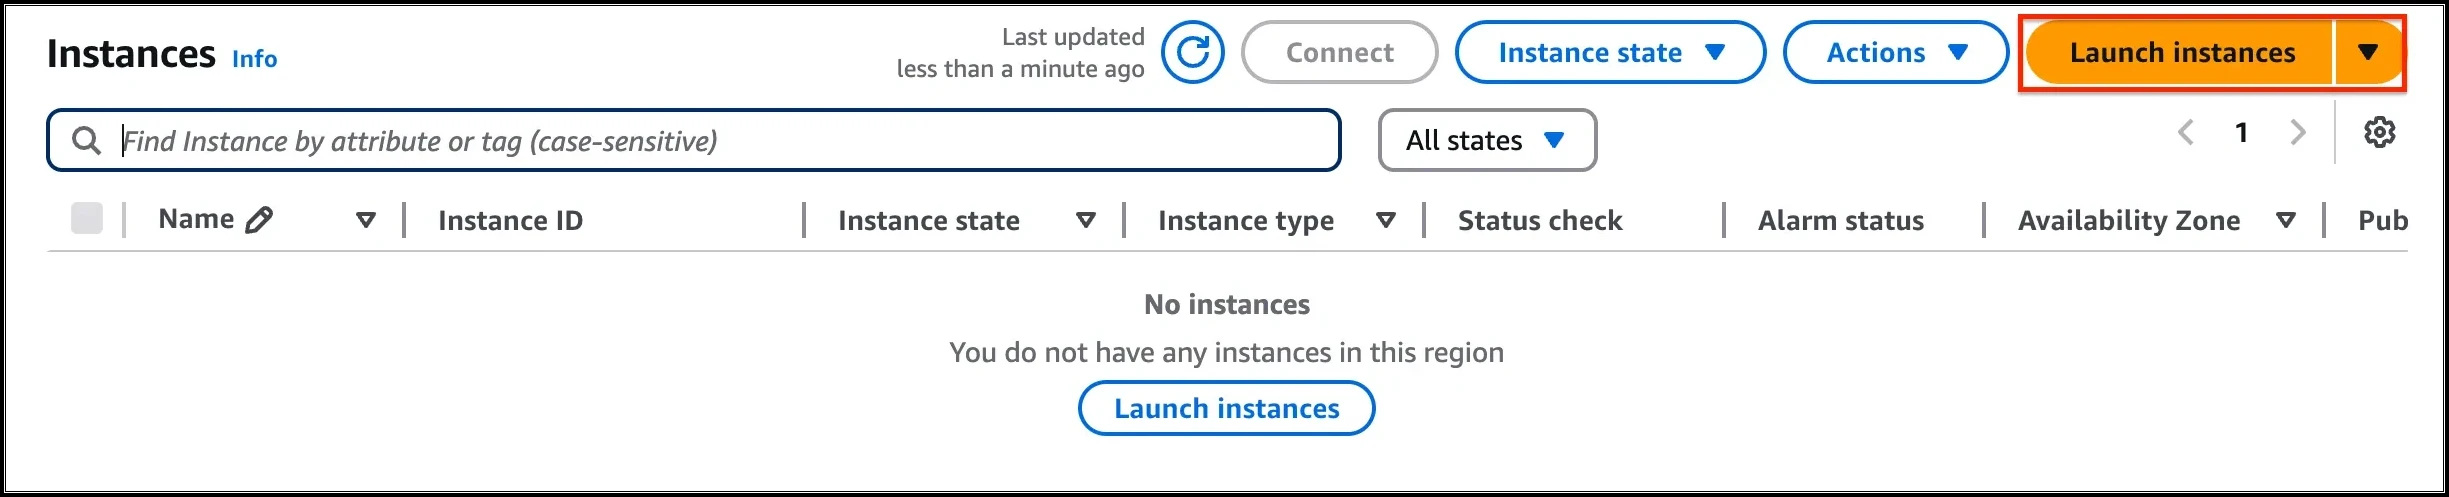
- Navigate to Instances on the left panel and click on Launch instances.
- Task 8: Create a Bastion host (Publicly accessible EC2 Instance)
- Name : Enter Bastion-host.
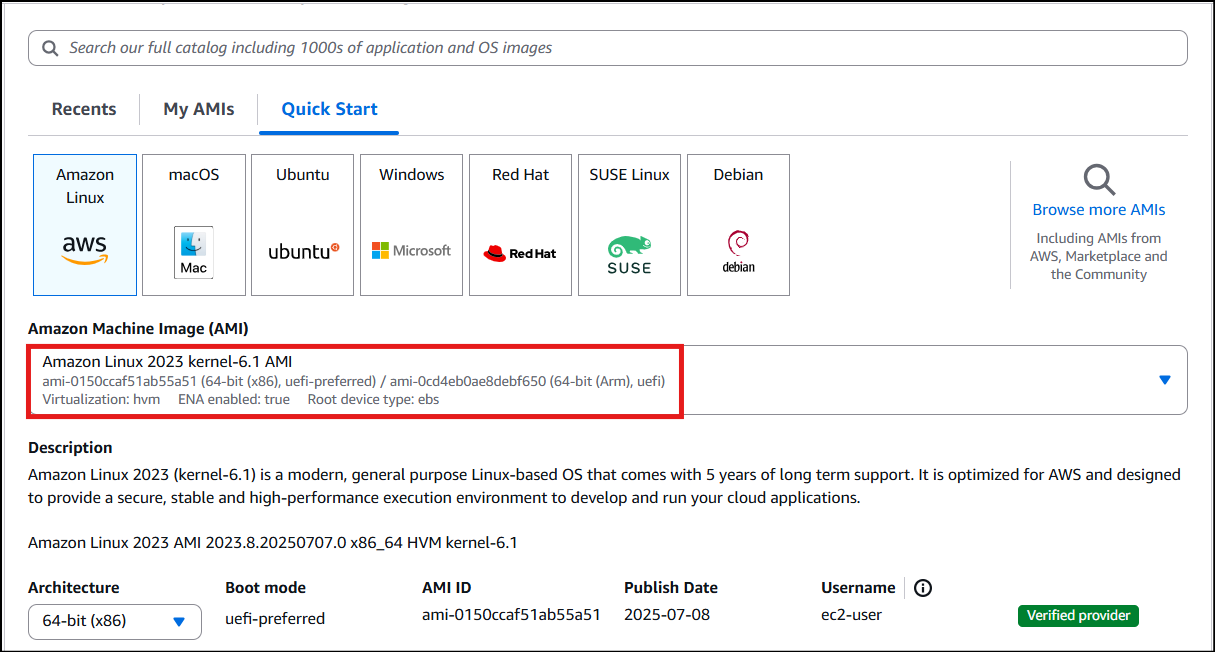
- For Amazon Machine Image (AMI): Search for Amazon Linux 2023 AMI in the search box and click on the Select button
- Task 8: Create a Bastion host (Publicly accessible EC2 Instance)

- Note: if there are two AMI's present for Amazon Linux 2023 AMI, choose kernel-6.1 AMI.
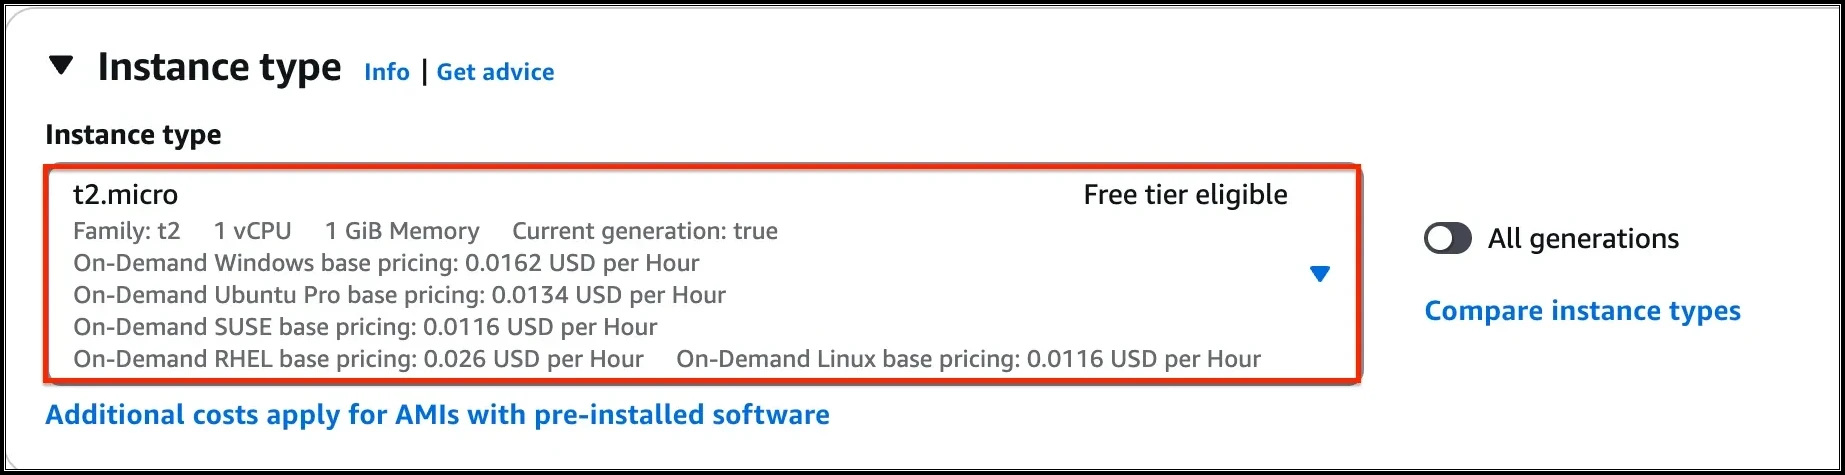
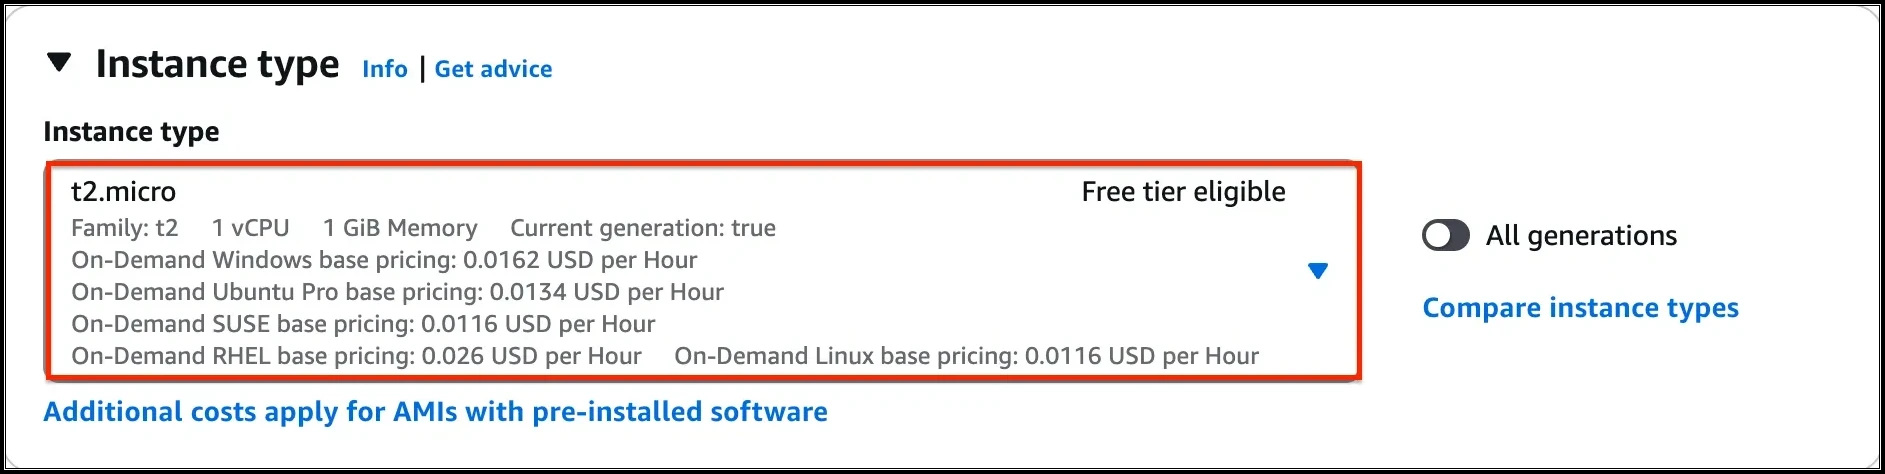
- For Instance Type: select t2.micro
- Task 8: Create a Bastion host (Publicly accessible EC2 Instance)
- For Key pair: Select Create a new key pair Button
- Key pair name: WhizKey
- Key pair type: RSA
- Private key file format: .pem
- Select Create key pair Button.
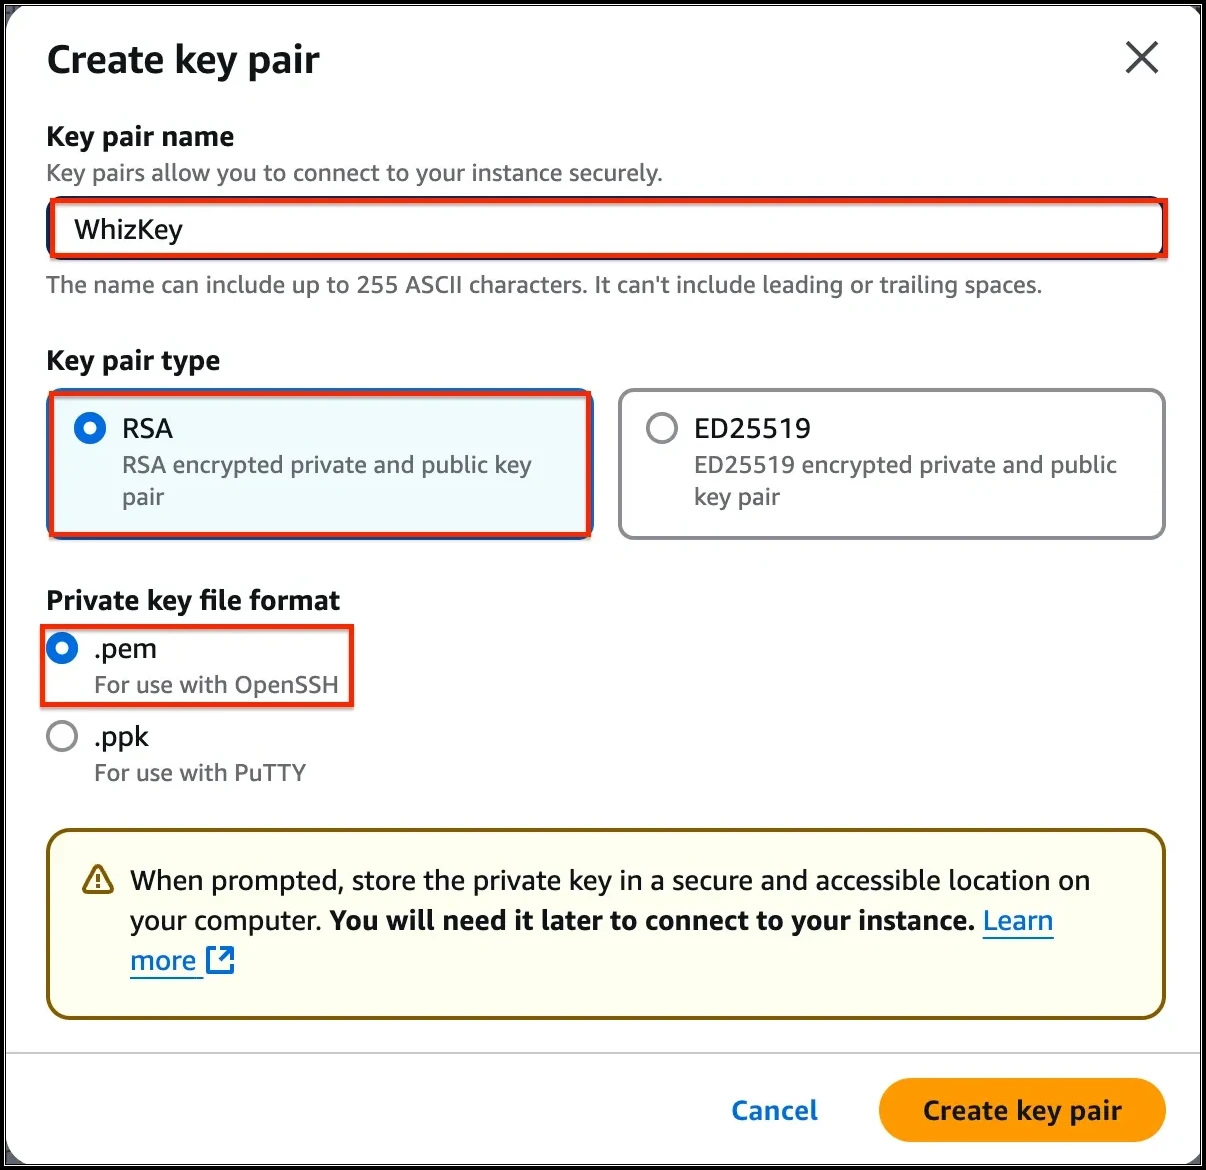
- Task 8: Create a Bastion host (Publicly accessible EC2 Instance)

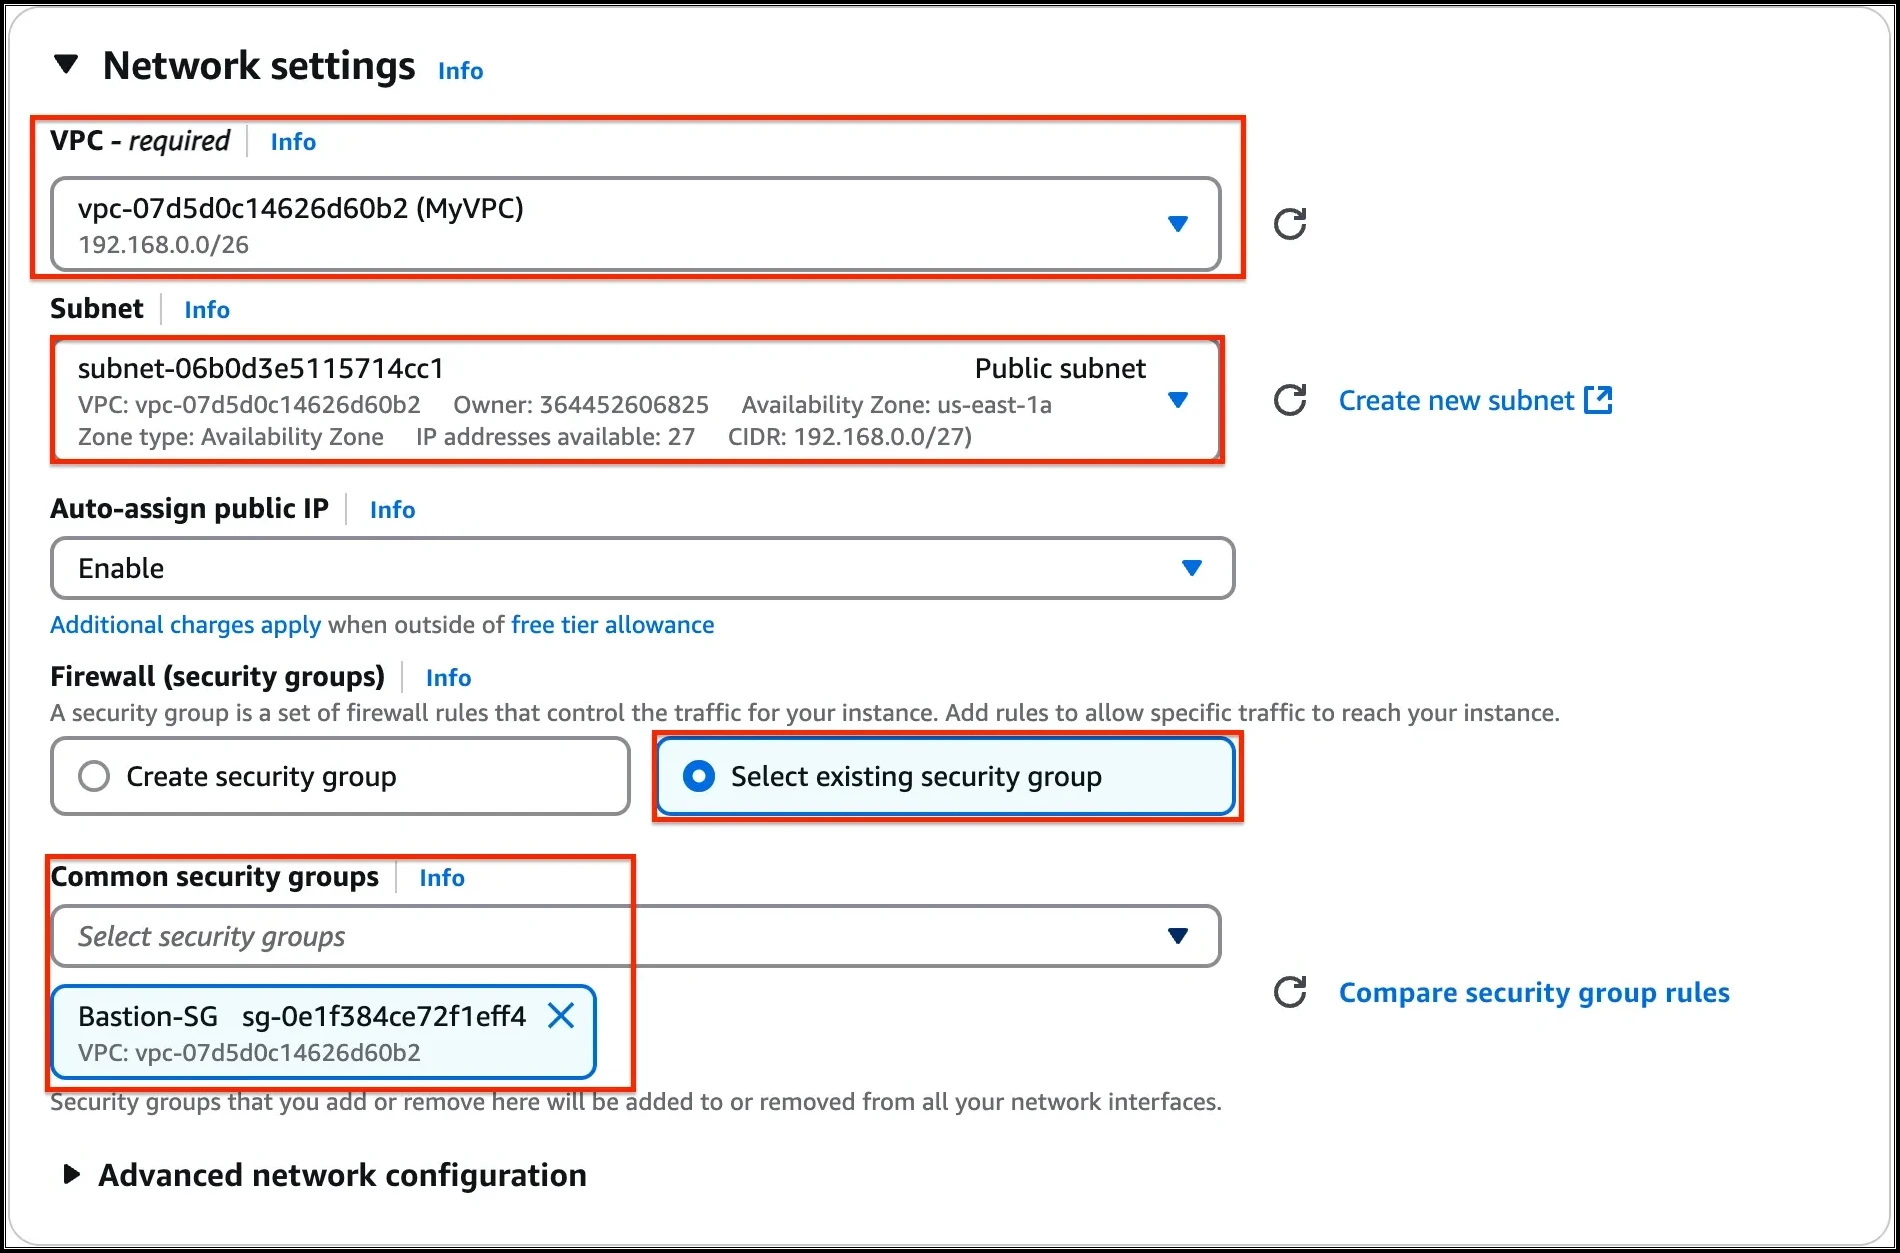
- In Network Settings Click on Edit Button:
- VPC: Choose MyVPC
- Subnet : Choose Public Subnet
- Auto-assign public IP: Enable
- Select existing security group
- Security group name : Choose Bastion-SG

- Task 8: Create a Bastion host (Publicly accessible EC2 Instance)
- Keep rest thing default and Click on Launch Instance button.
- Select View all Instances to view Instance you created
- Launch Status: Your instance is now launching, Click on the instance ID and wait for complete initialization of the instance till status changes to Running.
- Navigate to EC2 by clicking on the Services menu at the top, then click on EC2 in the Compute section.
- Navigate to Instances on the left panel and click on Launch instances.
- Name : Enter Endpoint-instance.
- For Amazon Machine Image (AMI): Search for Amazon Linux 2023 AMI in the search box and click on the Select button.
- Task 9: Create an Endpoint instance (Privately accessible EC2 instance)
- Note: if there are two AMI's present for Amazon Linux 2023 AMI, choose kernel-6.1 AMI.
- For Instance Type: select t2.micro
- Task 9: Create an Endpoint instance (Privately accessible EC2 instance)
- For Key pair: Select the key pair made during the previous task.
- In Network Settings Click on Edit Button:
- VPC: Choose MyVPC
- Subnet : Private Subnet
- Select existing security group
- Security group name : Choose Endpoint-SG
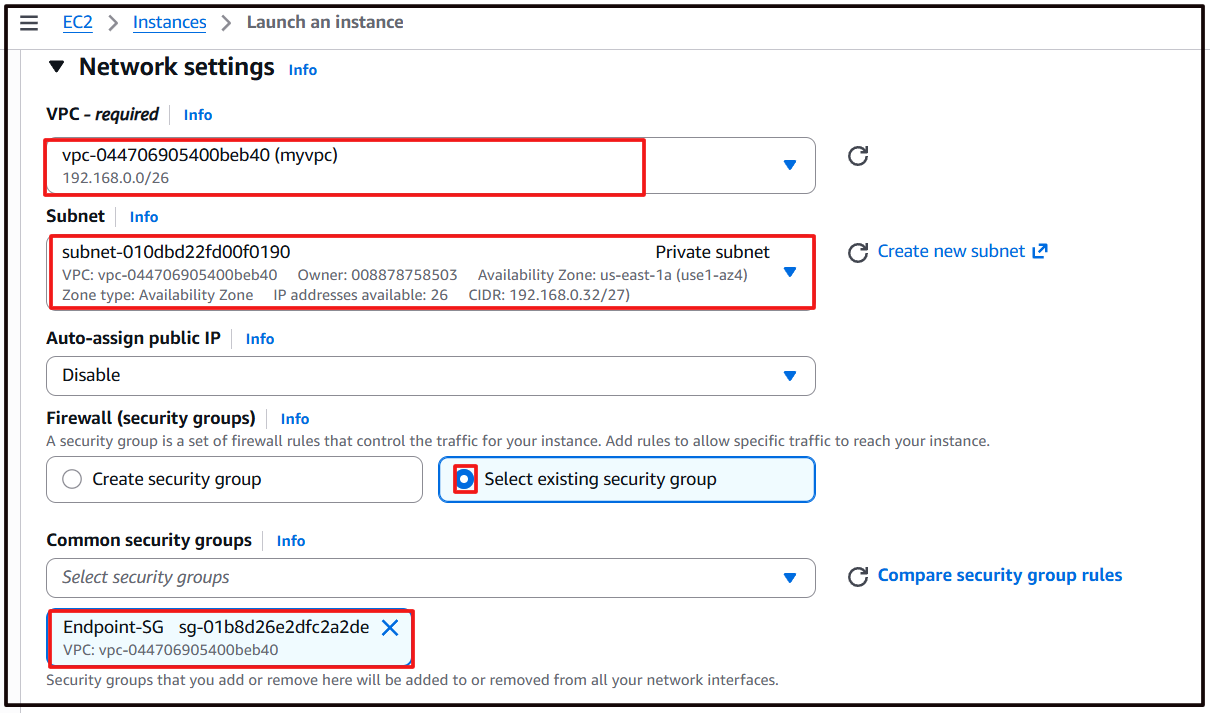
- Task 9: Create an Endpoint instance (Privately accessible EC2 instance)

- Keep rest thing Default and Click on Launch Instance button.
- Select View all Instances to view Instance you created
- Launch Status: Your instance is now launching, Click on the instance ID and wait for complete initialization of the instance till status changes to Running.
- Navigate to Instances and wait for 1-2 minutes (until the Endpoint-instance's status changes from pending to running state)
- Task 9: Create an Endpoint instance (Privately accessible EC2 instance)

- SSH into the Bastion instance using the Bastion PEM key: WhizKey.pem
- To SSH into Endpoint instance via the Bastion instance, we need the WhizKey.pem to be present on the Bastion instance.
- Open the WhizKey.pem file on your local system and then copy the text content.
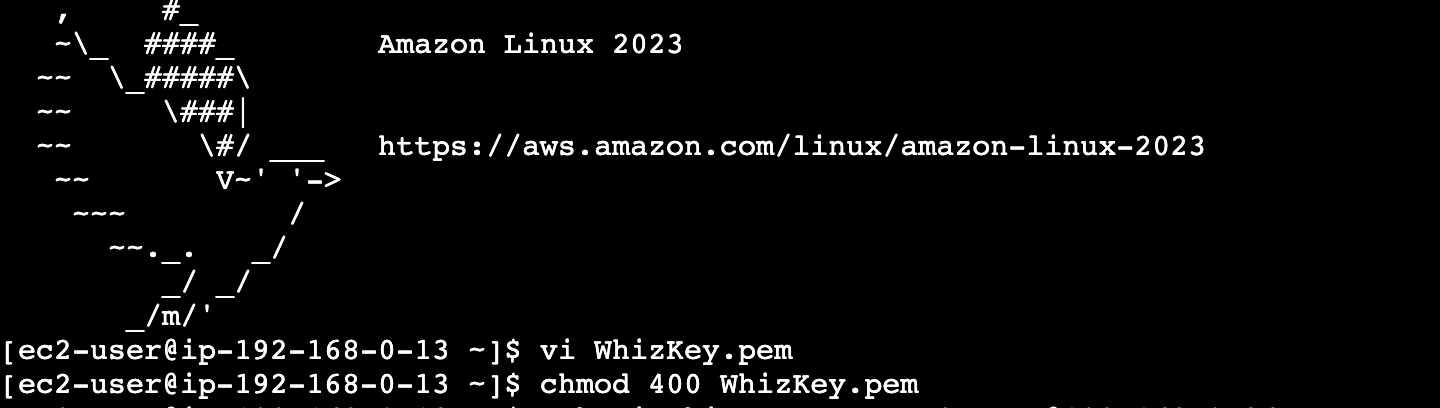
- Navigate to the Bastion Instance and create a file named WhizKey.pem using the below command:
- Press i and paste the content of WhizKey.pem. Save it by pressing Esc key and type :wq and hit Enter.
- Make sure you have changed the permission of the key file to 400. You can change the permission using the below command:
- Task 10: SSH into Endpoint instance (Privately accessible) through Bastion host
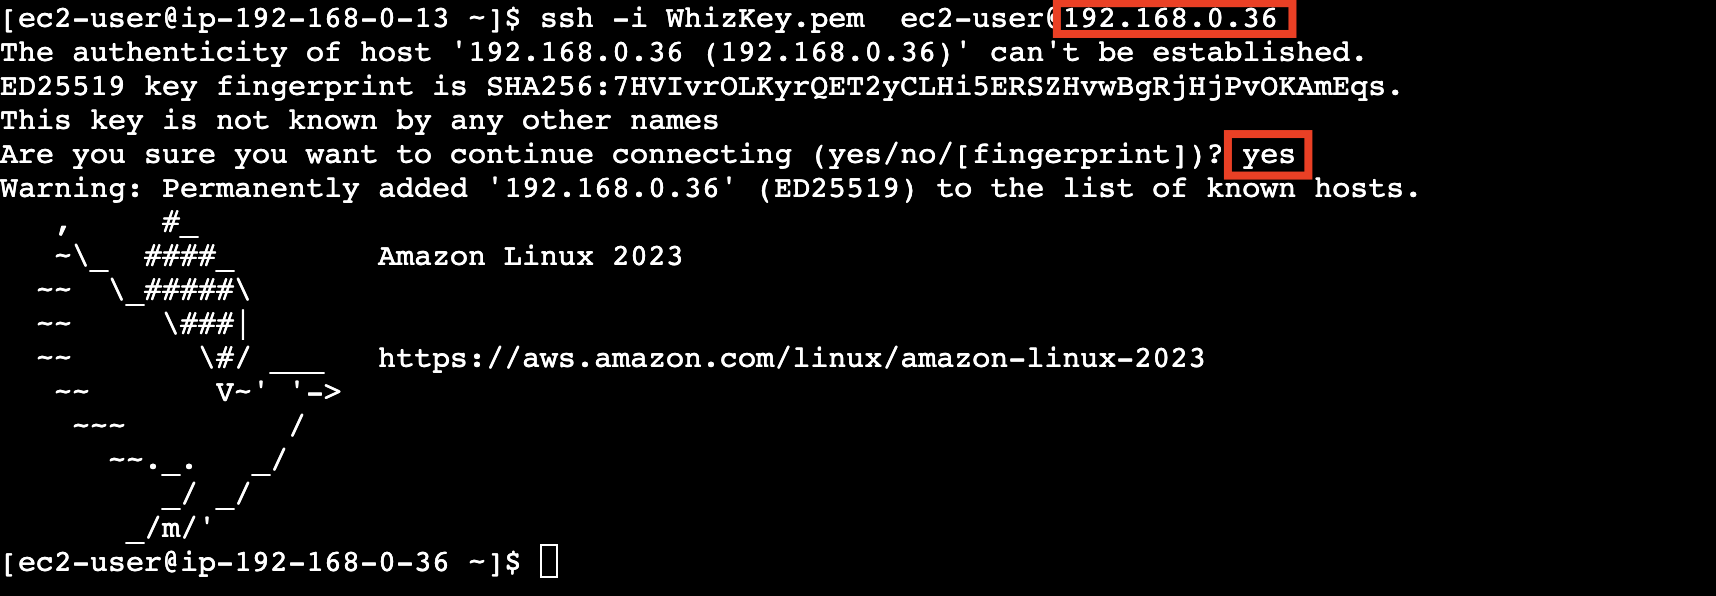
- Now you can log into the web servers using the private key copied to the bastion server with the help of the below commands.
- Note: You don't have public IP's for the Endpoint instance since we created them in a private subnet.
- Syntax : ssh -i WhizKey.pem ec2-user@<Endpoint instance's Private IP>
- Example: ssh -i WhizKey.pem [email protected].
- When asked for confirmation type: yes
- Task 10: SSH into Endpoint instance (Privately accessible) through Bastion host
- Enter the following command aws configure
- Access Key: Paste the access key provided to you
- Secret Key: Paste the secret key provided to you
- Default region name: us-east-1
- Default output-format: Enter [ENTER]
- Note: Though the assigned IAM role is having access for S3 Read, listing the bucket through AWS CLI command got failed, saying, connection timeout on S3's endpoint.
- Task 10: SSH into Endpoint instance (Privately accessible) through Bastion host

- As, this instance's security group is only allowed to do SSH, running any other command, will fail.
- Let's add the permission to access the S3 endpoints using the VPC Endpoint for S3.
- Navigate to VPC by clicking on the Services menu at the top, then click on VPC in the Networking and Content Delivery section.
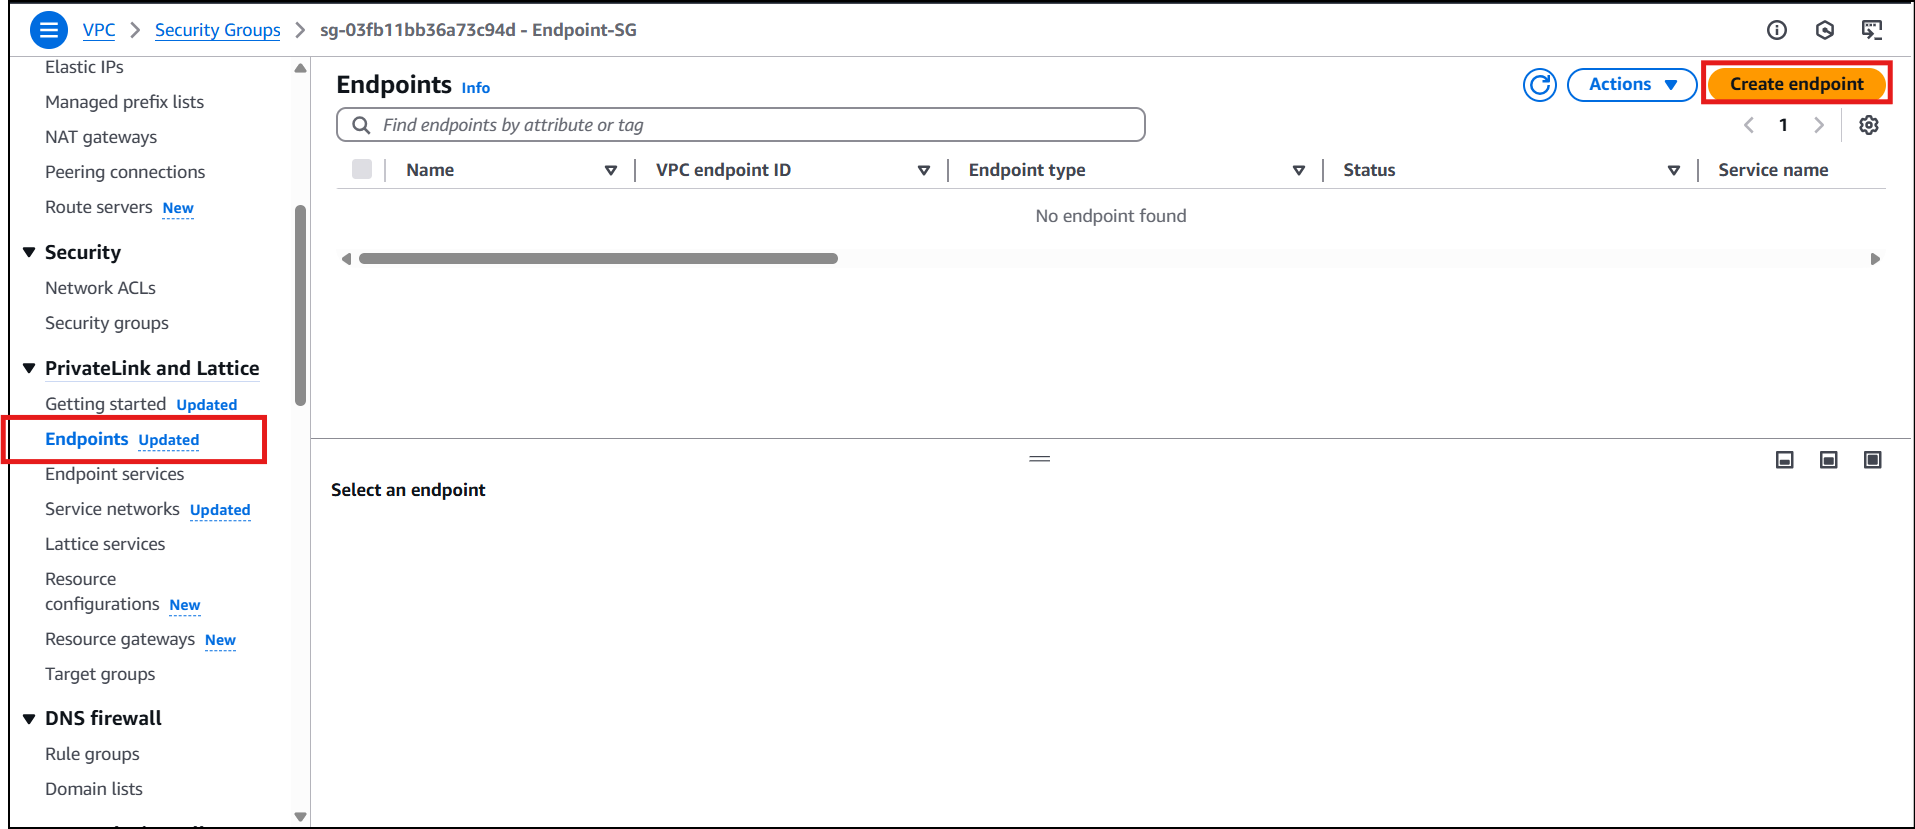
- Click on Endpoints present under PrivateLink and Lattice.
- Click on the Create endpoints button.
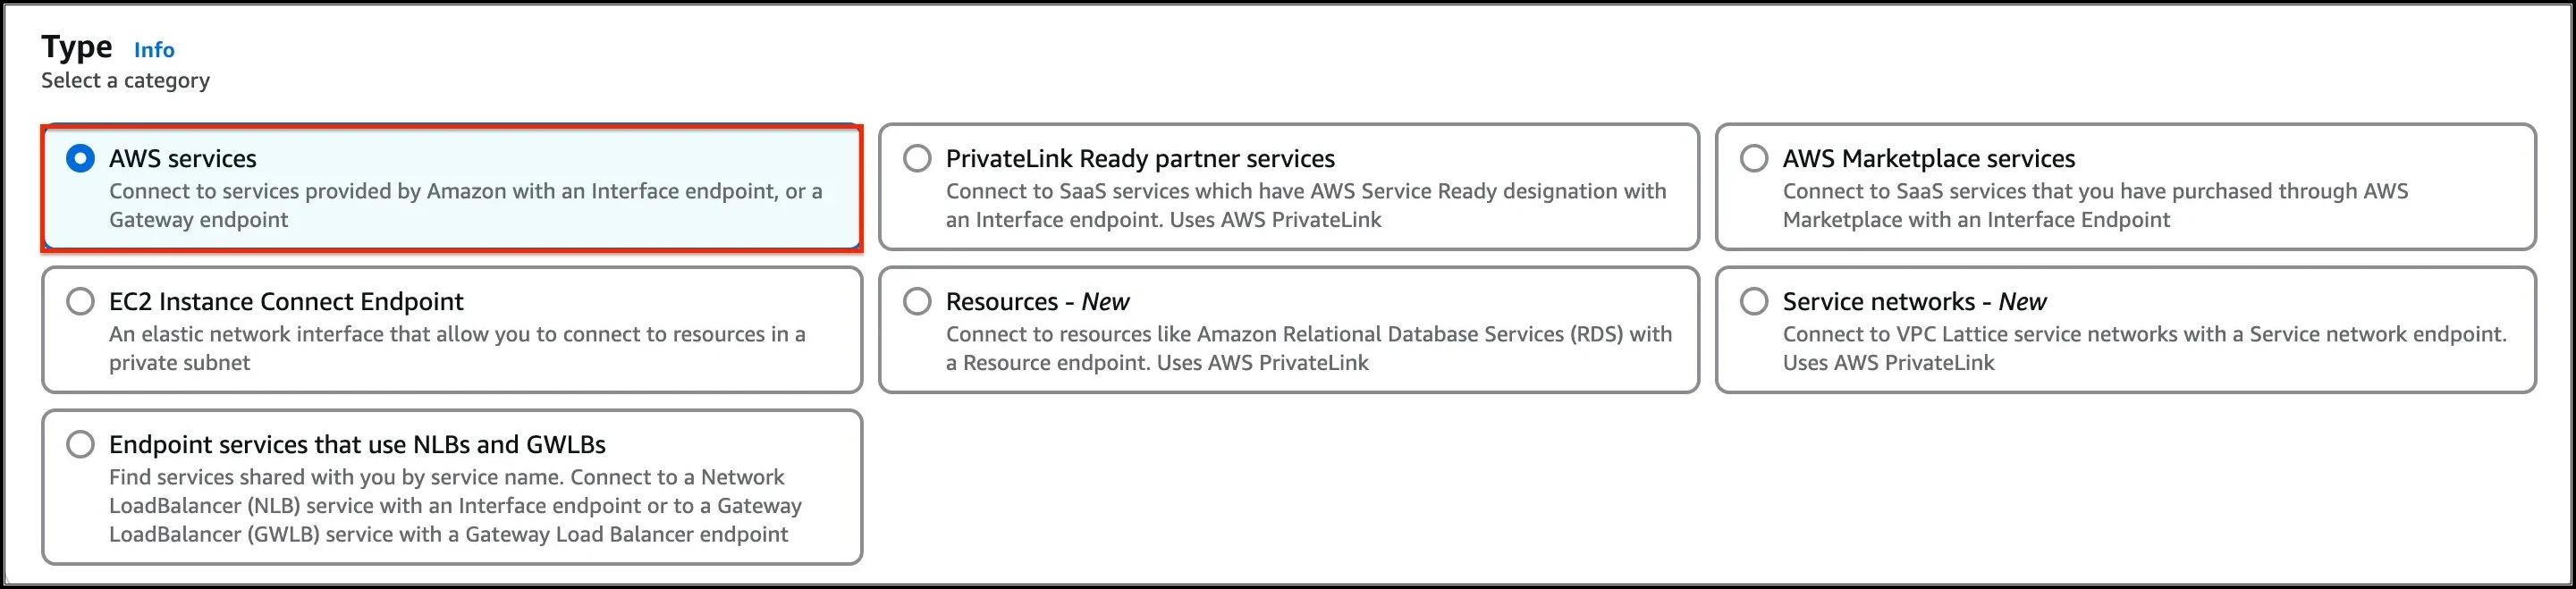
- Task 11: Create a VPC Endpoint for S3, attach it to the Private subnet's Route table

- Make sure the Service category is selected for AWS services. In the Service name search bar, type s3, and press enter
- Task 11: Create a VPC Endpoint for S3, attach it to the Private subnet's Route table

- The endpoint of Type, Gateway with Service name as com.amazonaws.us-east-1.s3 will be listed.
- Change the VPC, and select MyVPC.
- Task 11: Create a VPC Endpoint for S3, attach it to the Private subnet's Route table

- Check the option for Route Table having name as PrivateRouteTable.
- Finally, click on the Create endpoint button.
- An endpoint will be created.
- Click on the Close button, and within a few moments, you will see the endpoint will be listed.
- Task 11: Create a VPC Endpoint for S3, attach it to the Private subnet's Route table

- (Optional) To check whether the endpoint is associated with the custom route table (RT for Private subnet) or not. 12. Go to the Route tables, Select the custom route table and click on the Routes options below, you will see an entry of S3.
- Now SSH into the Endpoint instance from your bastion instance as mentioned in task 10.Enter aws configure. Access Key: Paste the access key provided to you. Secret Key: Paste the secret key provided to you.
- Now SSH into the Endpoint instance from your bastion instance as mentioned in task 10.
- Enter aws configure.
- Access Key: Paste the access key provided to you.
- Secret Key: Paste the secret key provided to you.
- Task 12: List all the S3 bucket and it's objects
- Default region name: us-east-1
- Default output-format: Enter [ENTER]
- List all the bucket's using the following AWS CLI command:
- Task 12: List all the S3 bucket and it's objects

- List the objects of the S3 bucket starting with name lab-bucket..
- Replace the S3 bucket name for the below command
- VPC Endpoint Service enables private connectivity, you can avoid data transfer charges associated with public internet traffic. By utilizing VPC endpoints, you can significantly reduce data transfer costs, especially if you have large volumes of data flowing between your VPC and AWS services.
- Once the lab steps are completed, please click on the Validation button on the Right side panel.
- This will validate the resources in the AWS account and displays whether you have completed this lab successfully or not.
- Sample output :

- Task 13: Validation Test
- Navigate to VPC by clicking on the Services menu at the top, then click on VPC in the Networking and Content Delivery section.
- Click on Endpoints present in the VIRTUAL PRIVATE CLOUD section on the left sidebar.
- To delete the VPC endpoint, perform the following tasks: Select the Endpoint, Click on the Actions button, Choose the option of Delete VPC endpoints
- To delete the VPC endpoint, perform the following tasks:
- Select the Endpoint,
- Click on the Actions button,
- Choose the option of Delete VPC endpoints
- Task 14: Delete AWS Resources
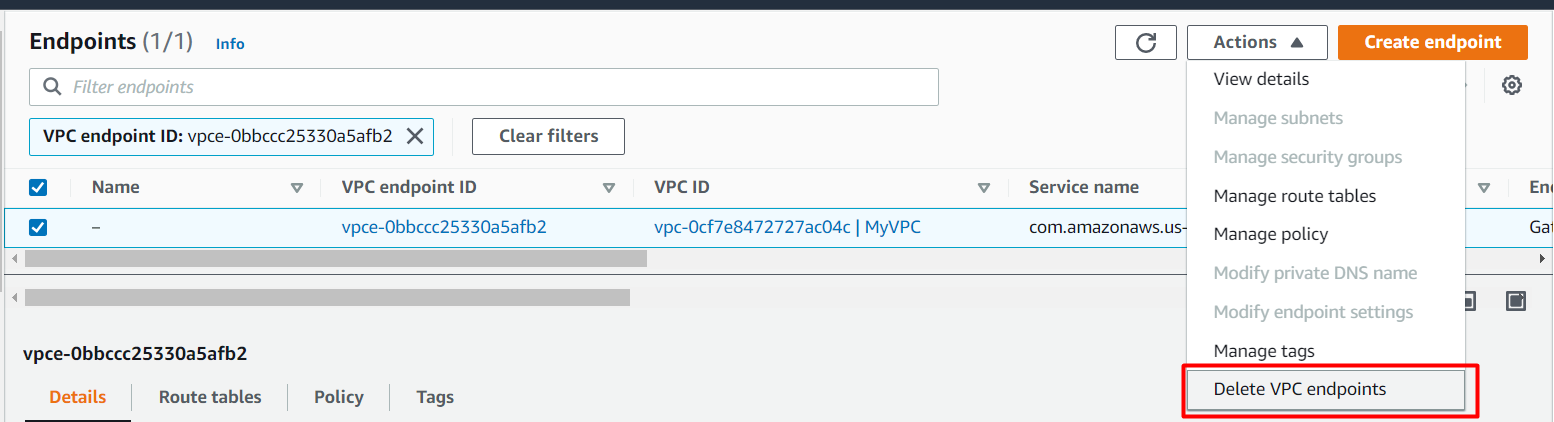
- Confirm the deletion by typing delete. 5. The endpoint will be deleted immediately.
- Navigate to EC2 by clicking on the Services menu at the top, then click on EC2 in the Compute section.
- Click on Instances on the left panel.
- EC2 Instances will be listed here.
- Task 14: Delete AWS Resources
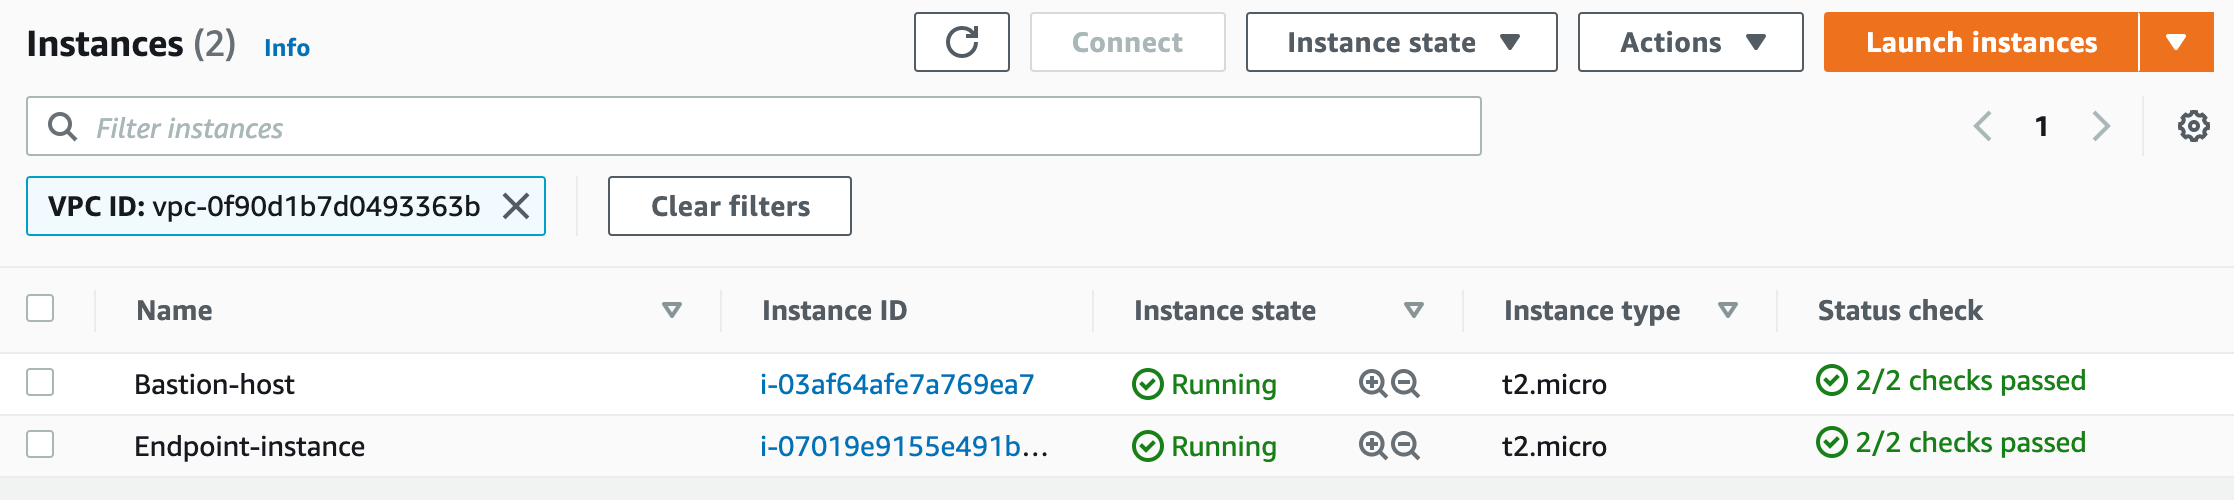
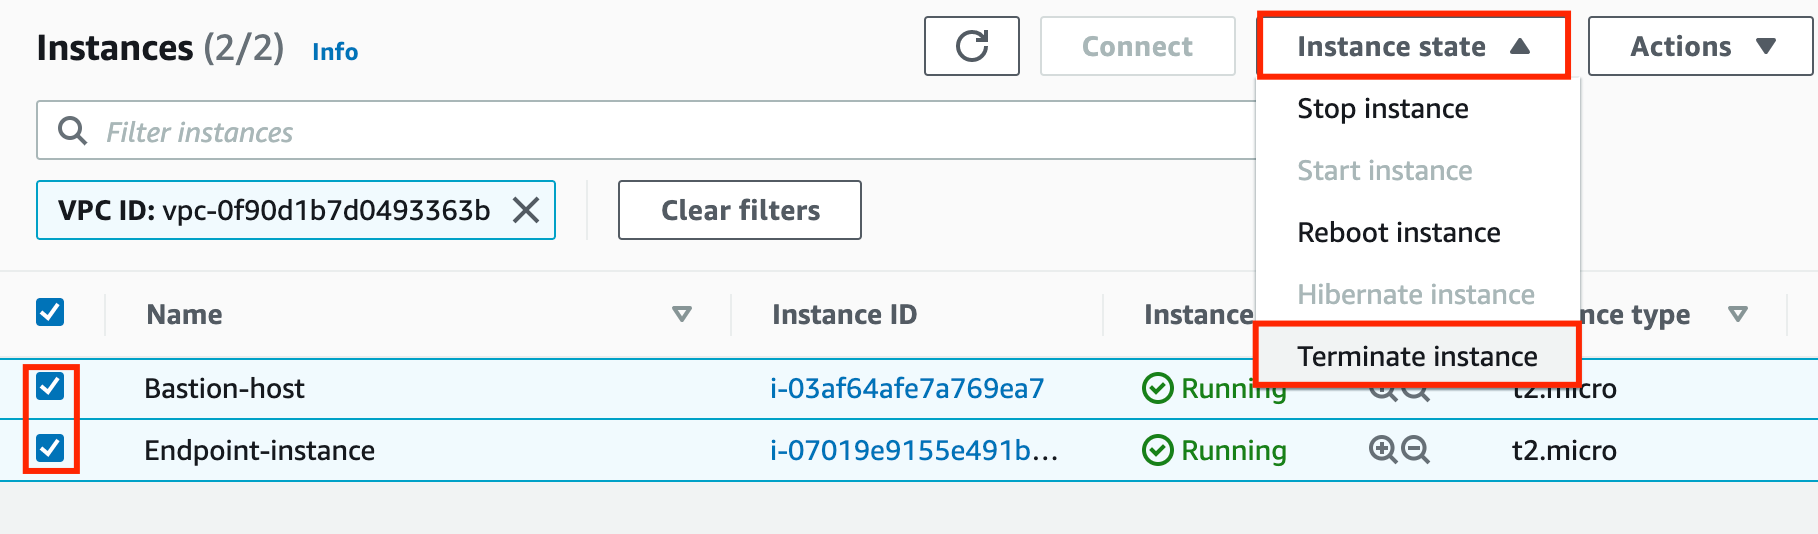
- To terminate both the present instances, perform the following tasks:
- Select both the EC2 instances
- Click on the Instance state
- Choose to Terminate instance

- Task 14: Delete AWS Resources
- To confirm the termination of both the selected EC2 instance, click on the Terminate button.
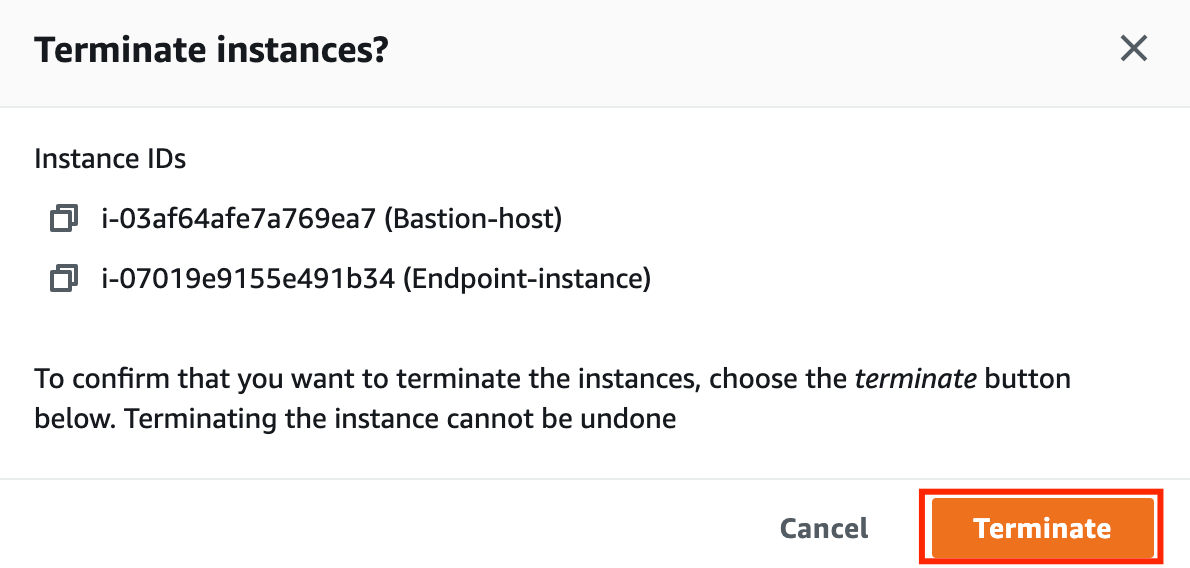
- The instance will be terminated in a minute or so.
- Task 14: Delete AWS Resources

- We have launched two EC2 instances i.e. Bastion instance and Endpoint instance. We were able to SSH into the Endpoint instance via Bastion Instance successfully.
- We have created a VPC endpoint for S3 to securely access S3 Buckets and their objects without going to the internet i.e. within Amazon's network through the Endpoint instance.
- We tested the VPC endpoint for S3 from the private instance.
- Sign out of the AWS Account.
- You have successfully completed the lab.
- Once you have completed the steps, click on End Lab from the lab console.